


A Moonboard climbing wall in my garage
TL;DR: I built a Moonboard climbing wall in my garage
It is an English translation of my french blog post about the Moonboard building process.
Intro
I started to get interested in climbing in the summer of 2015 (especially talking with Denis who started previously on his own), but without really practicing. With the eternal question, every year when the kids go back to school, to choose activities for our children (at the time they were 7 and 4 years old), we decided to register them in weekly group lessons at Mur de Lyon in September 2015. I still wasn’t climbing myself at that time but I accompanied each week my children to their course and little by little my desire to get myself started amplified.
After many years of tennis and a very frustrating 2015/2016 competition season, I needed some change and to get involved in another sport. So I started climbing in the summer of 2016, especially during epic sessions on Wednesday mornings with Geoffrey.
The children then changed their sport in September 2016 and I continued to climb on weekends, especially at Le Mur de Lyon (and sometimes Azium). At the end of 2016, we started to test bouldering, and I quickly hooked to this form of climbing.
The opening in March 2017 of Mroc 3, a bouldering only gym, 300 meters away from my work allowed me to add an average of 2 additional weekly sessions, with colleagues at noon.
And the Moonboard in all this?
It was when I started bouldering that I discovered the concept of the Moonboard, which tries to standardize the format of the climbing wall.
Ben Moon, a professional English rock climber, has designed a 40° inclined wall, with well-defined dimensions and above all a set of climbing holds (that he sells) allowing to have a “standard” wall.
The big advantage of the proposed solution is that a whole variety of climbing problems are proposed by the climbers (more than 10000 problems to date), allowing a diversity of climbing, without having to conceive the problems yourself.
Yes but where to build it?
Convinced by the interest of the Moonboard, now remained the most difficult, to know if (and how) I could build one.
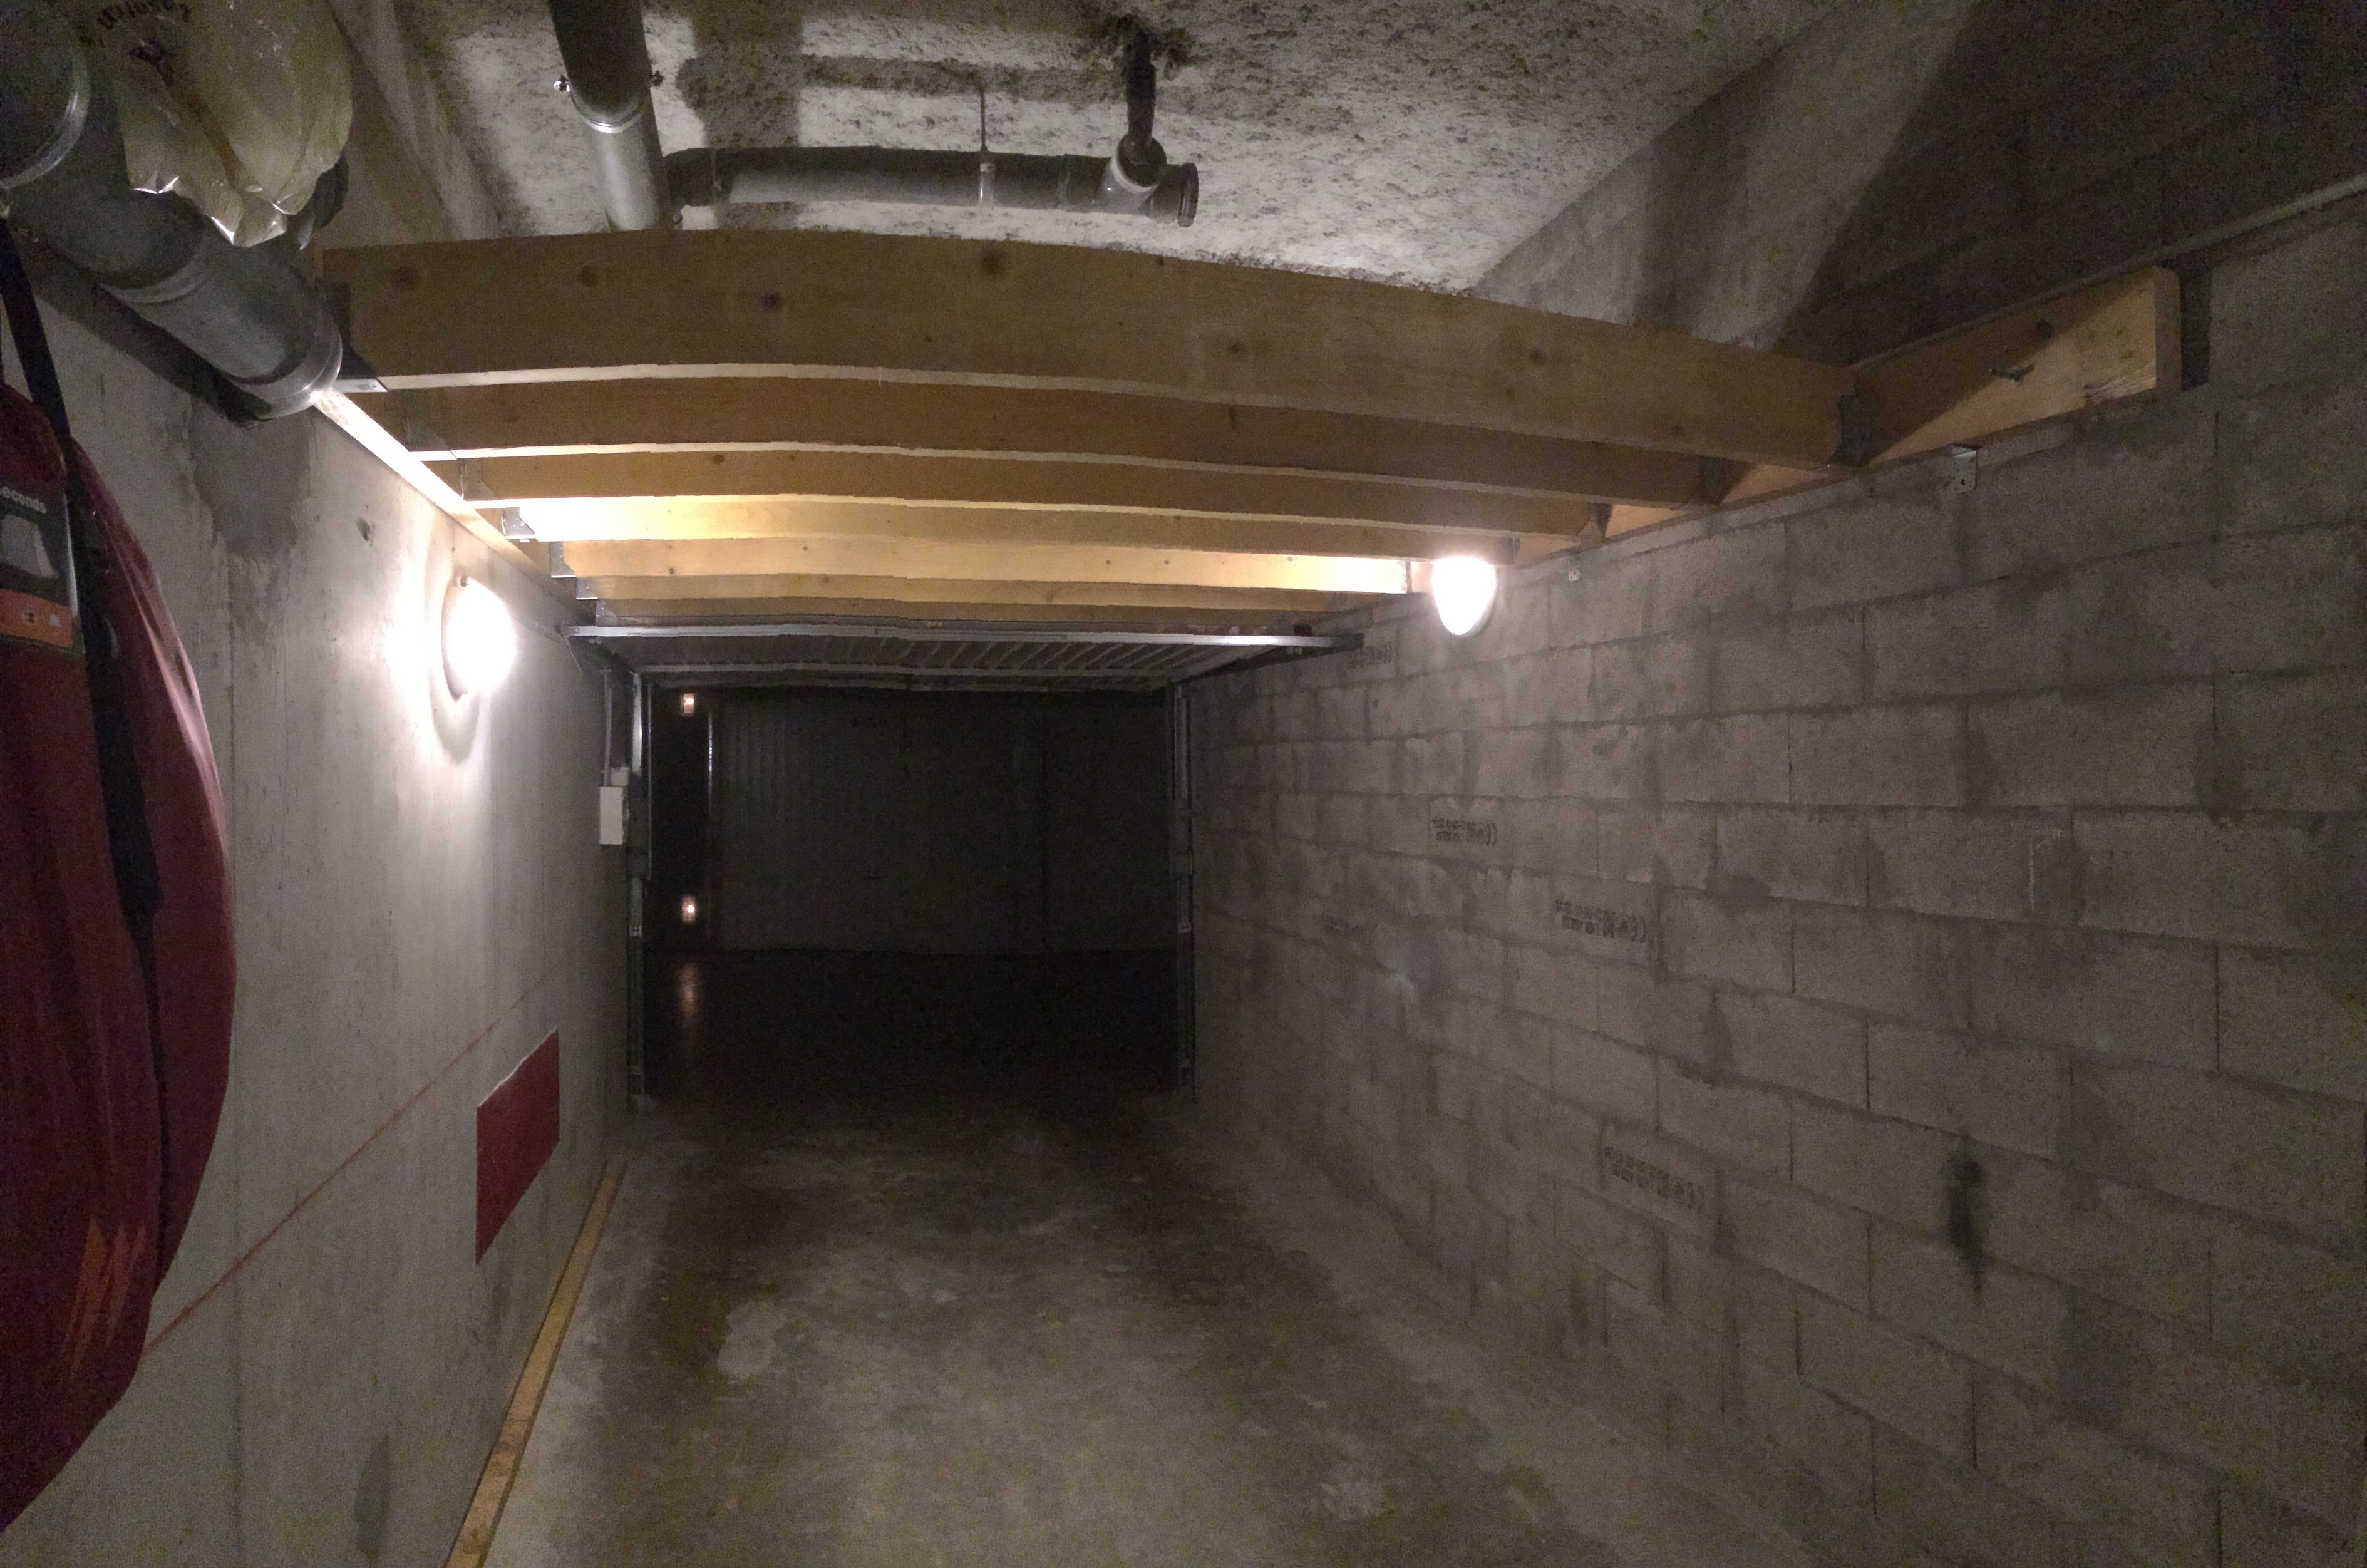
Given the size of the beast (3.15 meters high for 2.44 meters wide and about 3 meters deep), I had to find a location. My garage seemed the most suitable place. It is a double closed box with a respectable height of 3m. After several aborted ideas of location, I decided to push further the idea of making a Moonboard hanging on the mezzanine of the garage (which I built in late 2013) and articulated to be stored under the mezzanine when I do not use it so that I can still park my car, which is the main goal of a garage after all 😁
The plans
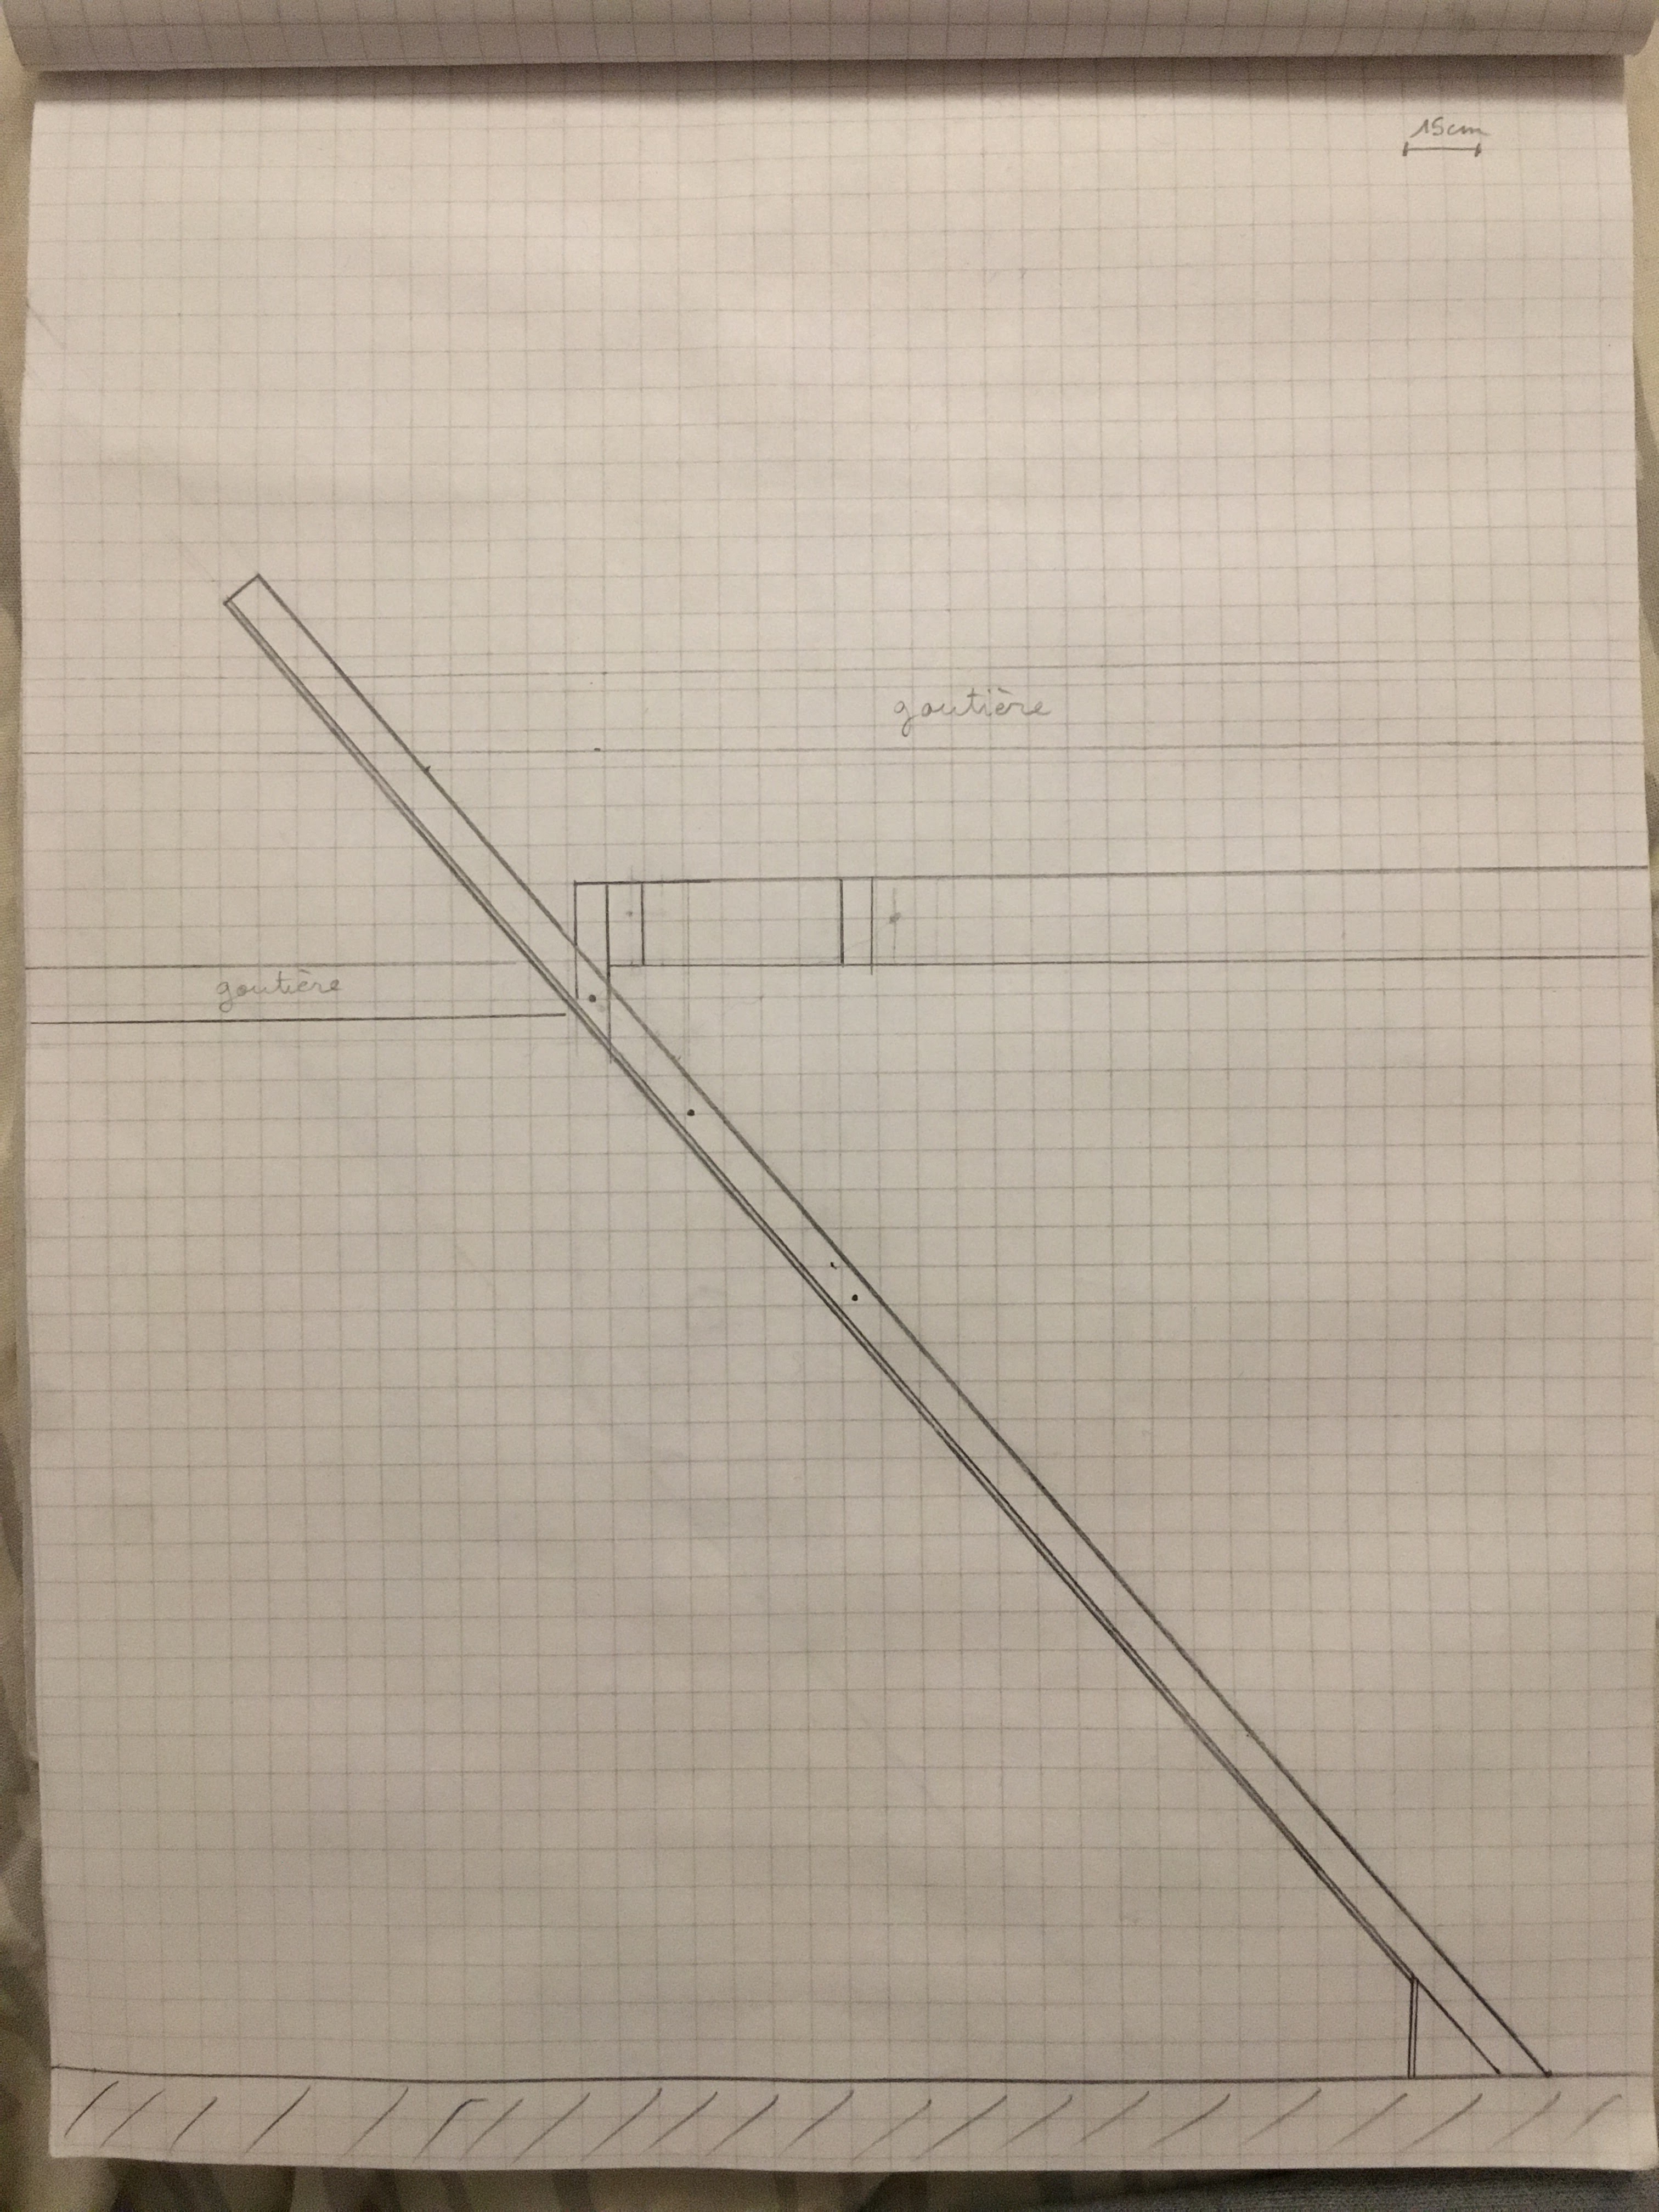
Once the location was chosen, I had to make the construction plans to validate the feasibility of the project. My garage being 3 meters high and 2.6 meters wide, I had to adjust the “official” plan [pdf]. In order to leave some space on the edges, I decided to go from 2.44 meters to 2.34 meters wide by trimming on the external margins (allowing to keep the horizontal spacing of 20 centimeters between the holds).
To gain height and have some room with my ceiling, I decided to go from 3.15 meters
to 2.9 meters. For this, I reduced the height of the “kicker” from 37 centimeters to
20 centimeters and I reduced the vertical spacing of the holds from 20 centimeters to
19.5 centimeters. I am well aware of deviating a little from the “standard” but I had
no choice if I wanted it to fit in. I also had to make a cut because of the evacuation
pipes that decorate the ceiling of my garage… In the end my plan (on paper because
I love doing my DIY plans on paper) gave this:

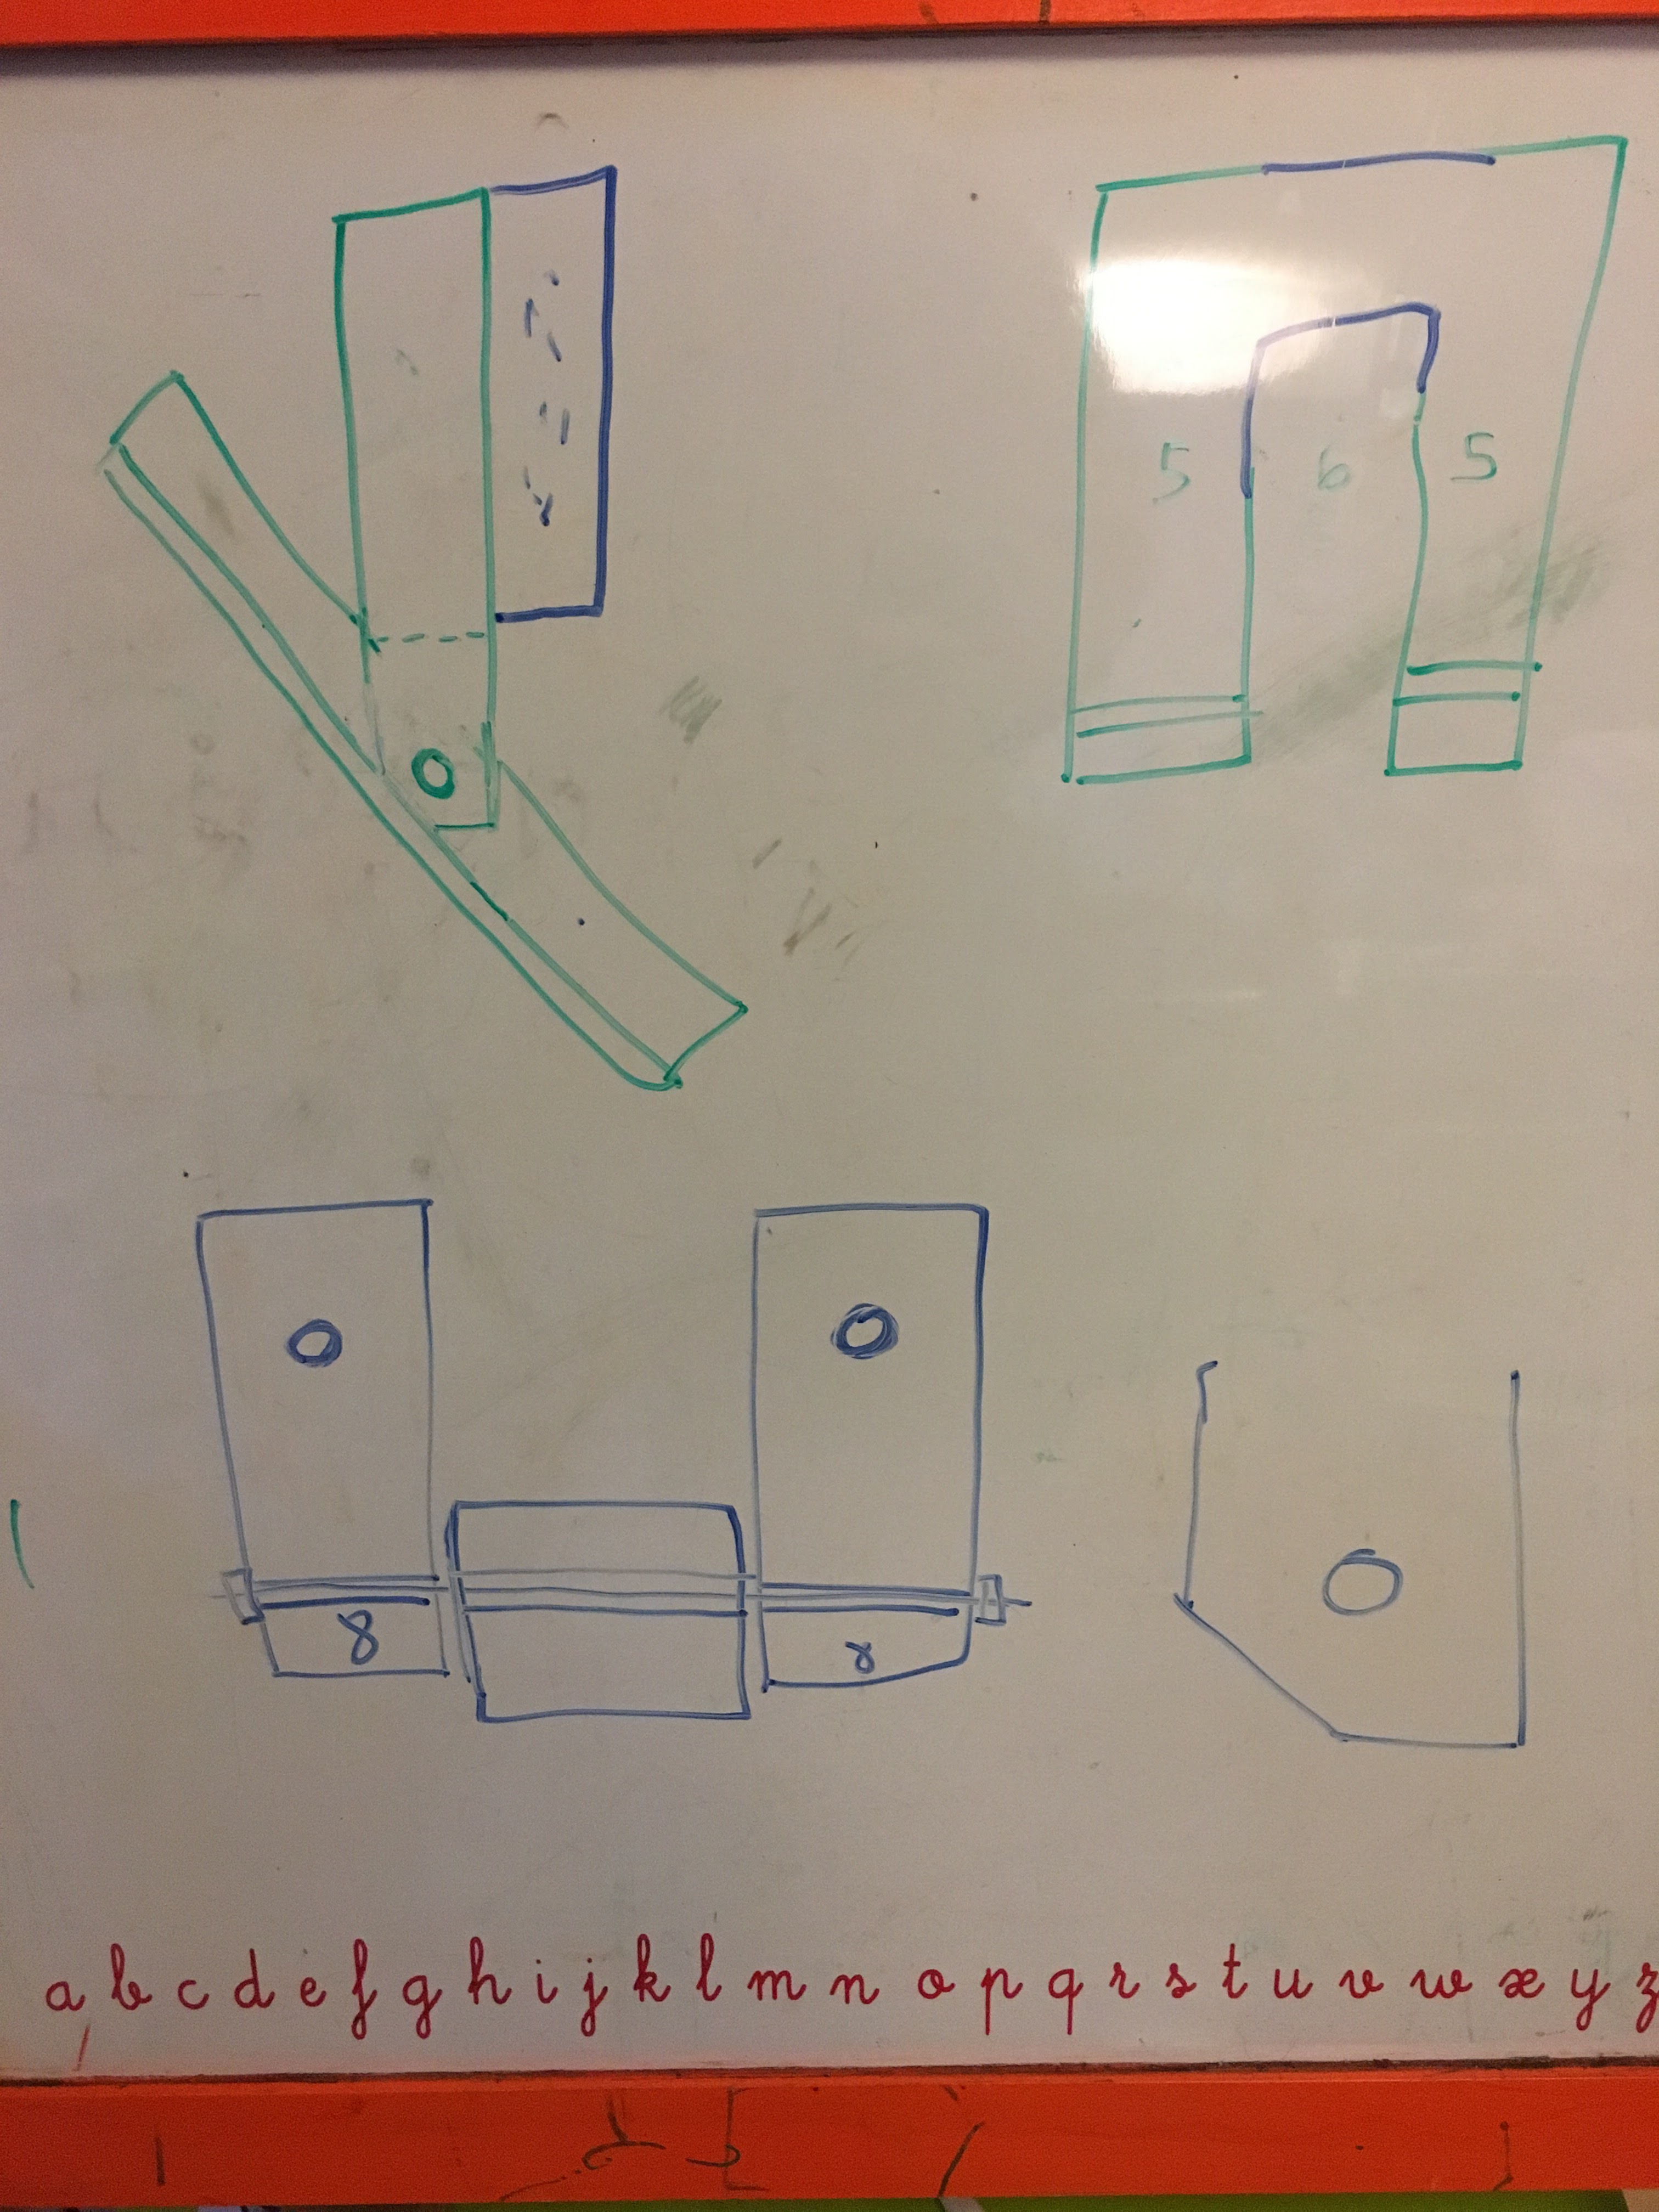
Here are the sketches of the assembly that will be used to fix the pan on one of
the beams of the mezzanine:
The whole of the empty structure (without climber) weighs a little more than 200kg (70 for the frame, 100 for the boards, 30 for the holds and 20 for the screws). Some mechanical calculations (soft reminder of my high school lessons) allowed me to calculate that it would take a force of about 600 to 800N to raise the pan around its axis of rotation. As a reminder, the weight of a mass of 1kg is 9.8N. This is therefore perfectly compatible with a simple rope hoist system, which are supposed to lift a few hundreds kg.
Let’s talk about money: the budget
The plans once made, a budget was also to be made.
In order to lower the price, for the boards used to support the holds, I preferred to take OSB in 18mm thickness rather than plywood, usually used. The resistance is sufficient and the price per square meter much more interesting.
For the security aspect of the reception area under the Moonboard (and yes we fall often), I left on a mix between used mattresses graciously offered by relatives and used mattresses found on Leboncoin (french Craiglist equivalent :)). Indeed a real climbing reception mat costs about 1000 € for this surface and was too expensive.
Here is the almost exhaustive list of supplies:
| What | Quantity | Unit price | Total price |
|---|---|---|---|
| 4m rafter in 63x75mm | 8 | 7 € | 56 € |
| Brackets | 24 | 1 € | 24 € |
| 10mm steel chain | 1 | 11 € | 11 € |
| Rock plates | 10 | 0.75 € | 7.5 € |
| Quick link | 10 | 2.5 € | 25 € |
| 18mm OSB | 6 | 12 € | 72 € |
| Hoist for 300 kg | 1 | 16 € | 16 € |
| Rope for hoist | 1 | 12 € | 12 € |
| Screw inserts | 1 | 56 € | 56 € |
| 150 M10 x 50 mm screws | 6 | 6 € | 36 € |
| 25 M10 x 80 mm screws | 1 | 9 € | 9 € |
| Moonboard holds | 1 | 546 € | 546 € |
| Mattresses from Leboncoin & gifts | 2 | 40 € | 80 € |
| Various screws | 1 | 40 € | 40 € |
| Total | about 990 € |
The build
The frame
After a trip to the store (it’s always a pleasure to lug 4m long wood in the car),
here I am with the rafters that will serve as a structure to the pan:
![]()
I cut the rafters to the right dimensions with my miter saw, I fix them with my
brackets and I mount the whole thanks to my hoist rope. It goes up like a charm.
The joints with the mezzanine
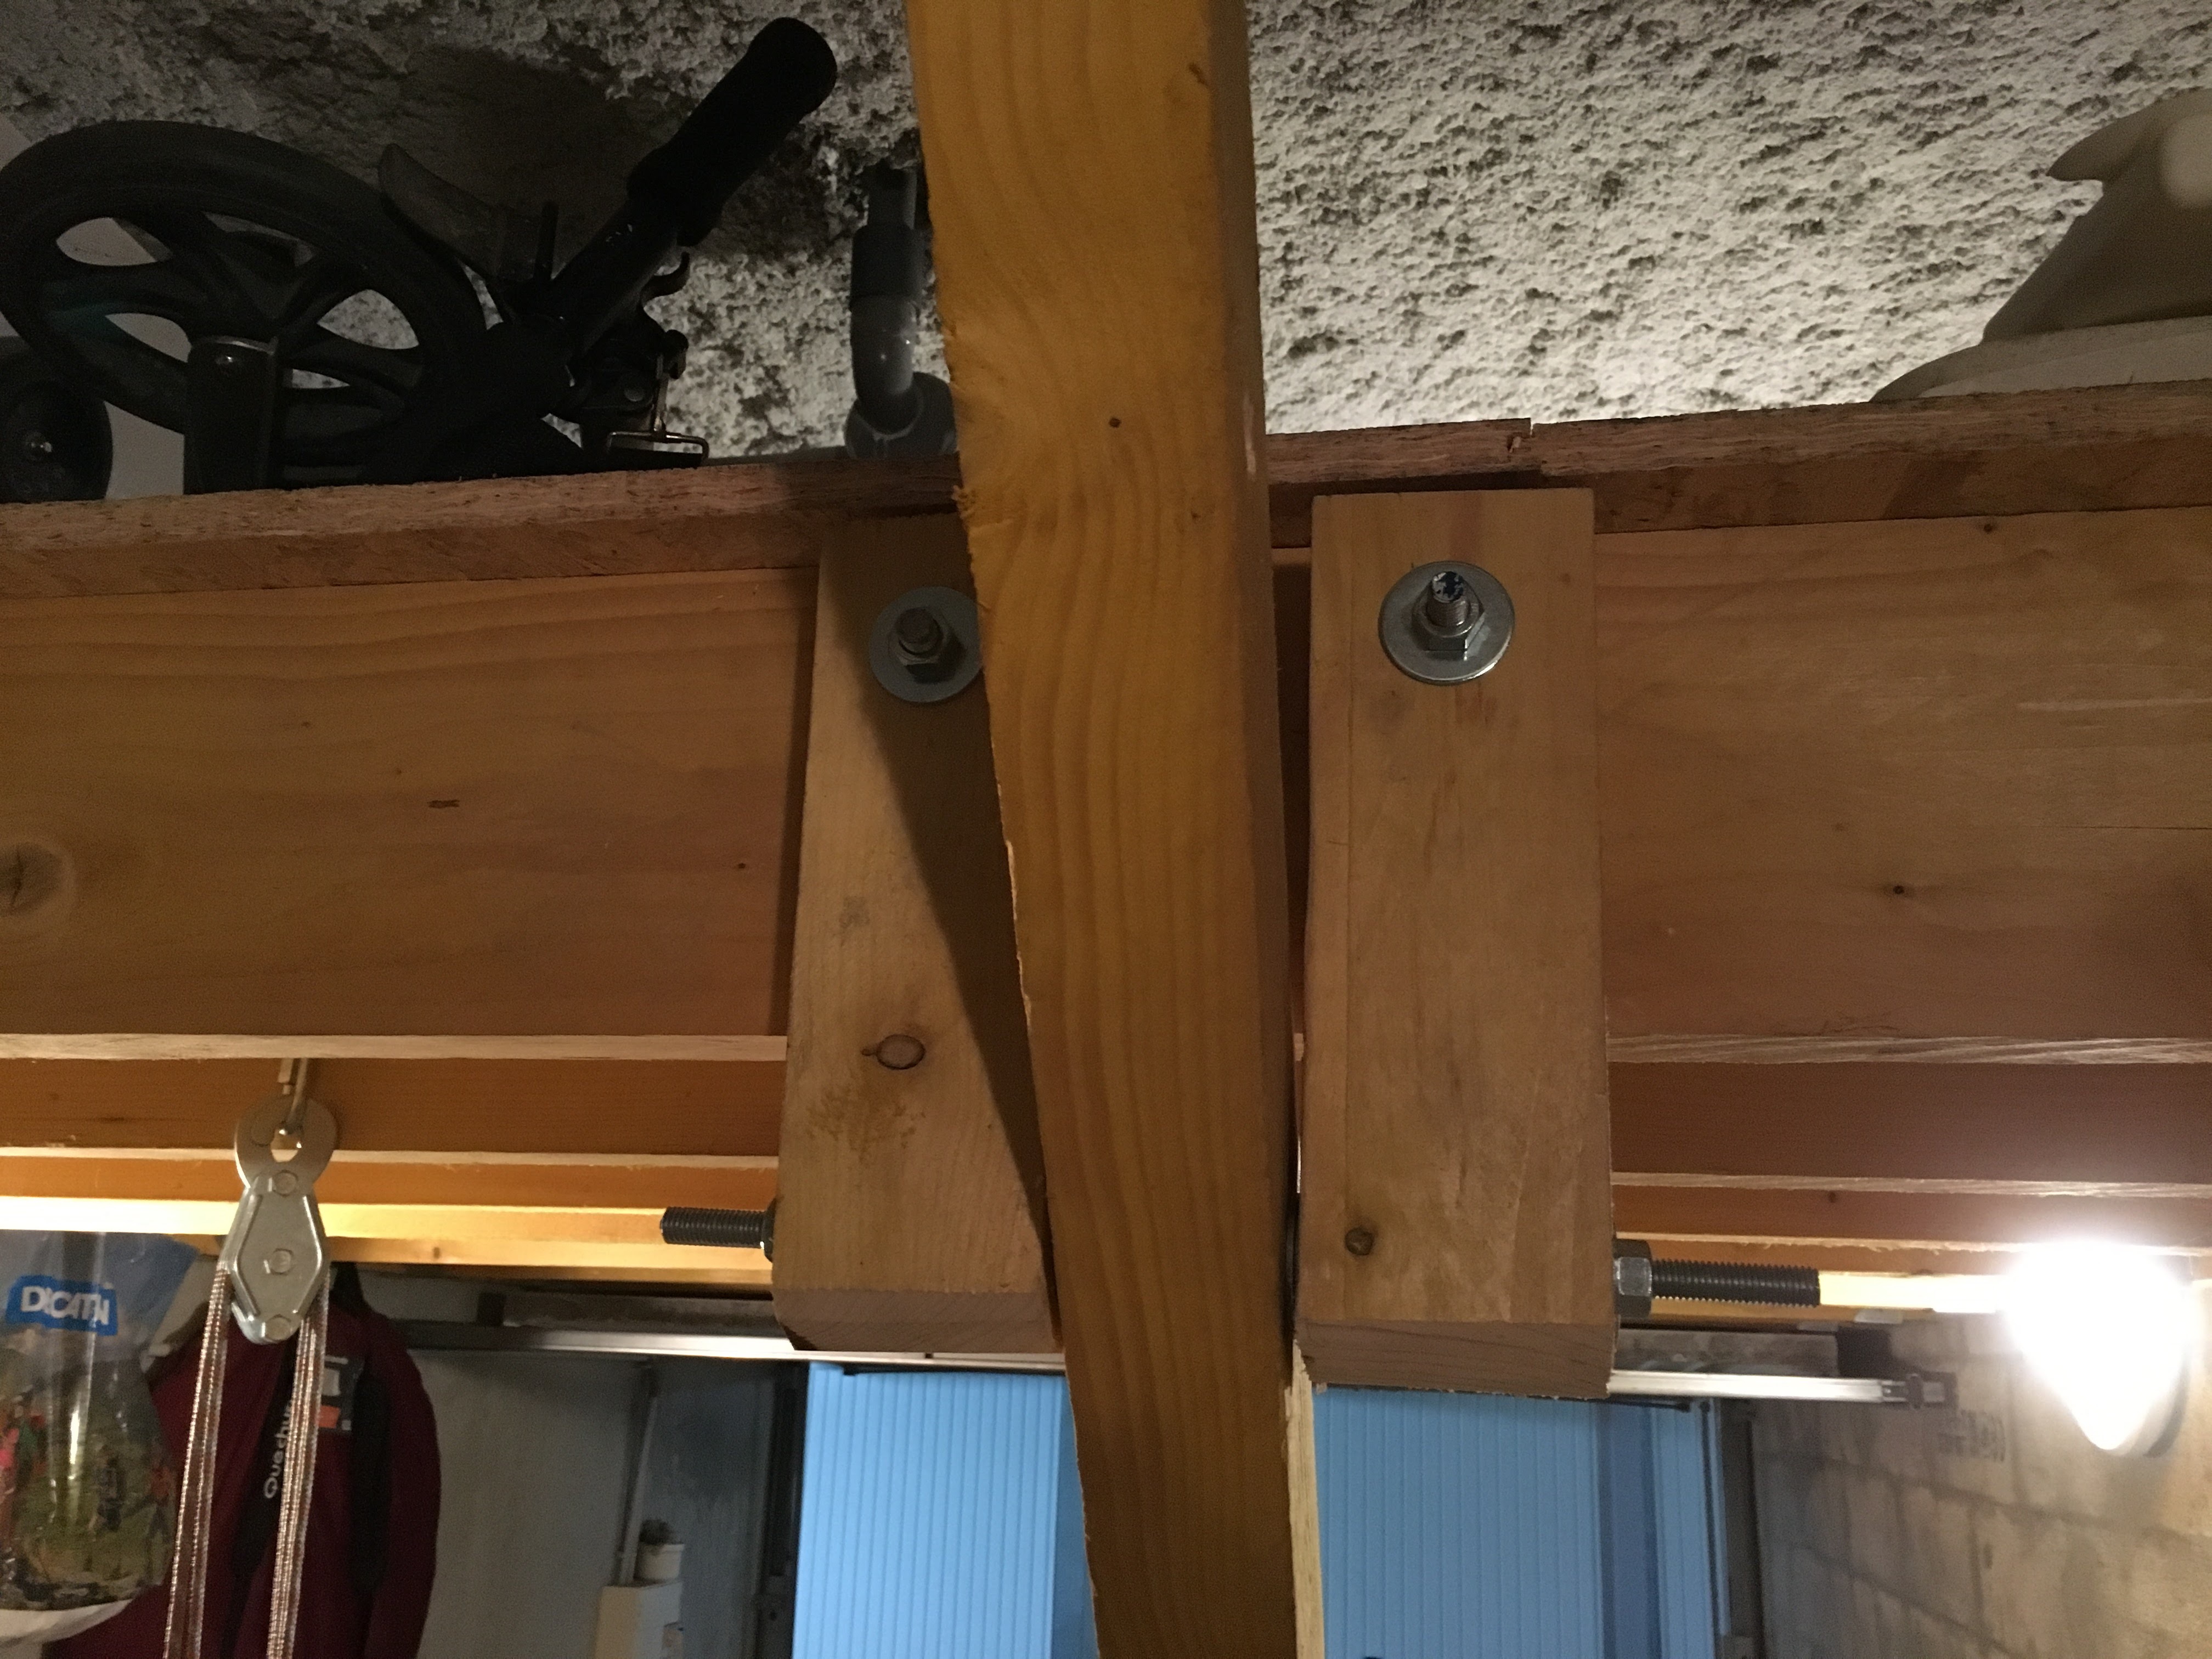
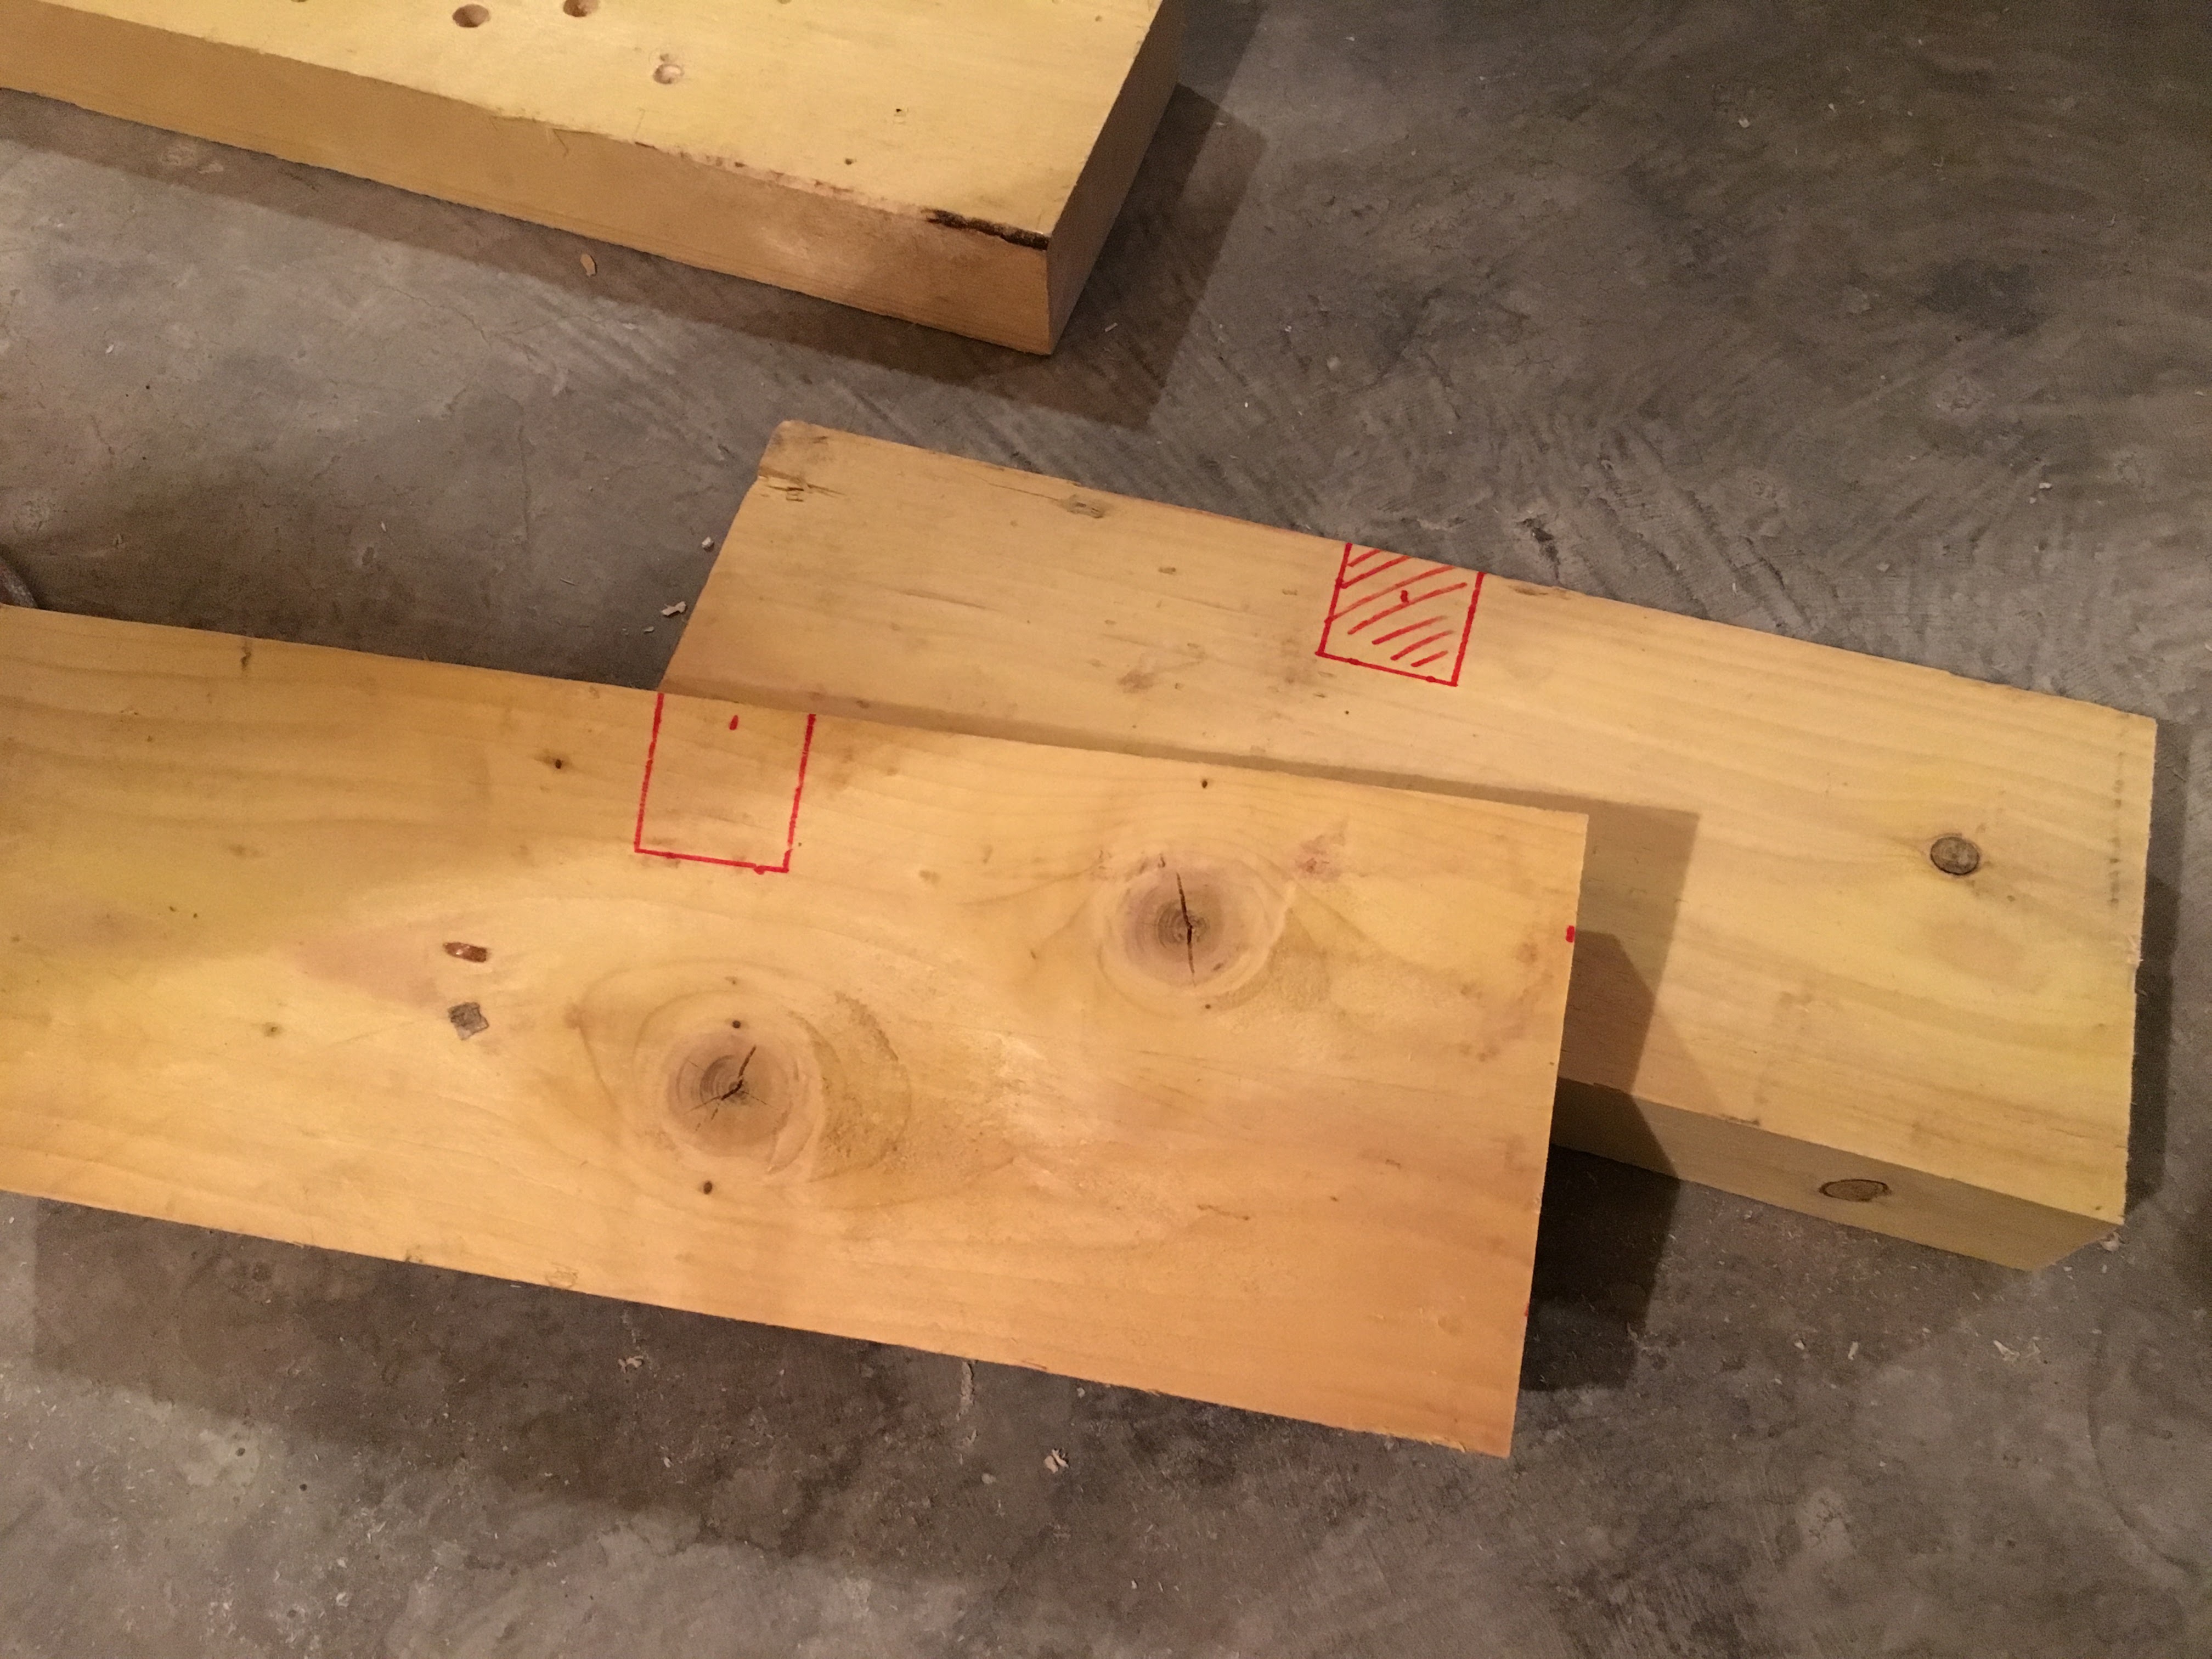
For the articulation of the frame with the mezzanine, I cut pieces of wood
(on falls that I had left of my project of mezzanine):
The axis of the joint is made with a threaded steel rod of 12mm diameter, which will slide in steel tubes (14mm) that will be inserted in the holes of the previous pieces of wood. The fit is perfect and it turns very well.
Here we see the pieces of steel tube, cut with the help of my jigsaw:

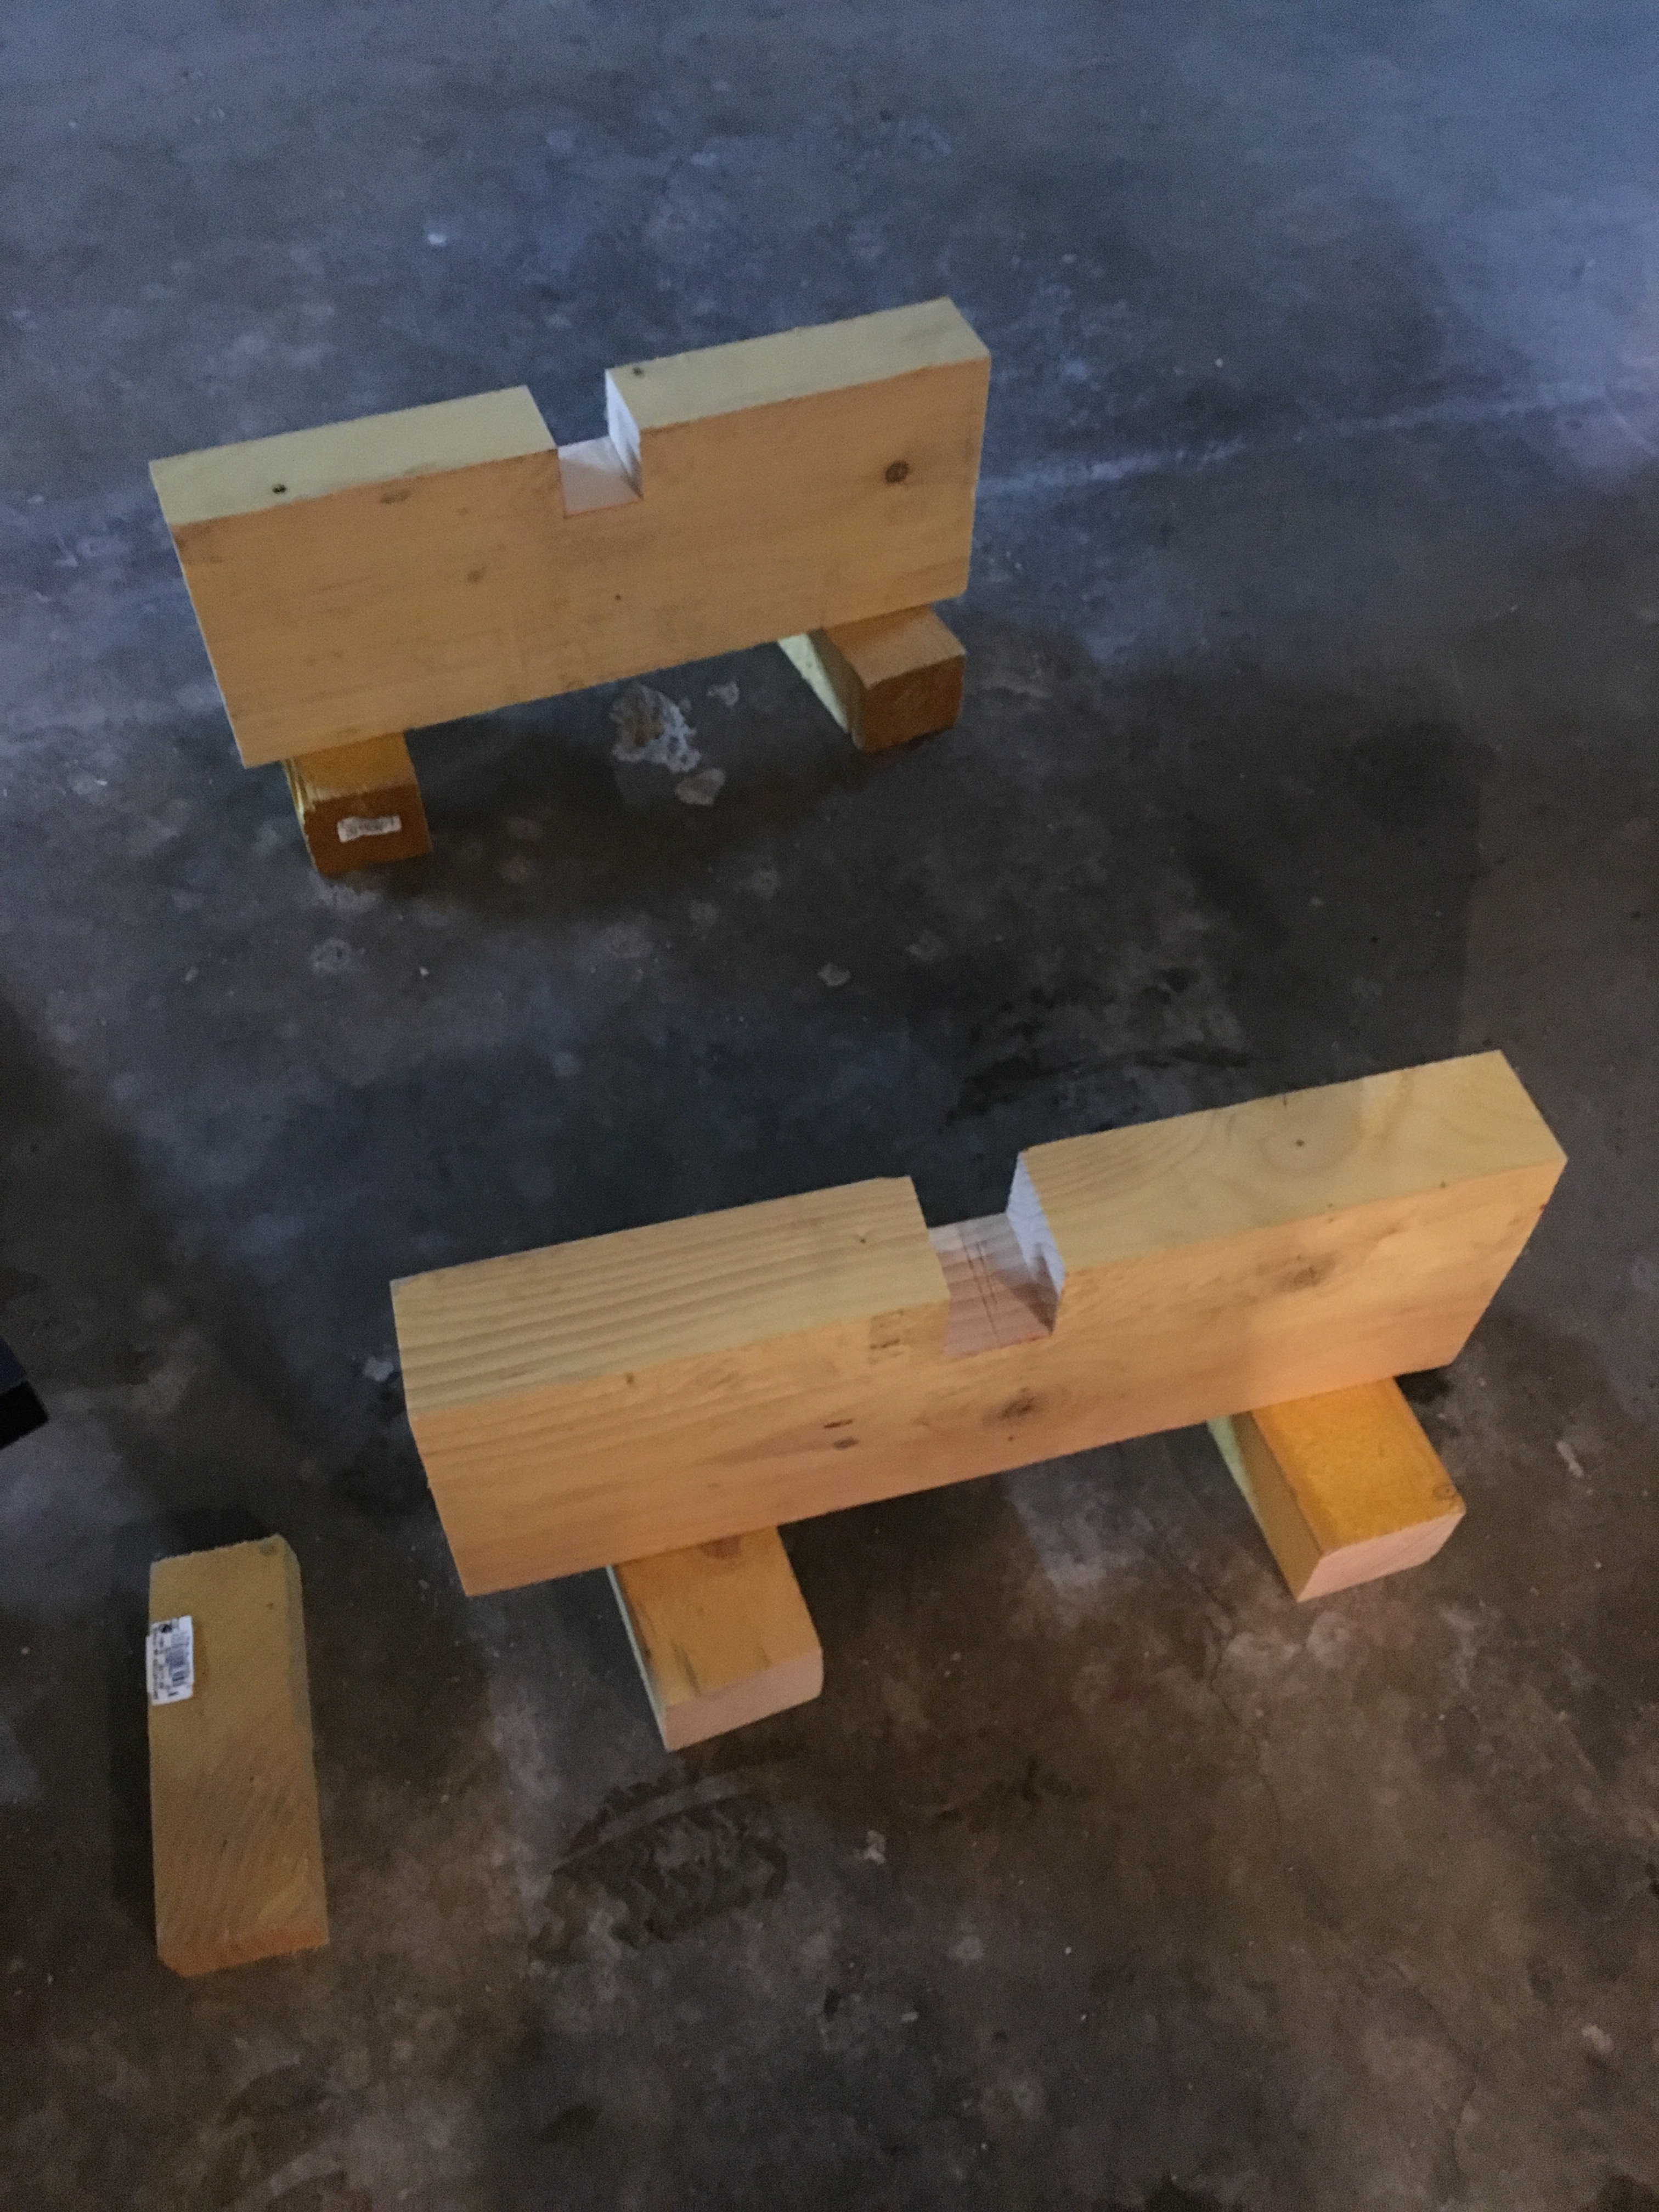
Here, we can see the detail of one of the joints, once realized. We see
that it is supported on one of the beams of the mezzanine:
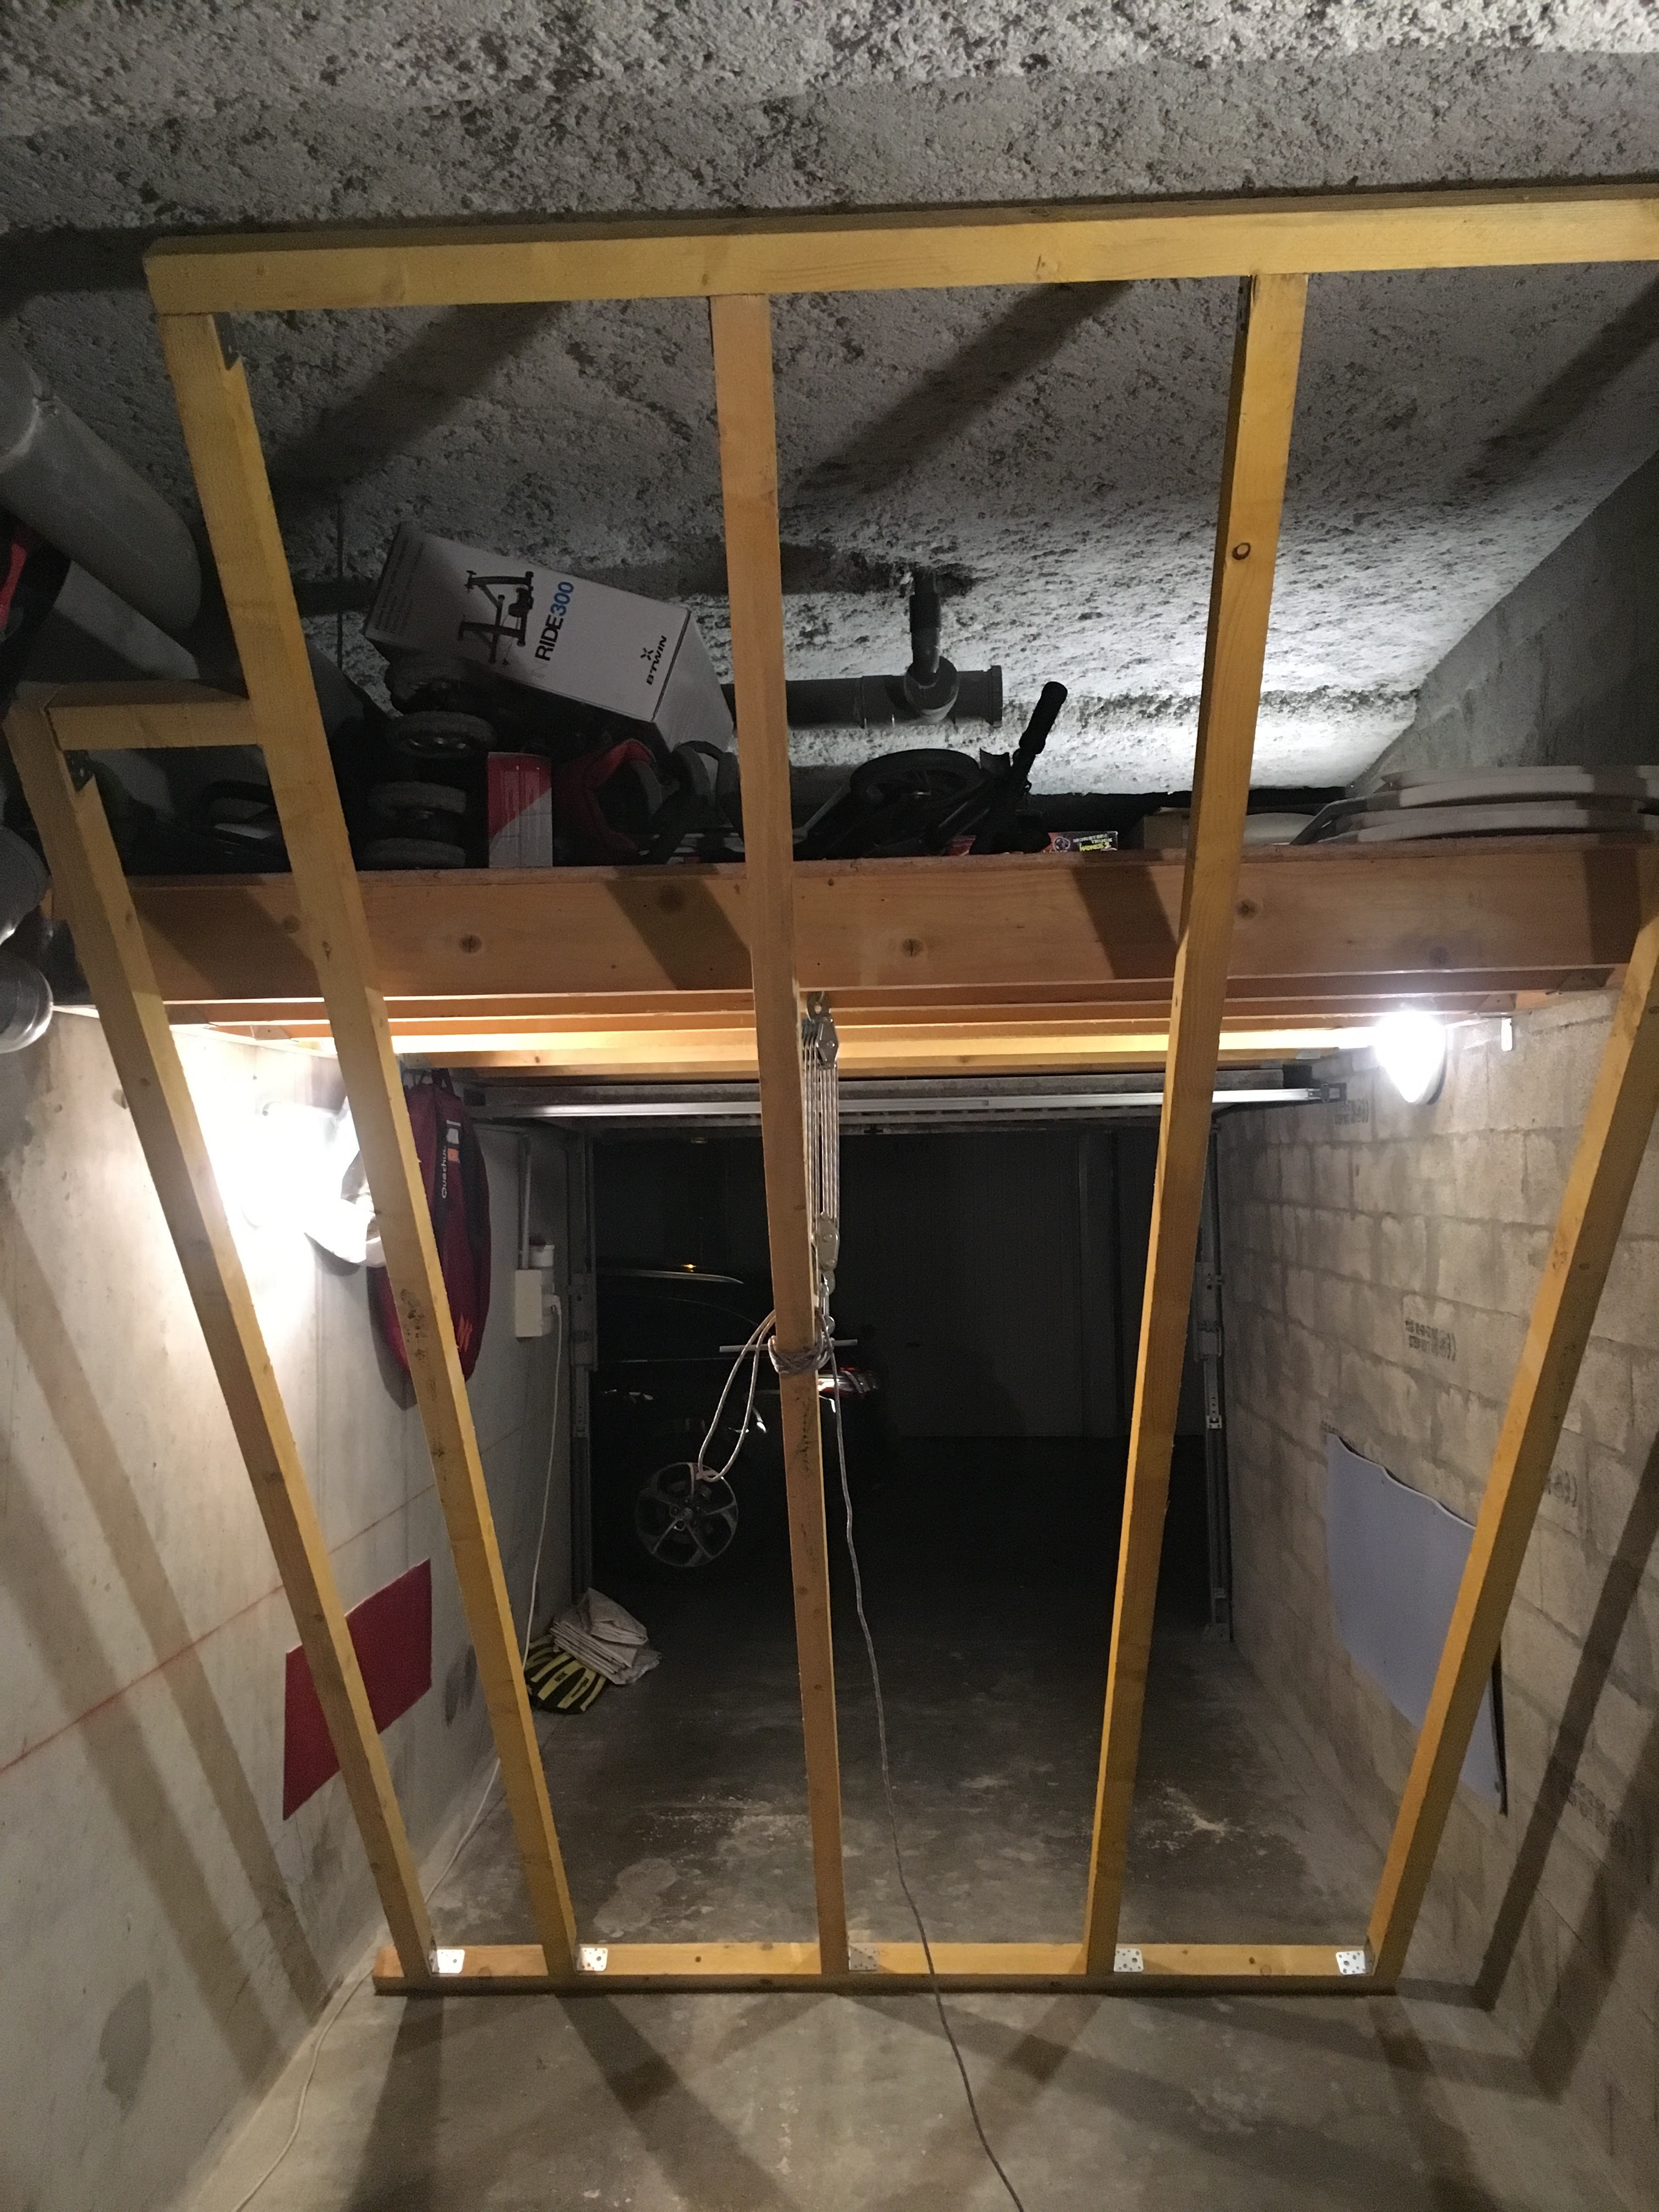
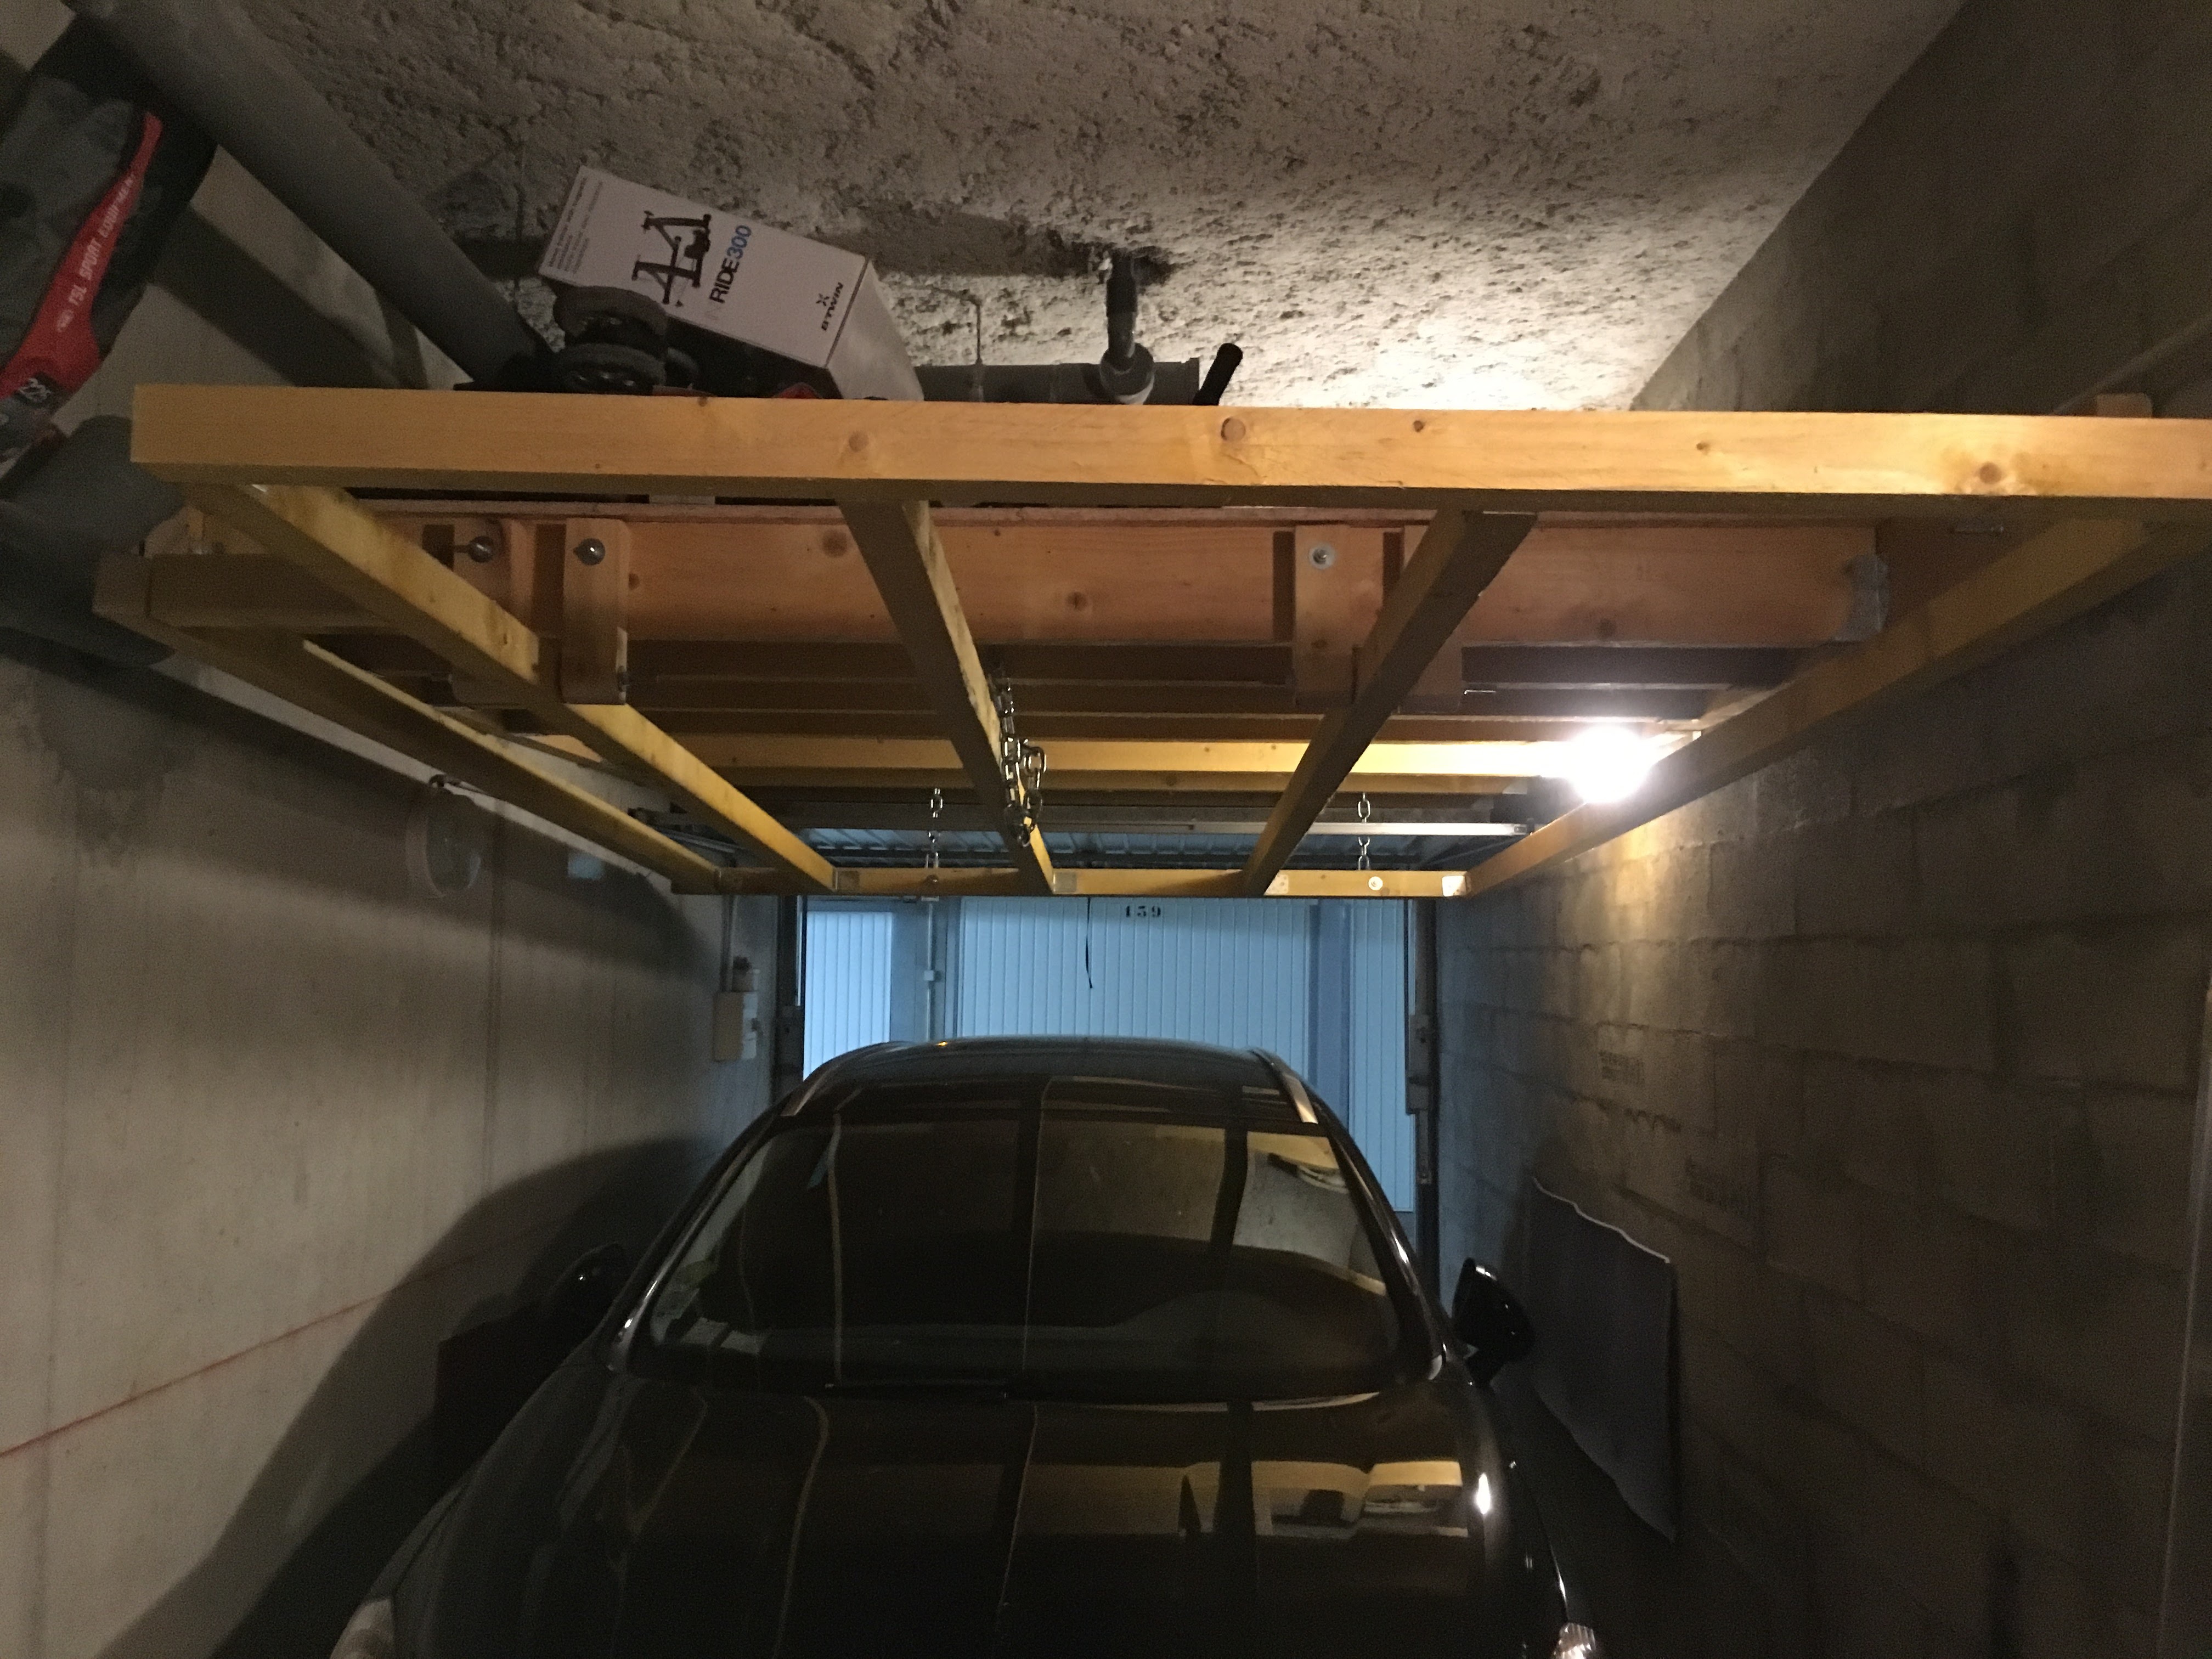
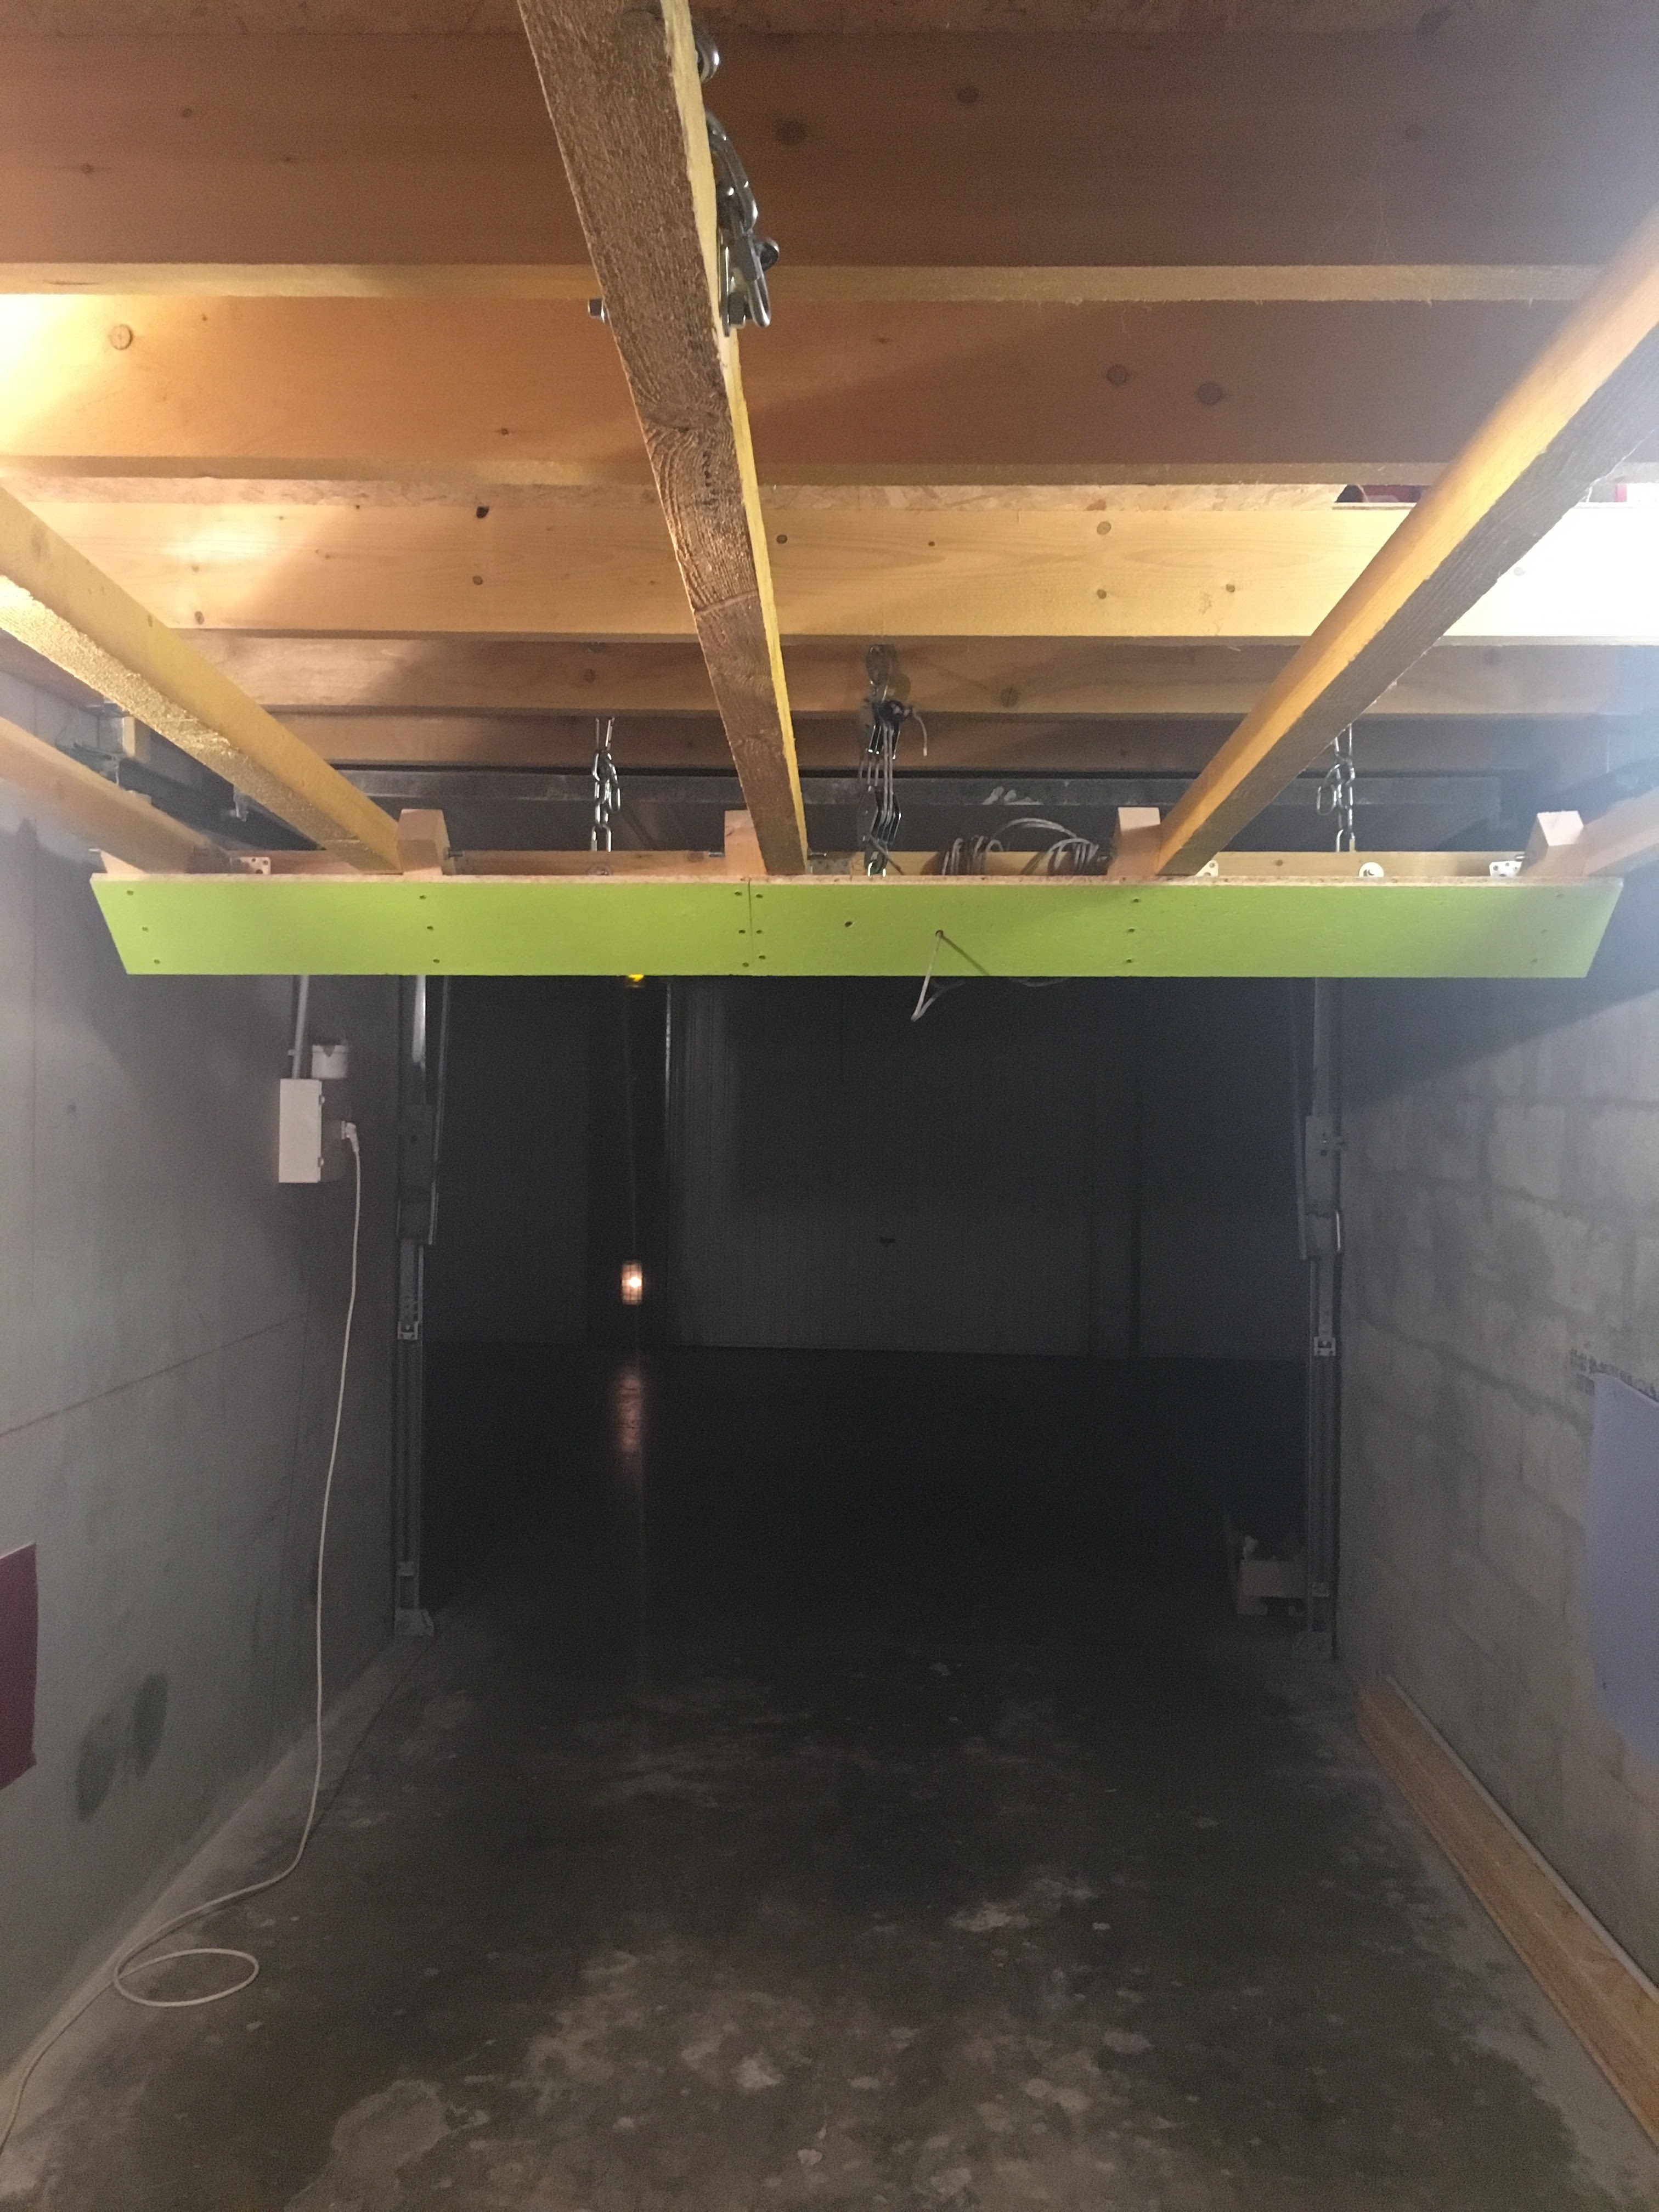
Overview of the chassis with 2 joints. At first I thought that 2 joints would
suffice. I finally put a joint on each rafter, to have a satisfactory rigidity
of the wall. I secured the wall with a 10mm steel chain that connects the
chassis to another beam of the mezzanine.

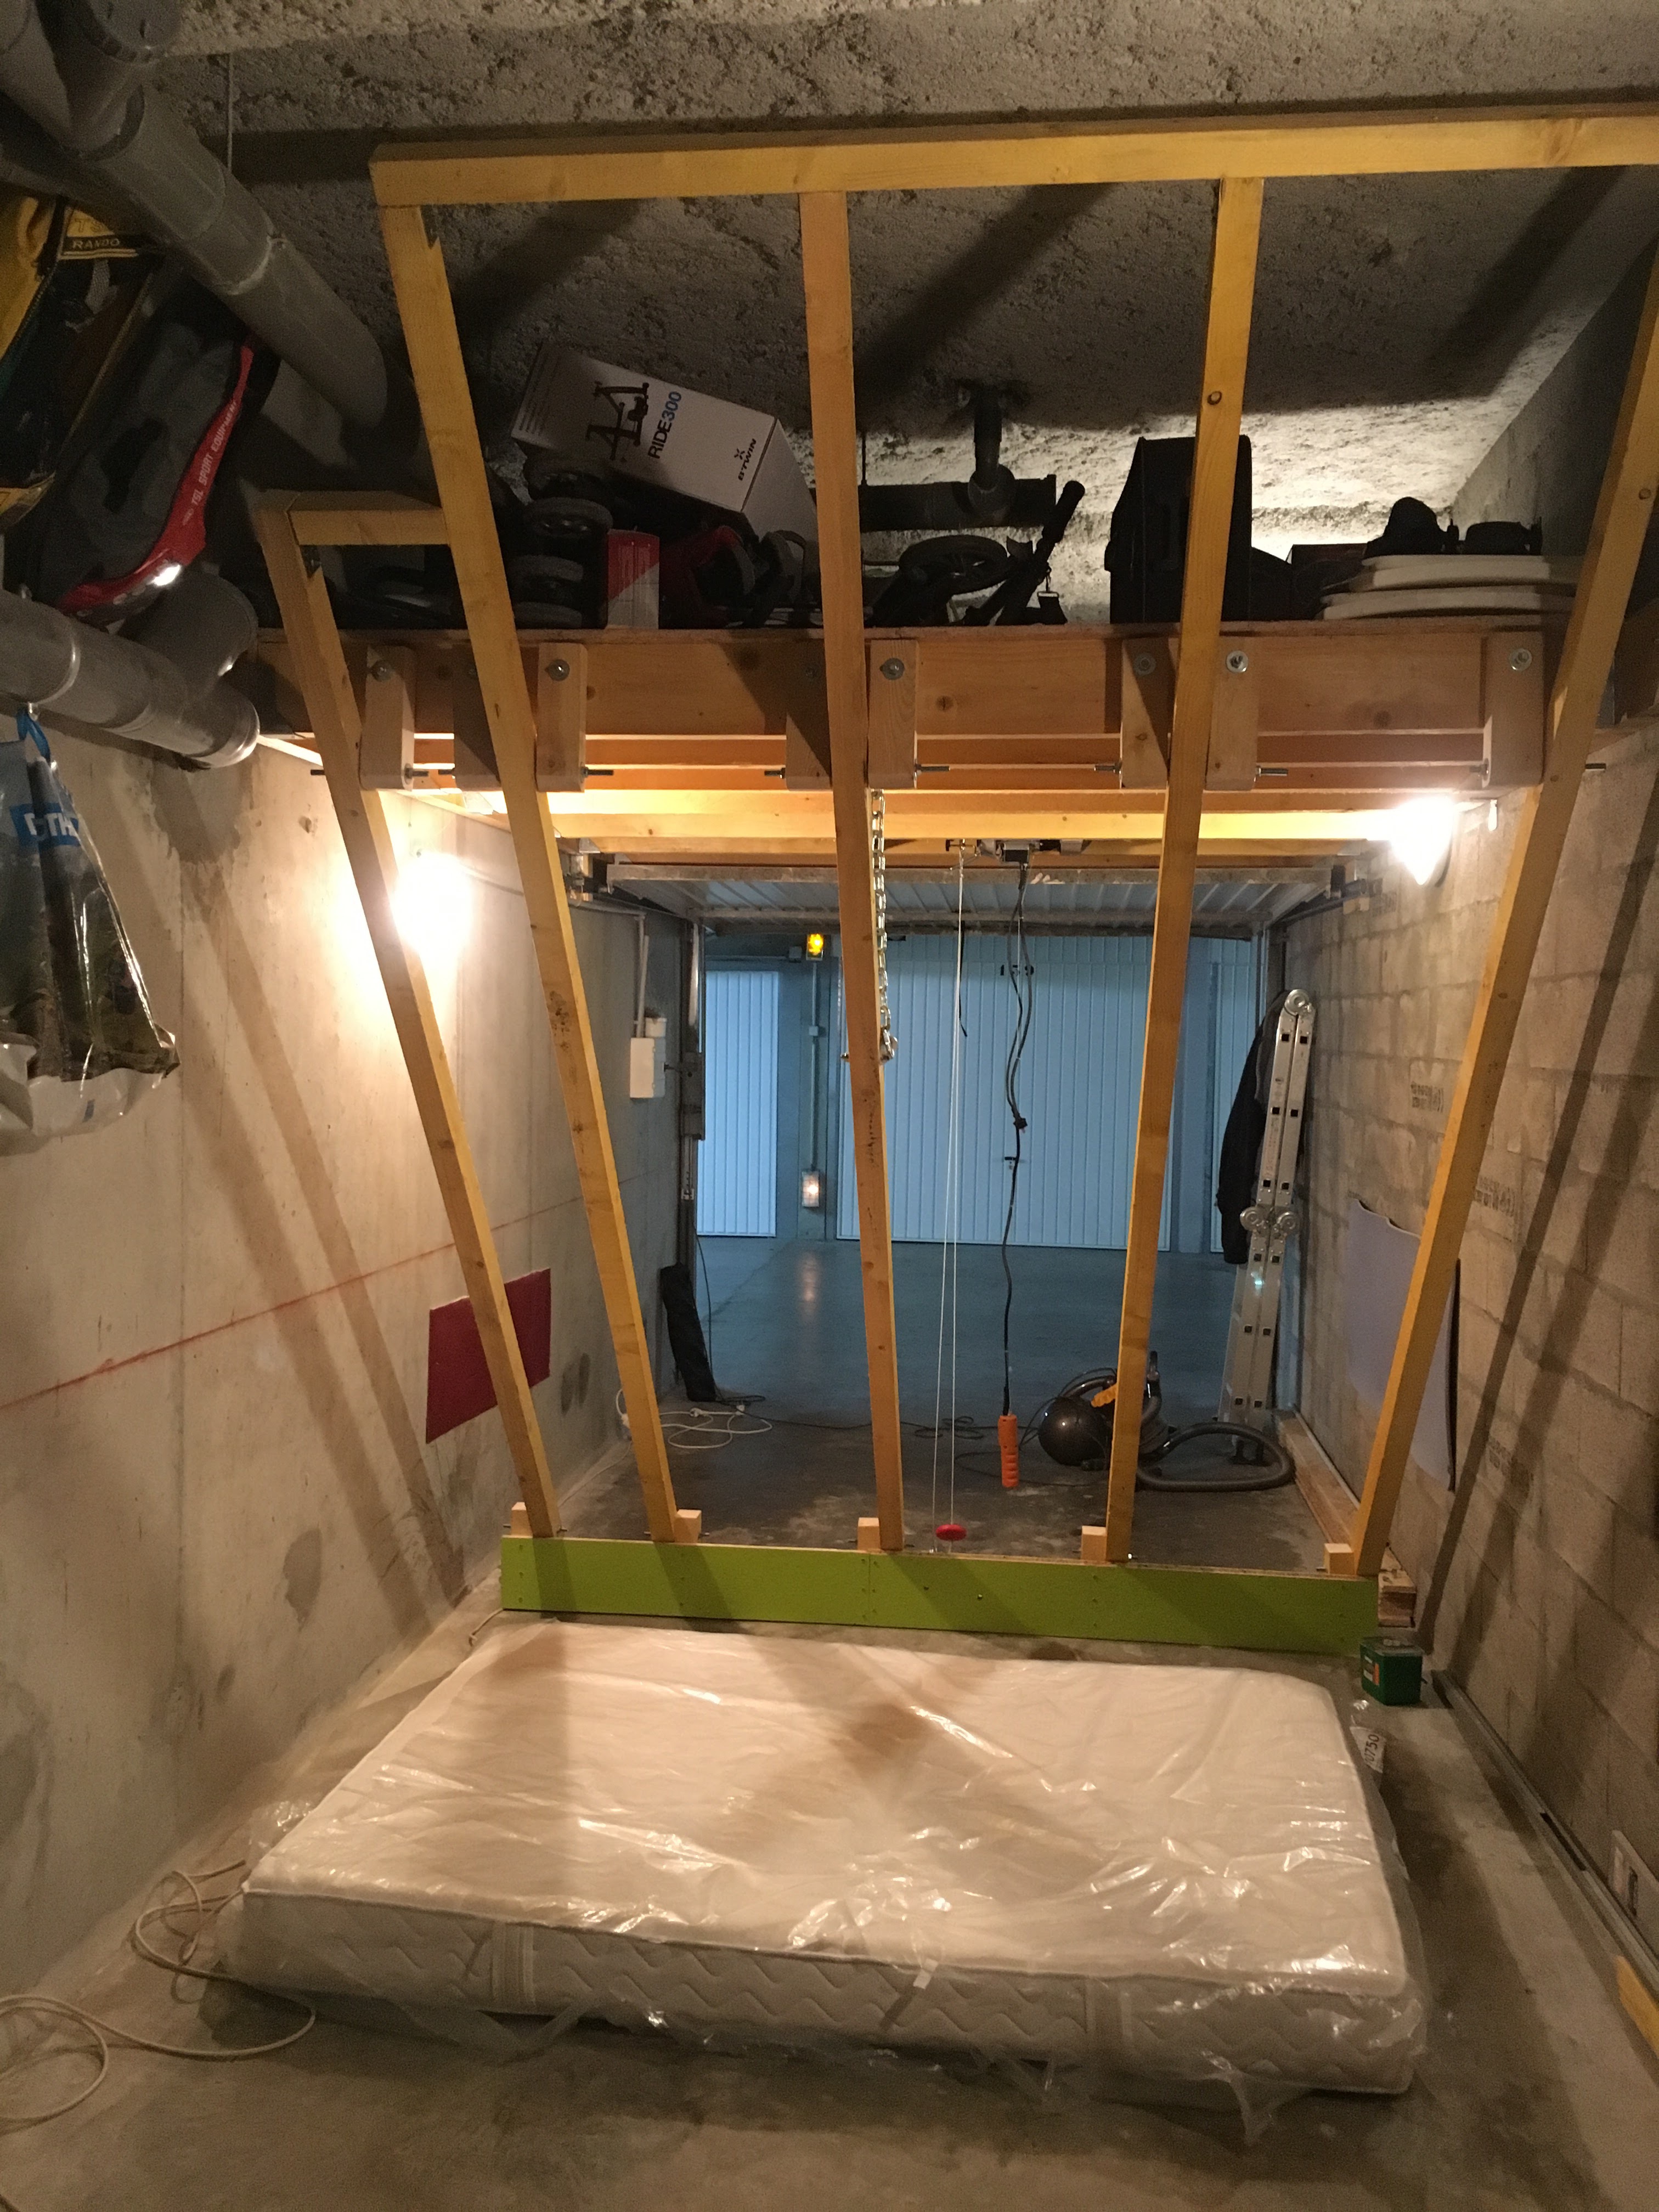
The chassis in raised position (by raising it myself thanks to the arm of lever,
we manage to lift it without problem, at this stage of the project). It is fixed with 2
pieces of steel chain (the same as before) to one of the beams of the mezzanine.

We can see that we can still park the car, epic win \o/ :
Preparation of OSB boards
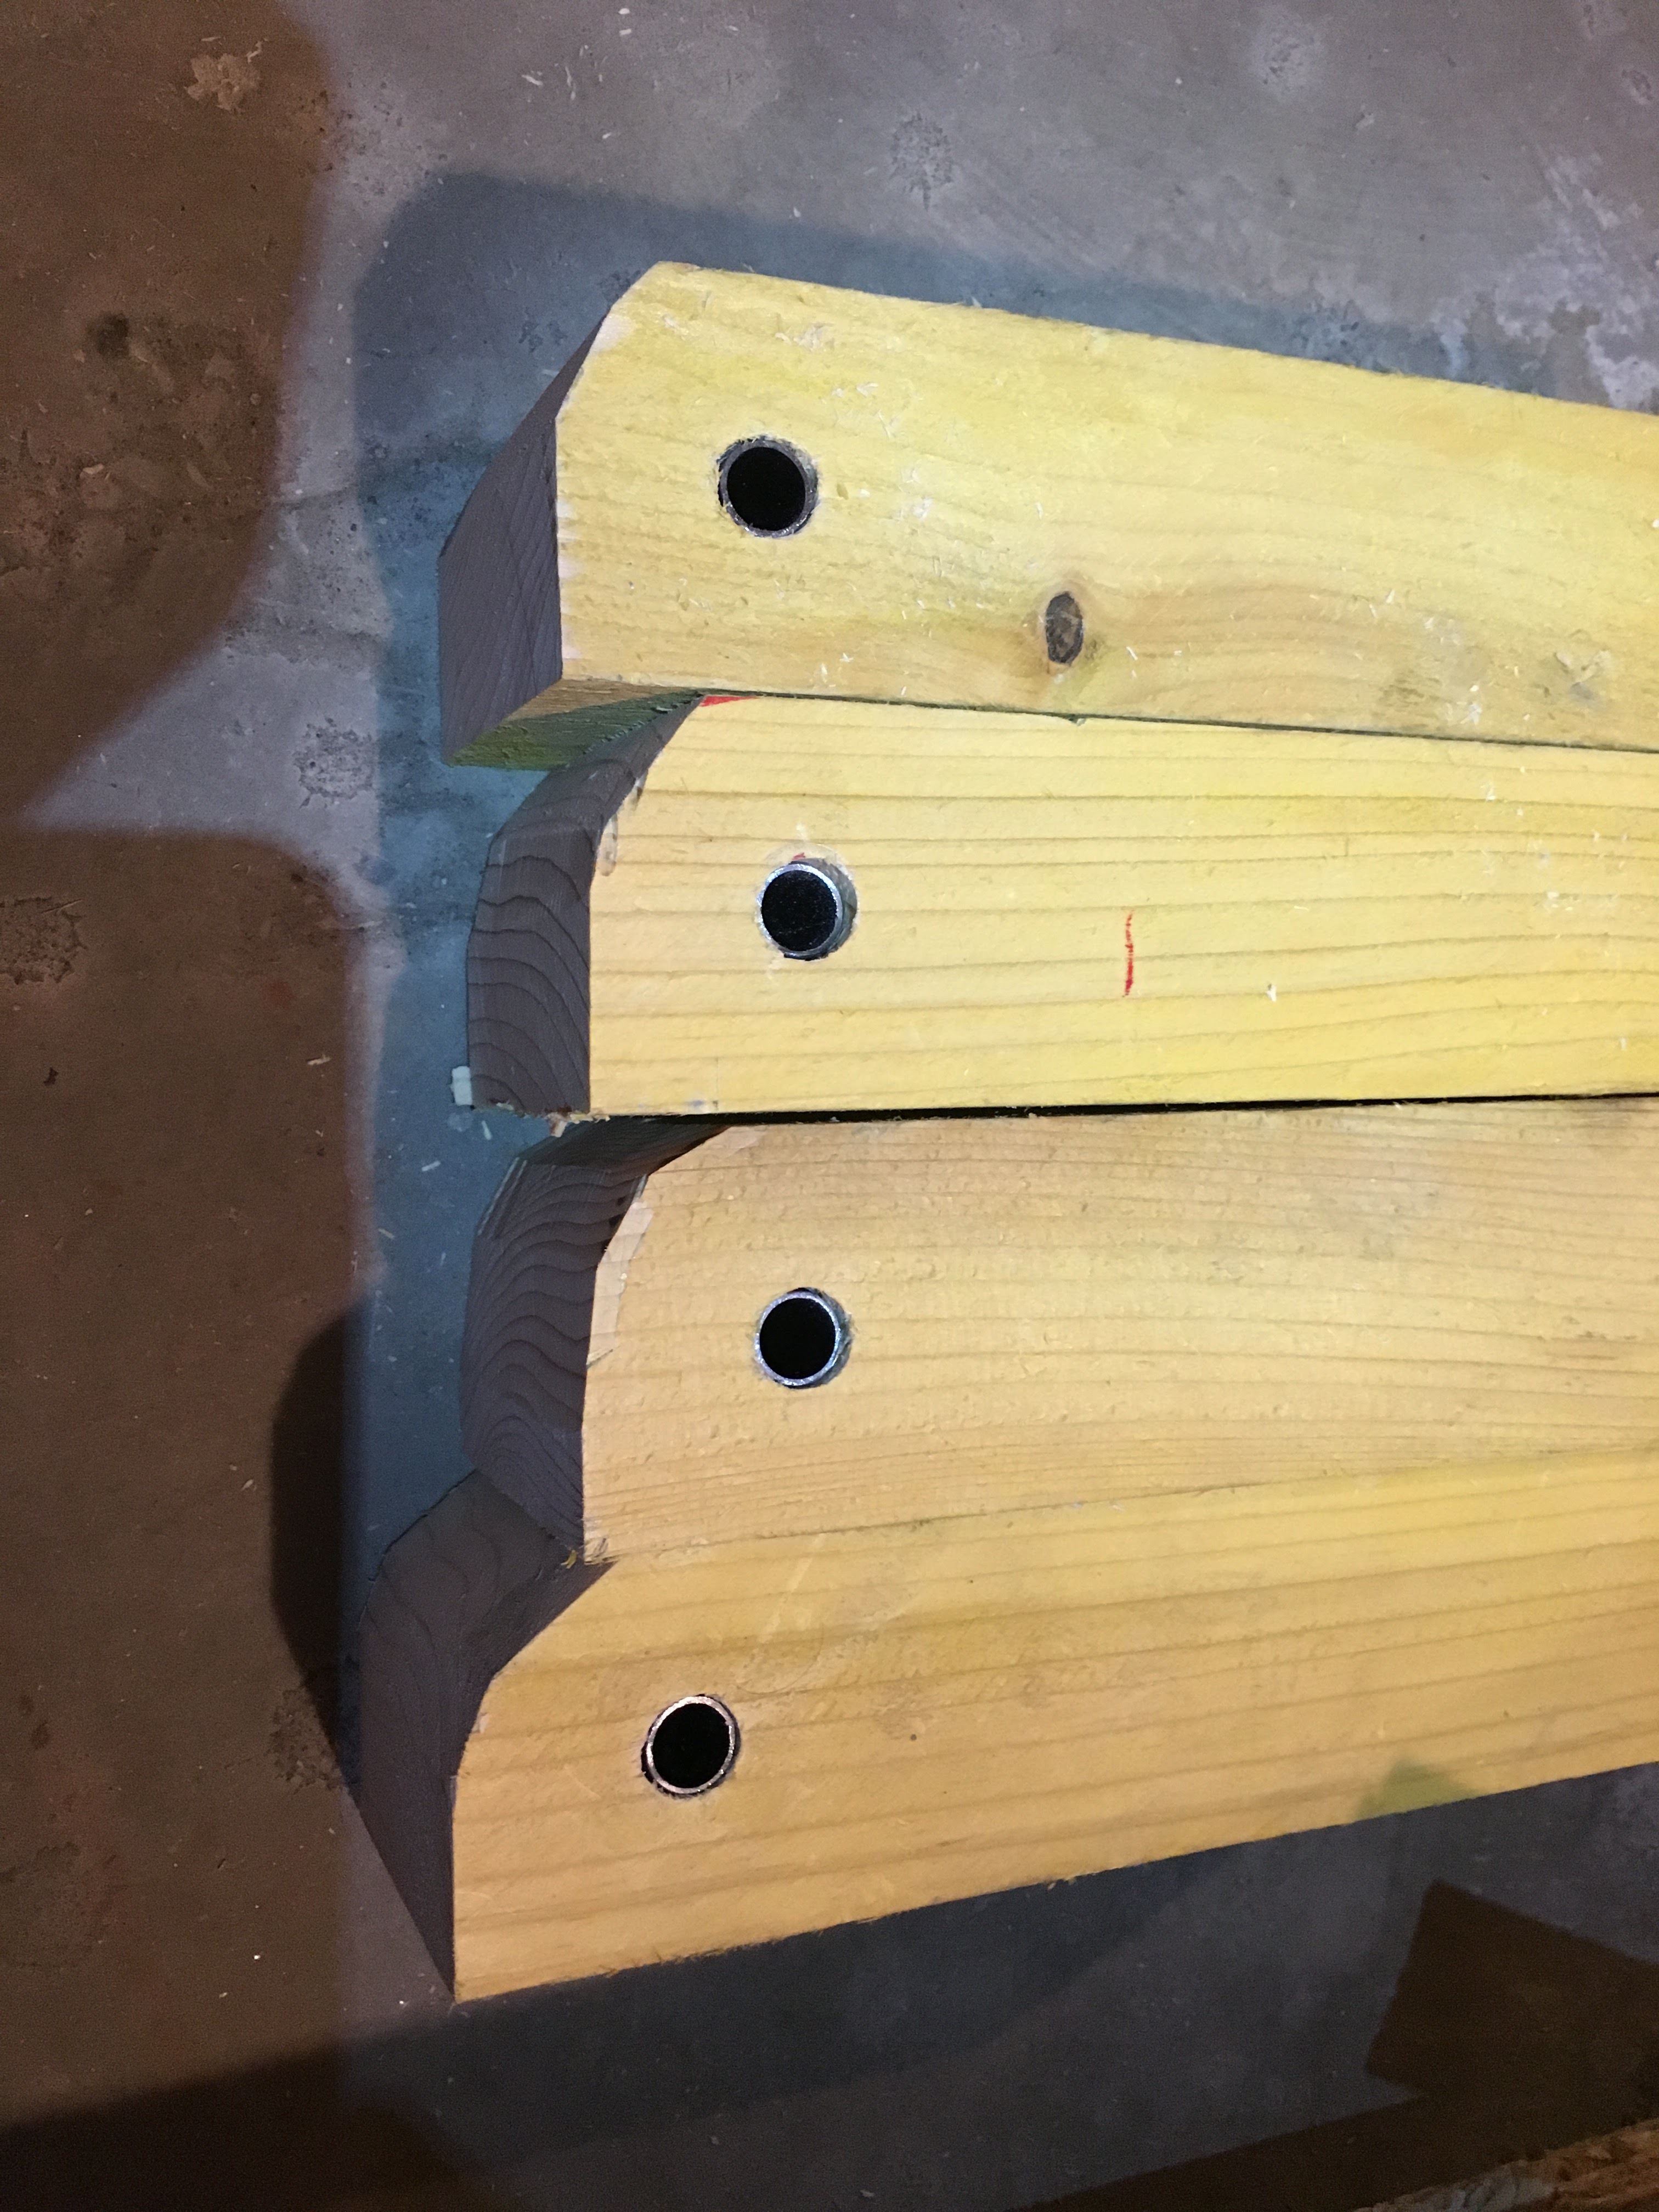
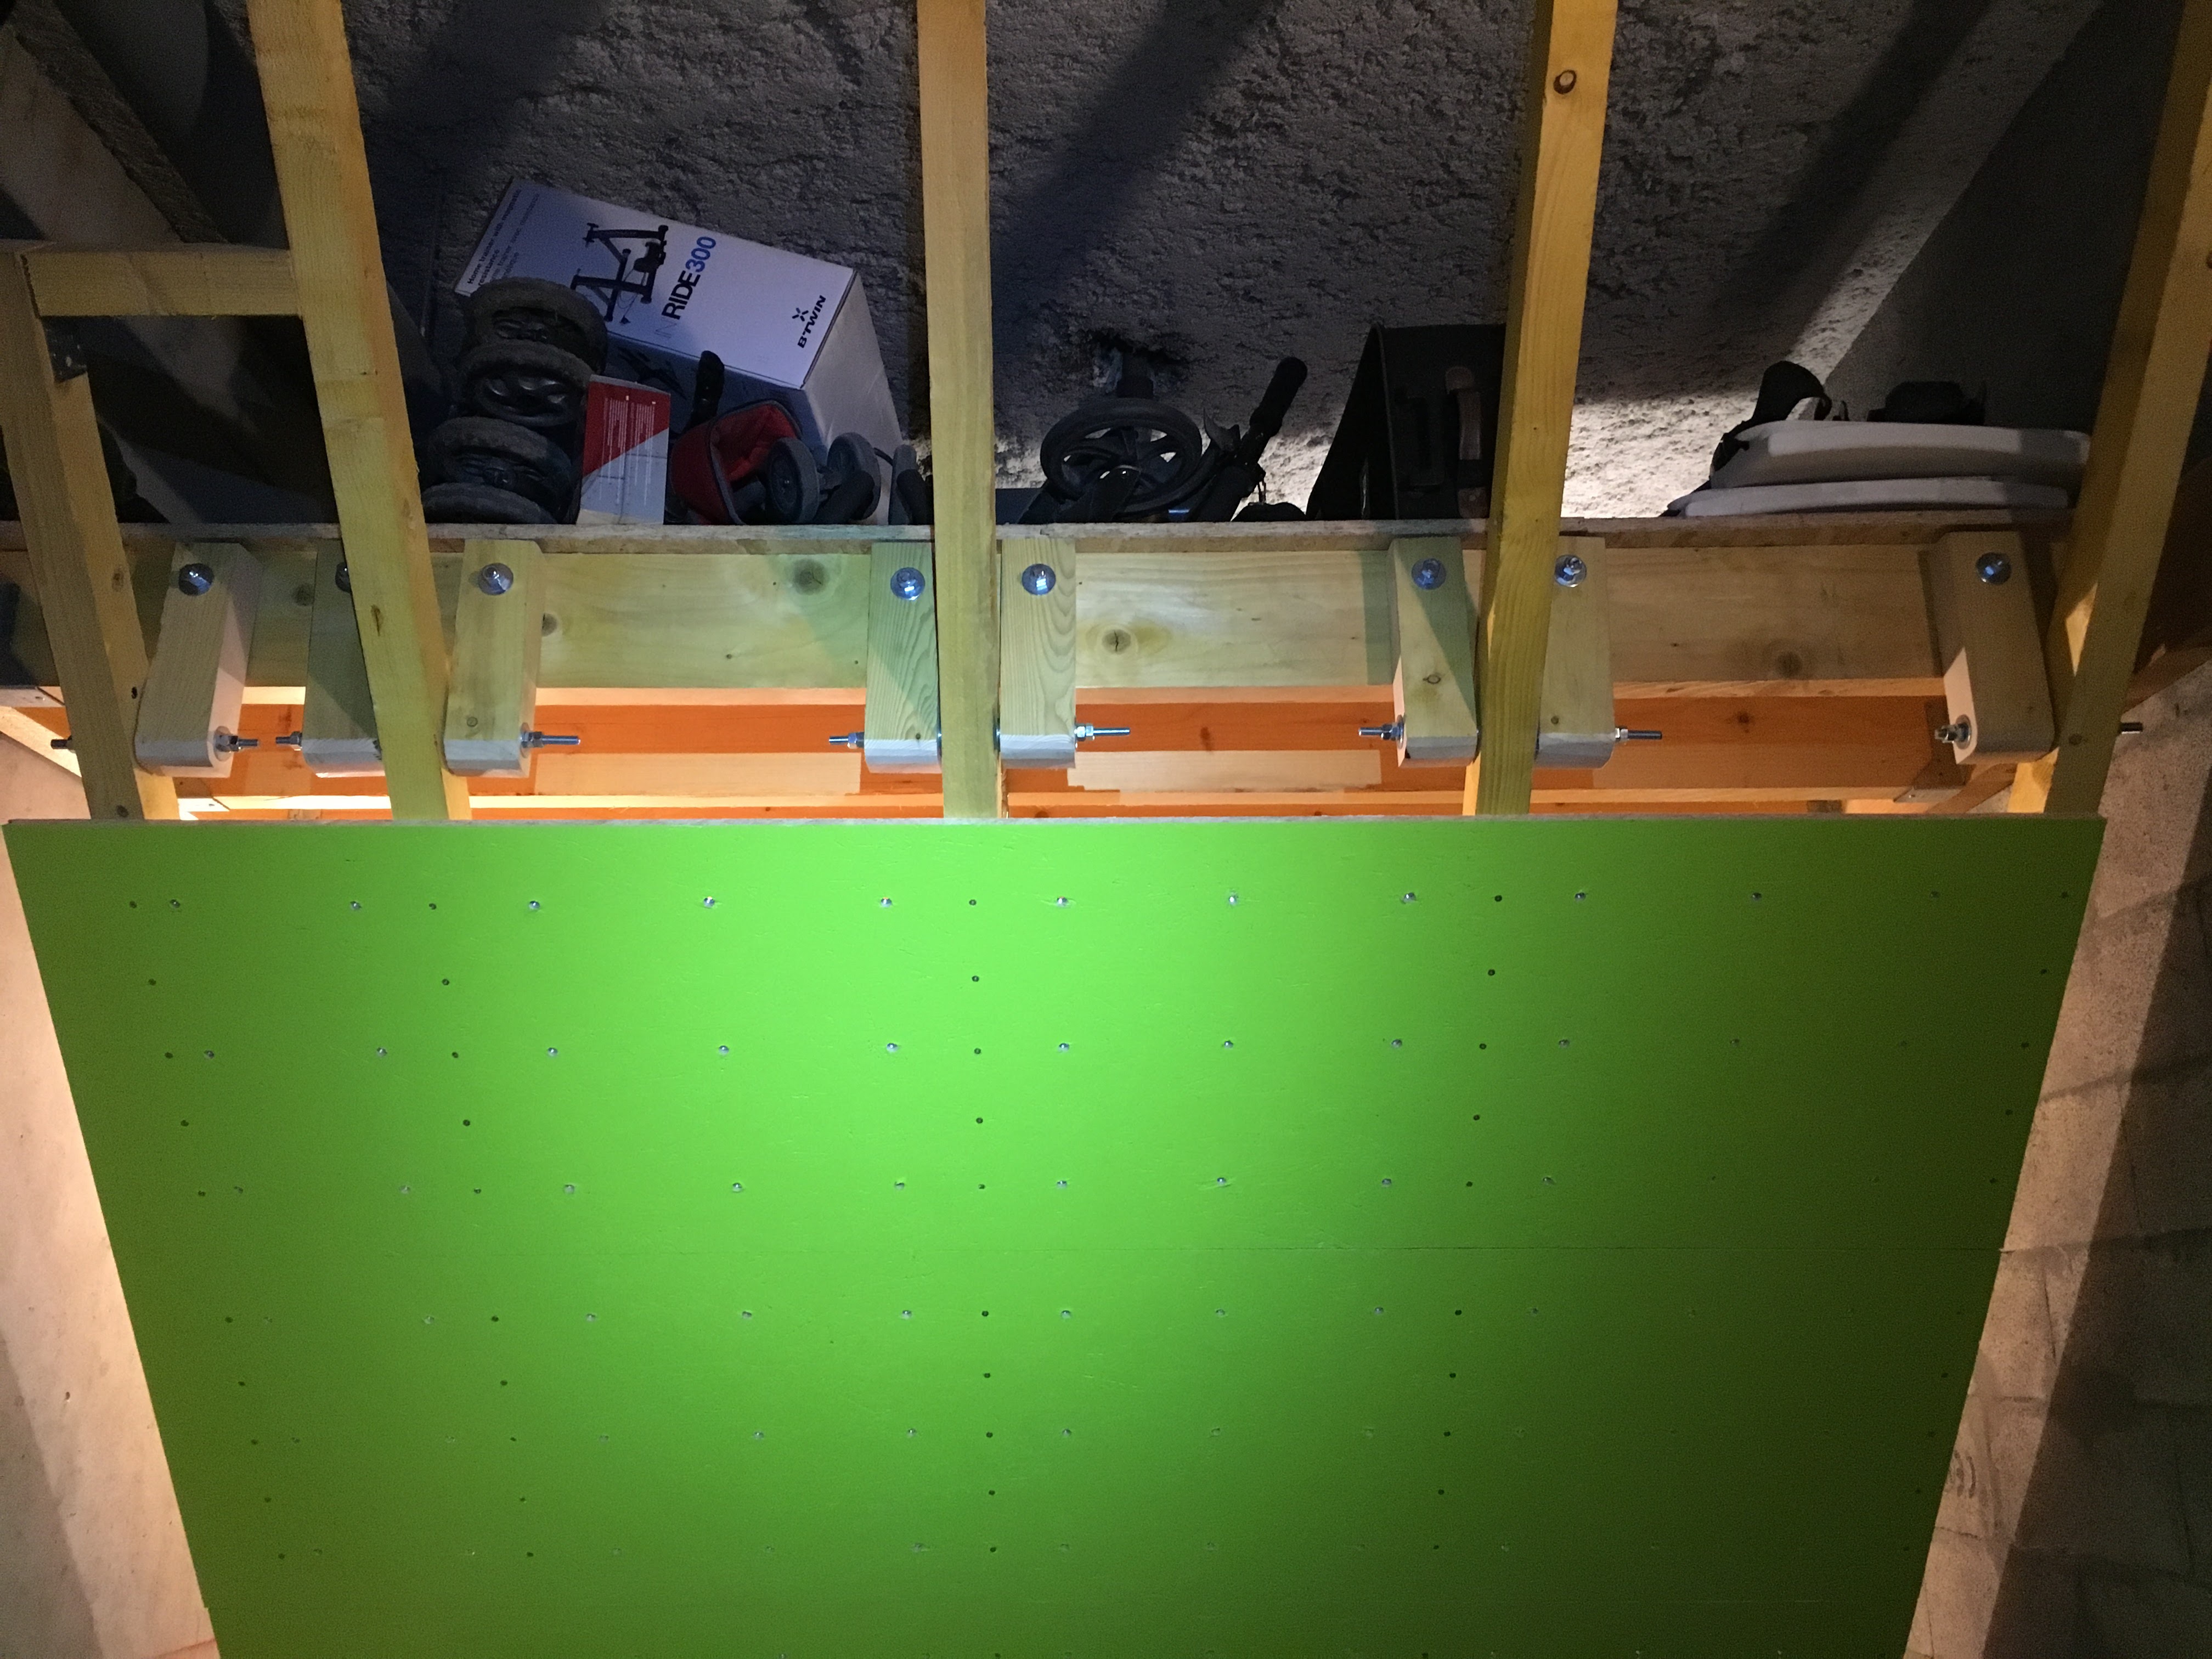
Then place to the preparation of the OSB boards which will welcome at term the climbing holds. I pass on the cuts to the right dimensions (thank you the circular saw this time). We must drill the boards at regular intervals to have the grid for fixing future holds.
Tip n°1 : we pierce 3 boards at once each time, it divides by 3 the number of holes to be made to the drill.
Tip n°2 : we first pierce 2 opposite corners in which we pass
a rod, so that all the boards do not shift during the drilling of
following holes.
Then a stroke of paint (thanks kids for the help):
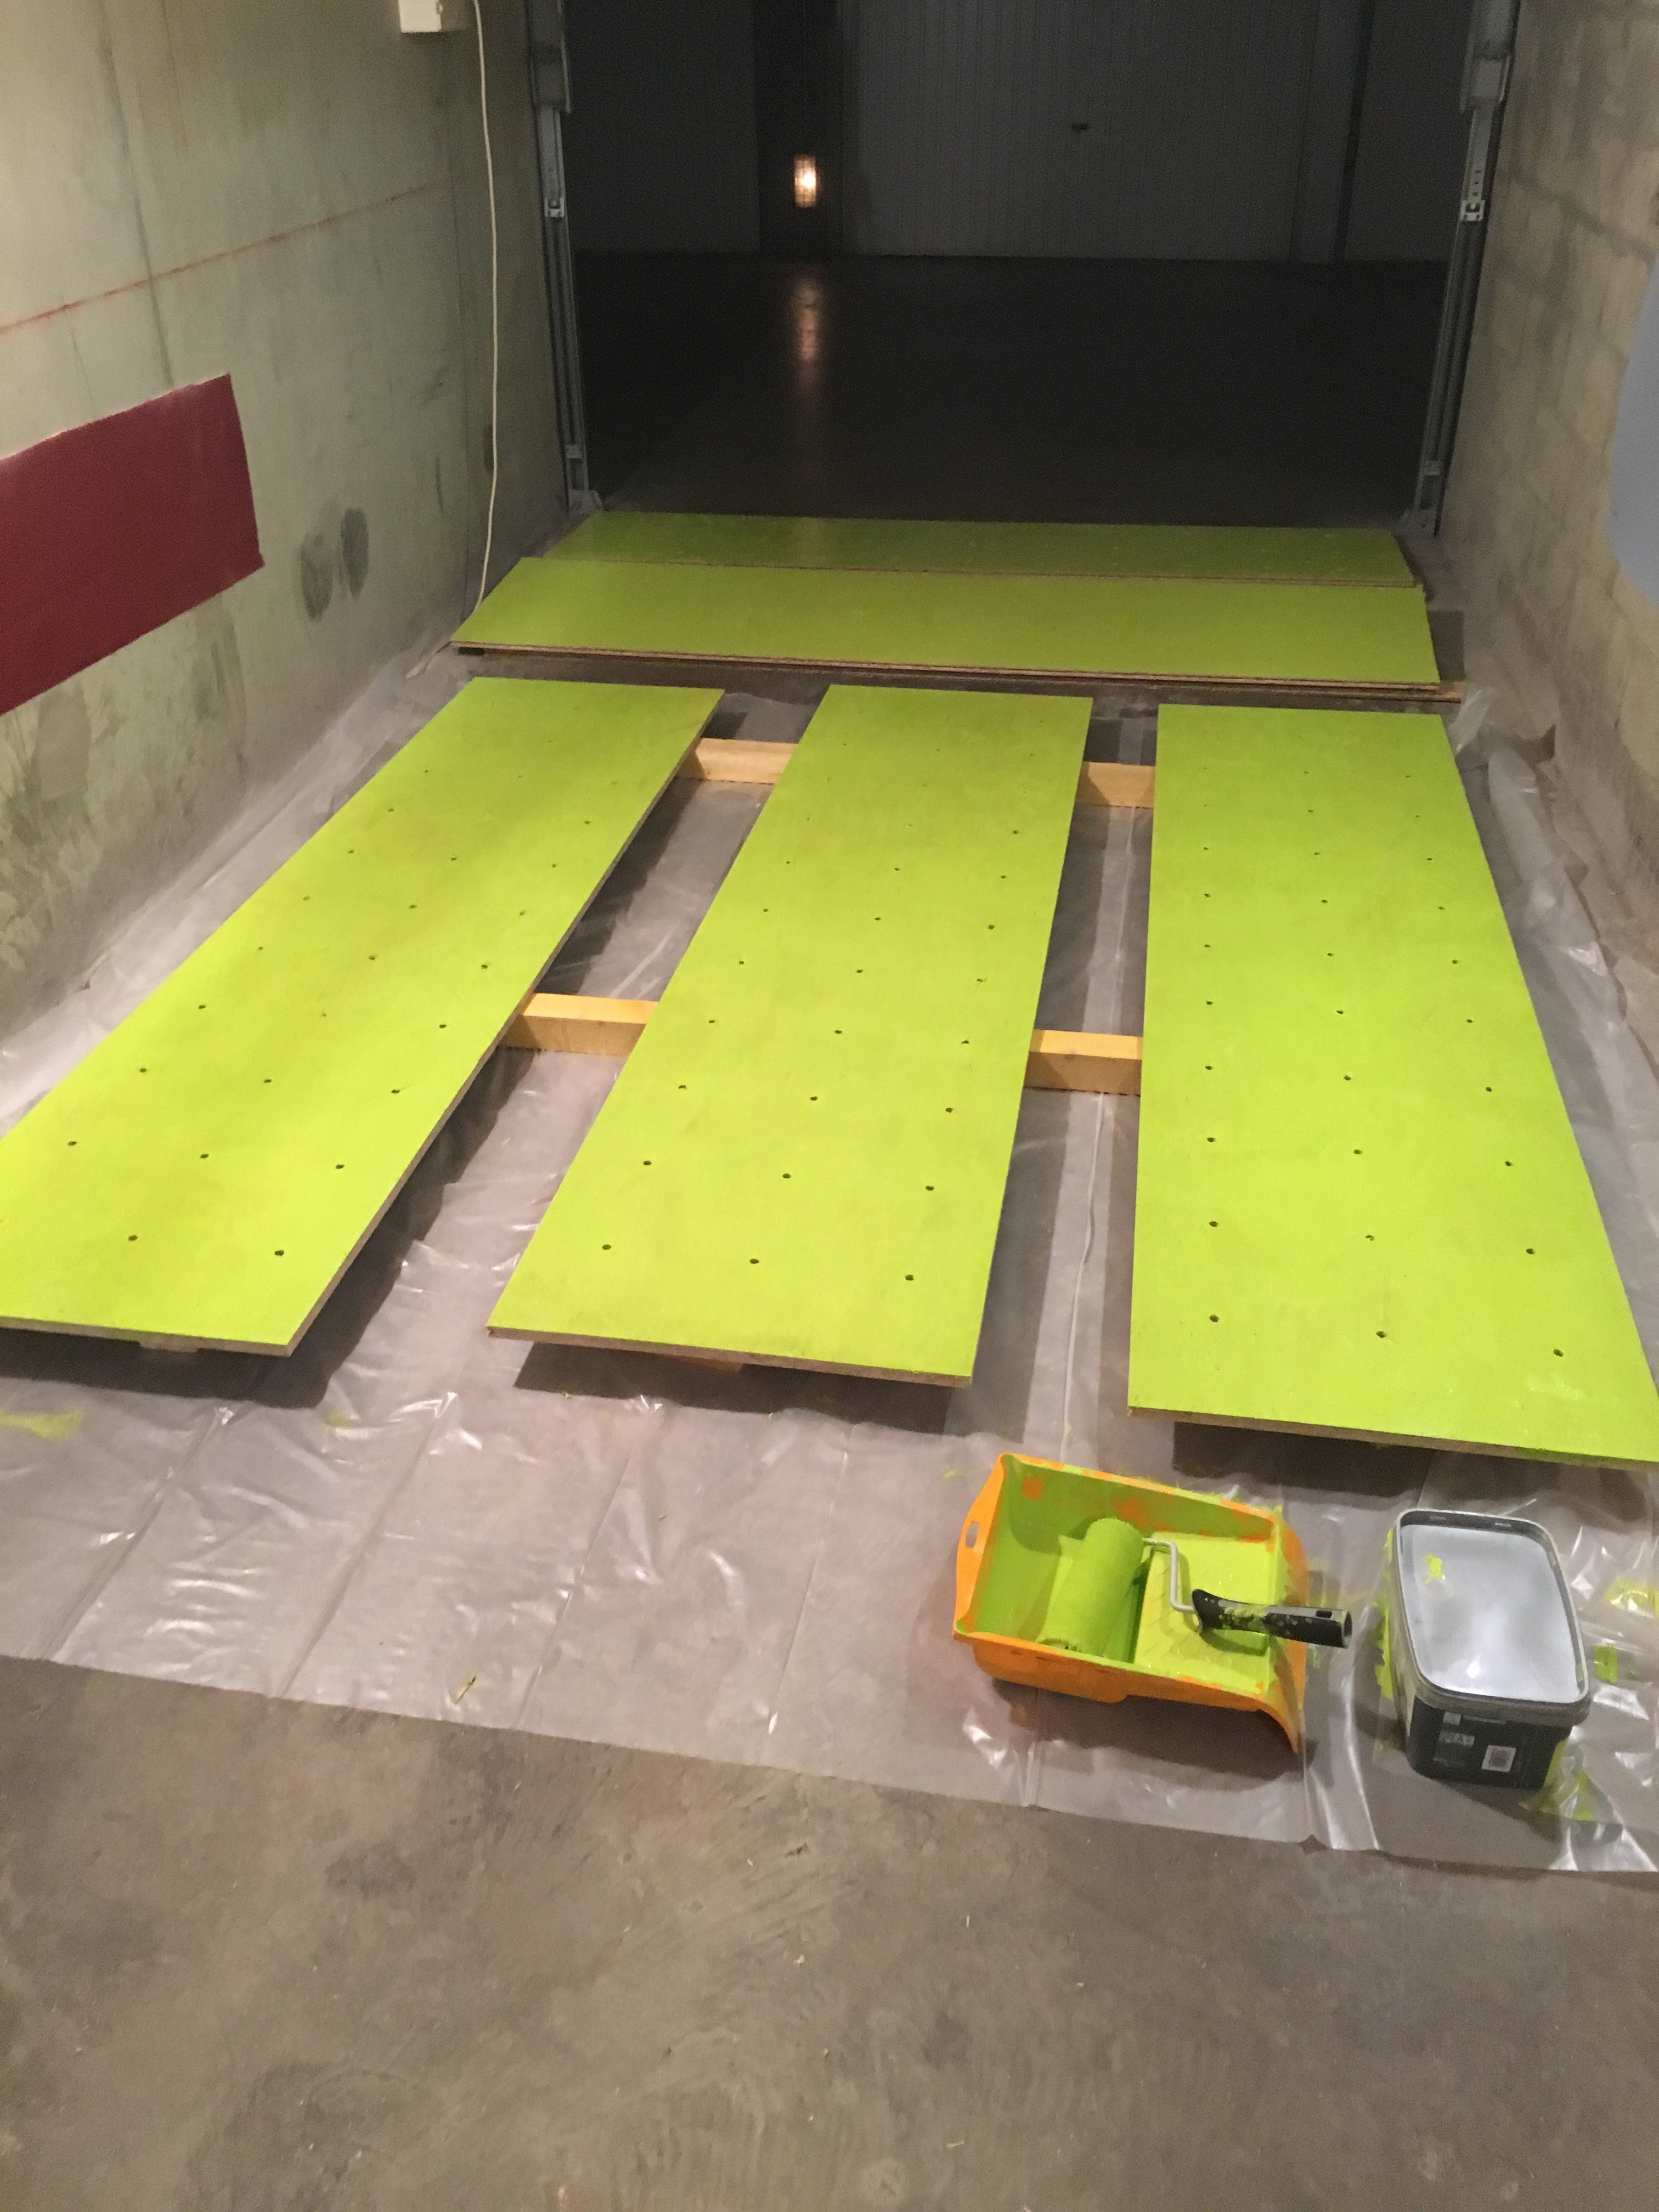
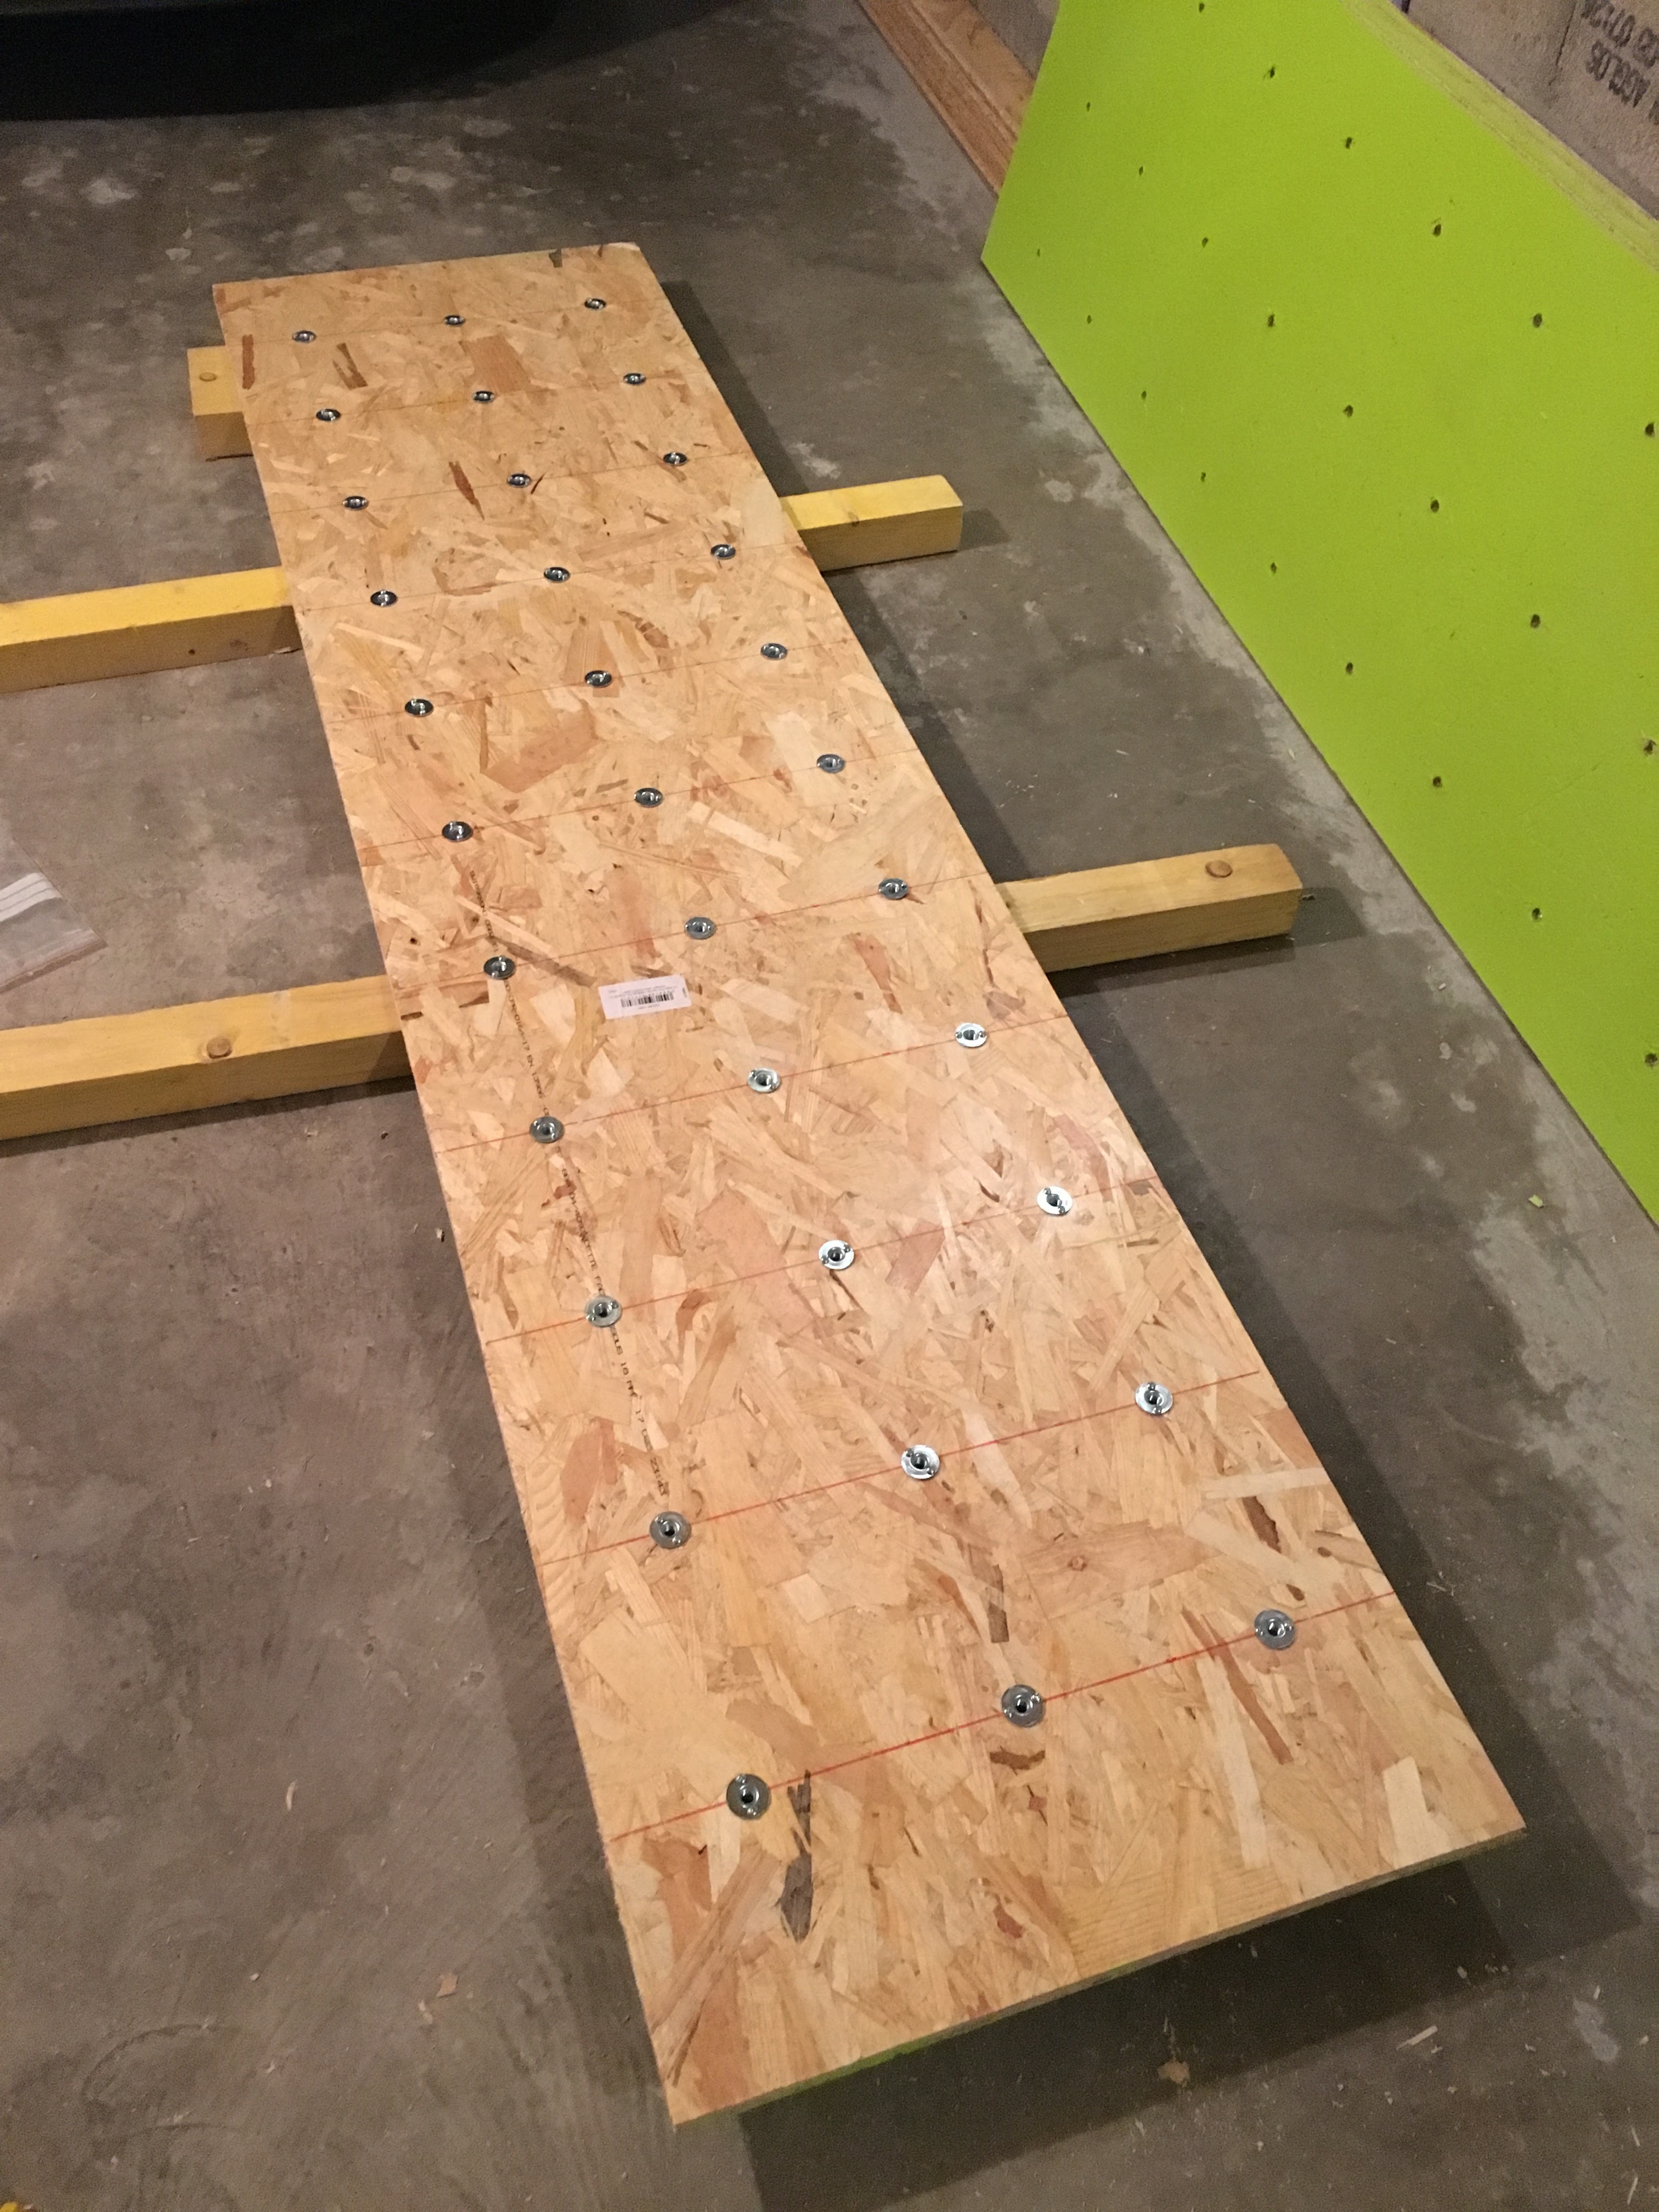
And we end by screwing the inserts that will host the holds at the end
(each insert uses 2 small screws to prevent rotation, that’s 400 screws
total…):
The kicker
Overall view of the kicker once fixed:

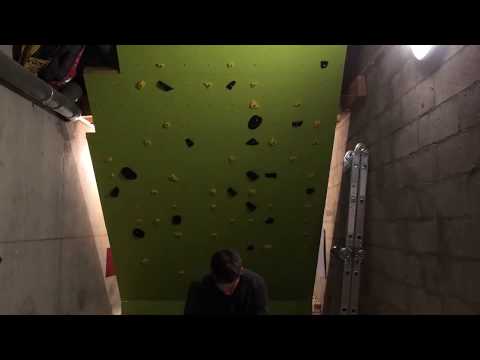
The hoist
Now we need a solution that will be used for lifting (and descent into
softness) of the Moonboard. I chose a rope hoist, fixed this way :

A video showing the operation of the hoist using the hoist rope:

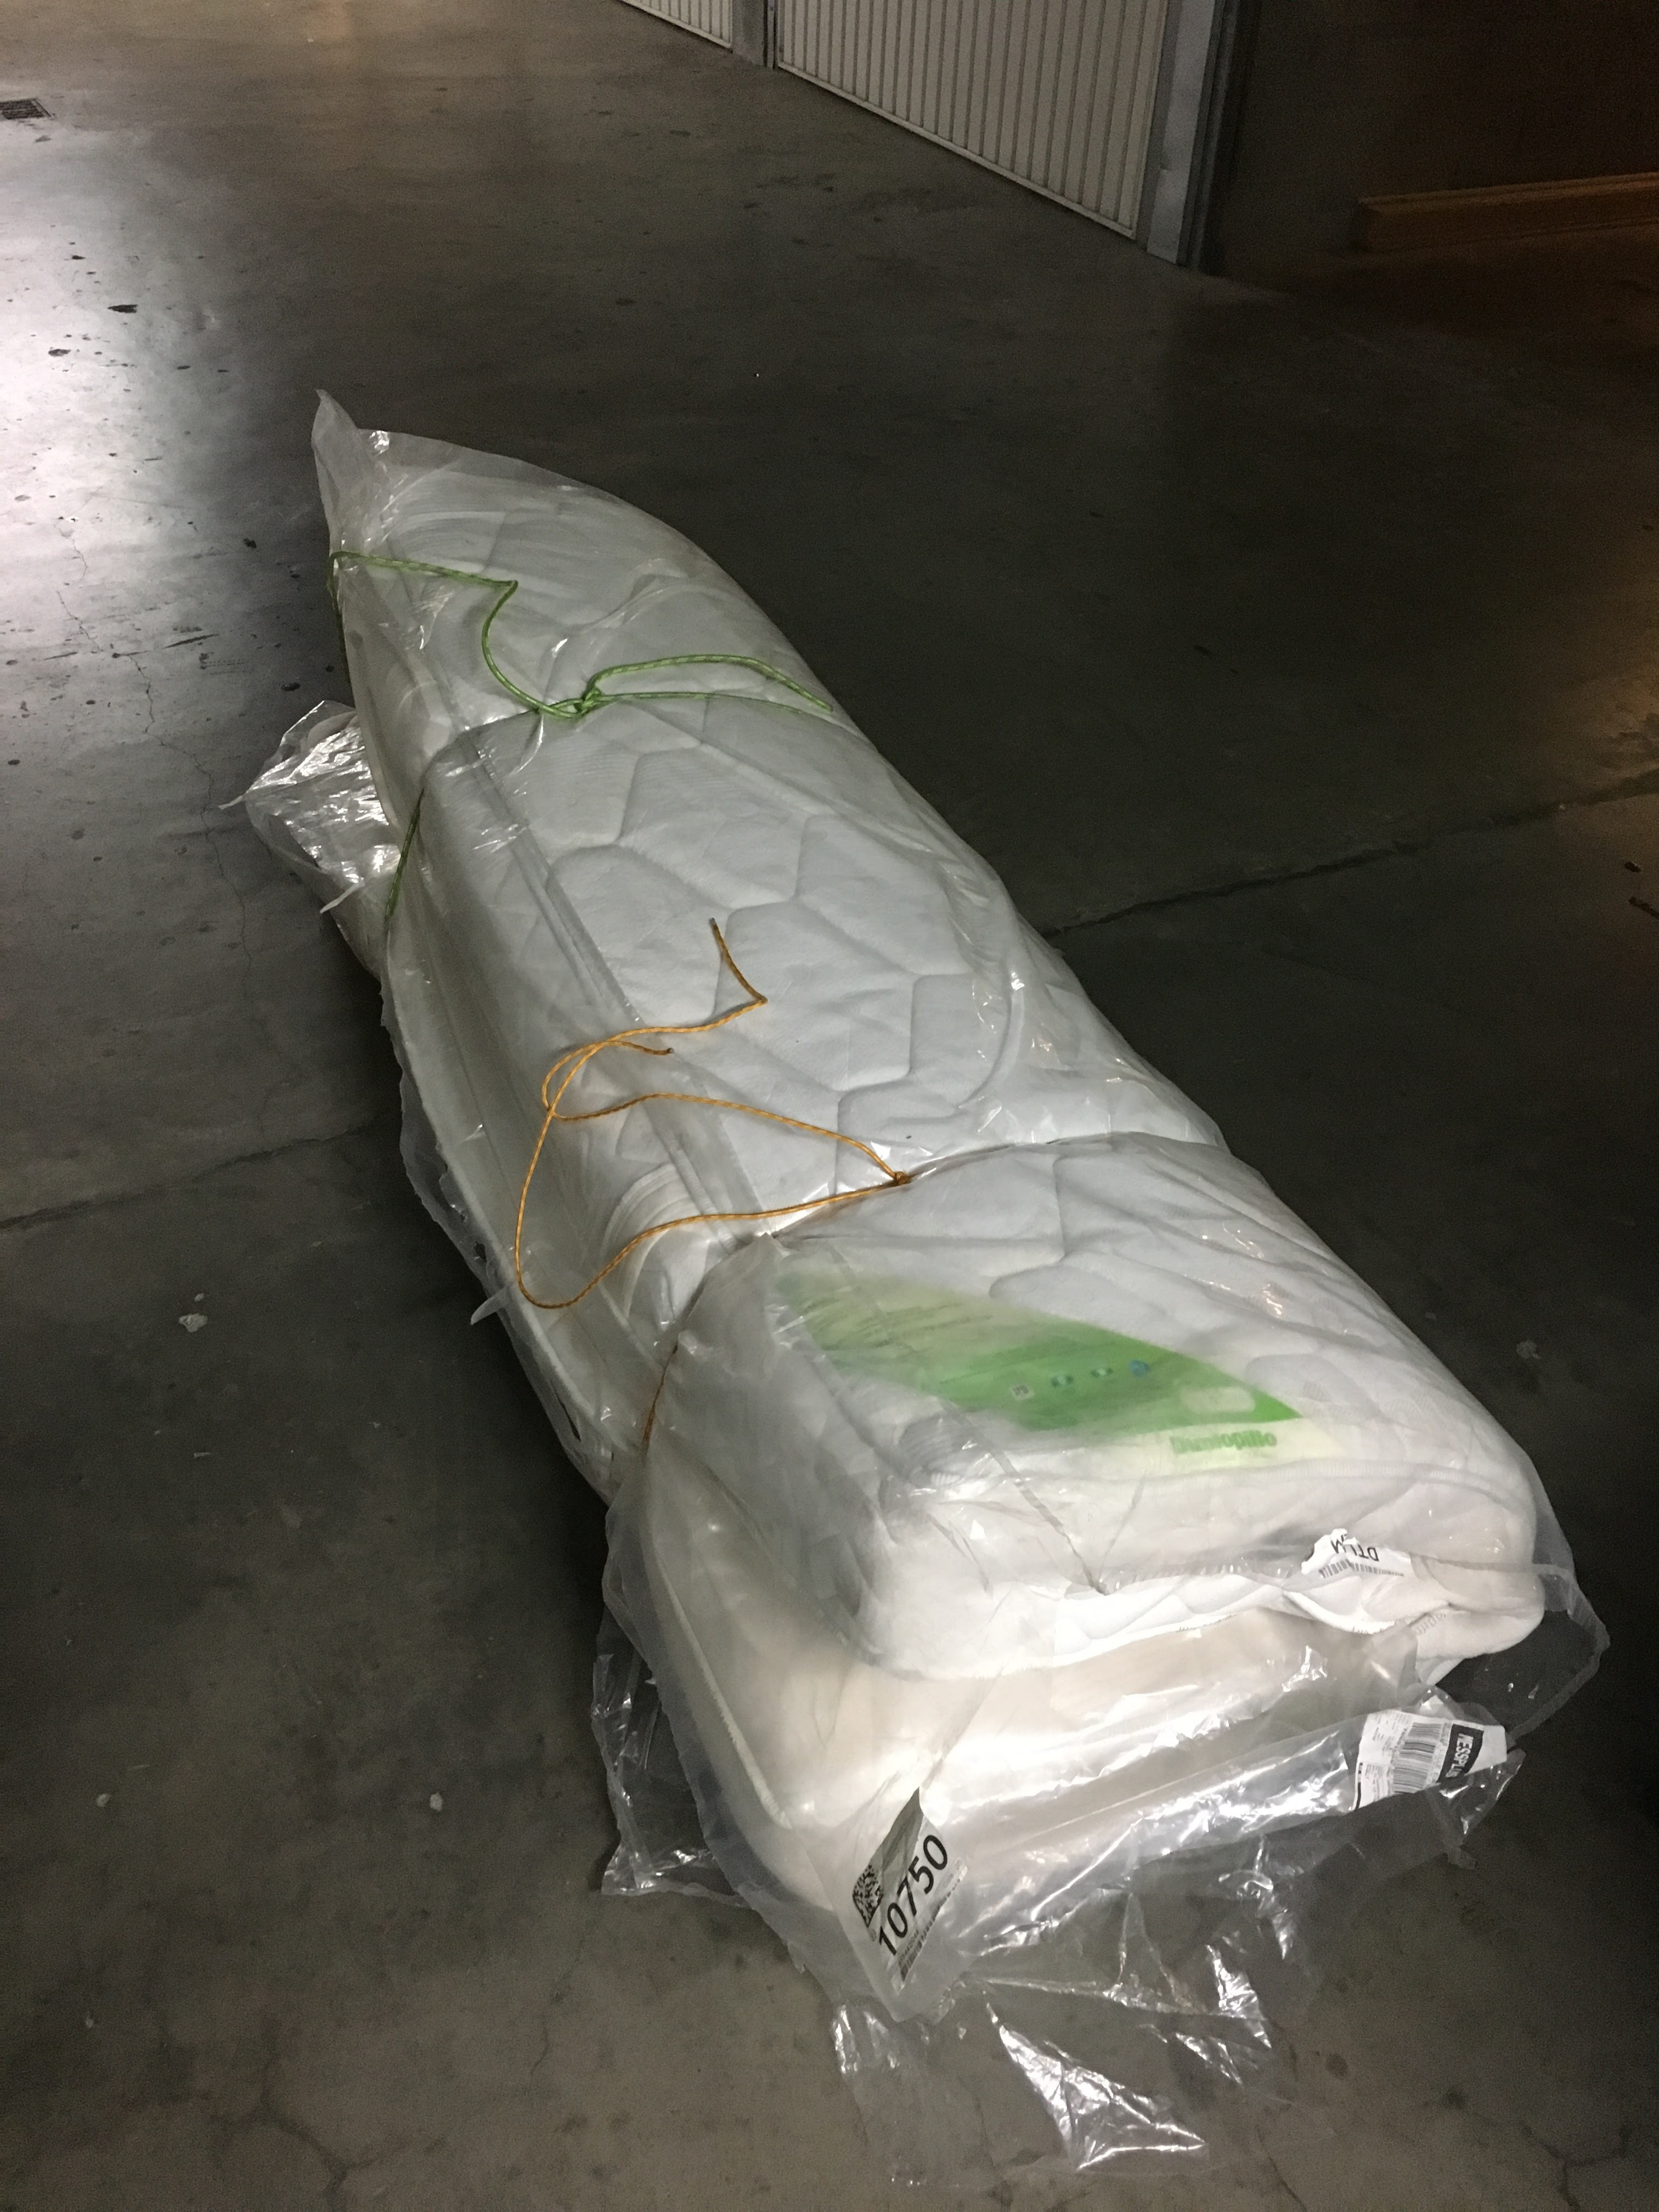
Oh a mattress
First used mattress bought on Leboncoin (I promise there is no body inside):
The return of the hoist
After an intense evening of thinking, I decided to upgrade my hoist to an electric
hoist (model Einhell BT-EH 250). It can lift 125kg live and 250kg
in hauling. So I have to provide pieces of beams to fix perpendicular to the beams of the
mezzanine and which will serve as a support for the bar that will hold the hoist:
A demonstration video of the hoist in operation:

Well, it’s starting to take shape:
Boards laying
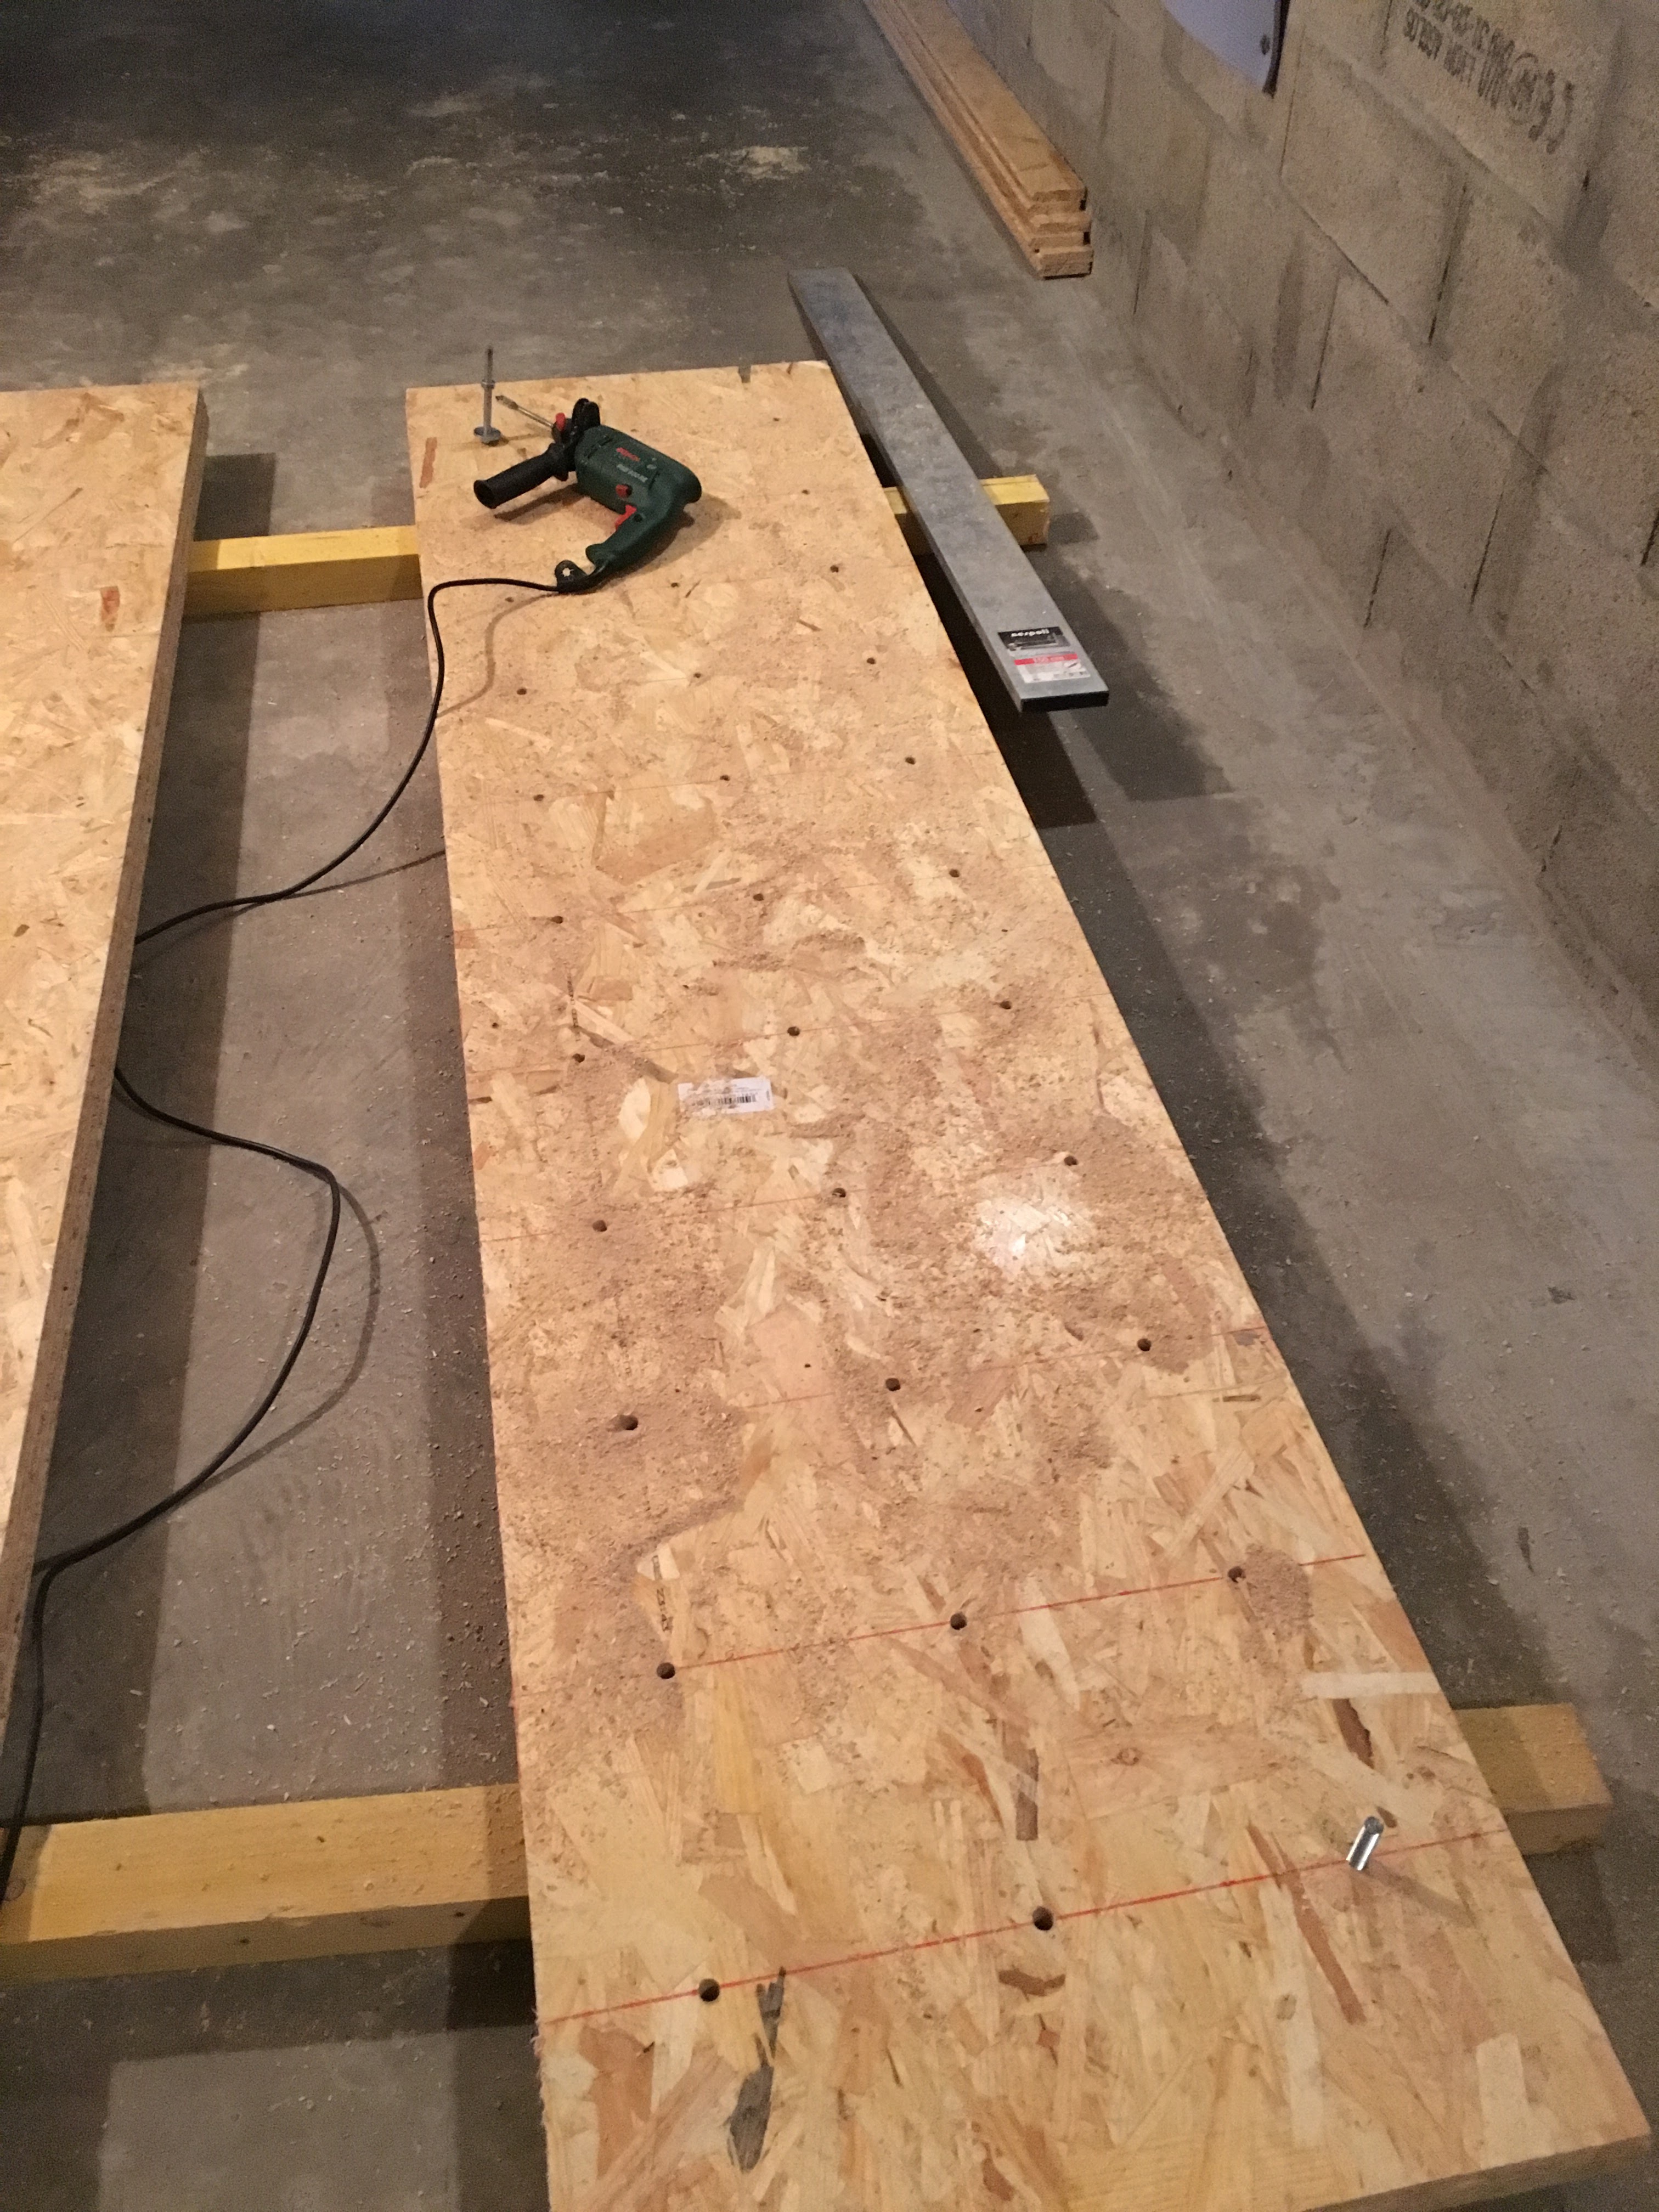
Next step, fixing the OSB boards to the frame. In order to make the fixation alone, I used 2 clamps
to fix the boards before screwing them.
First board:
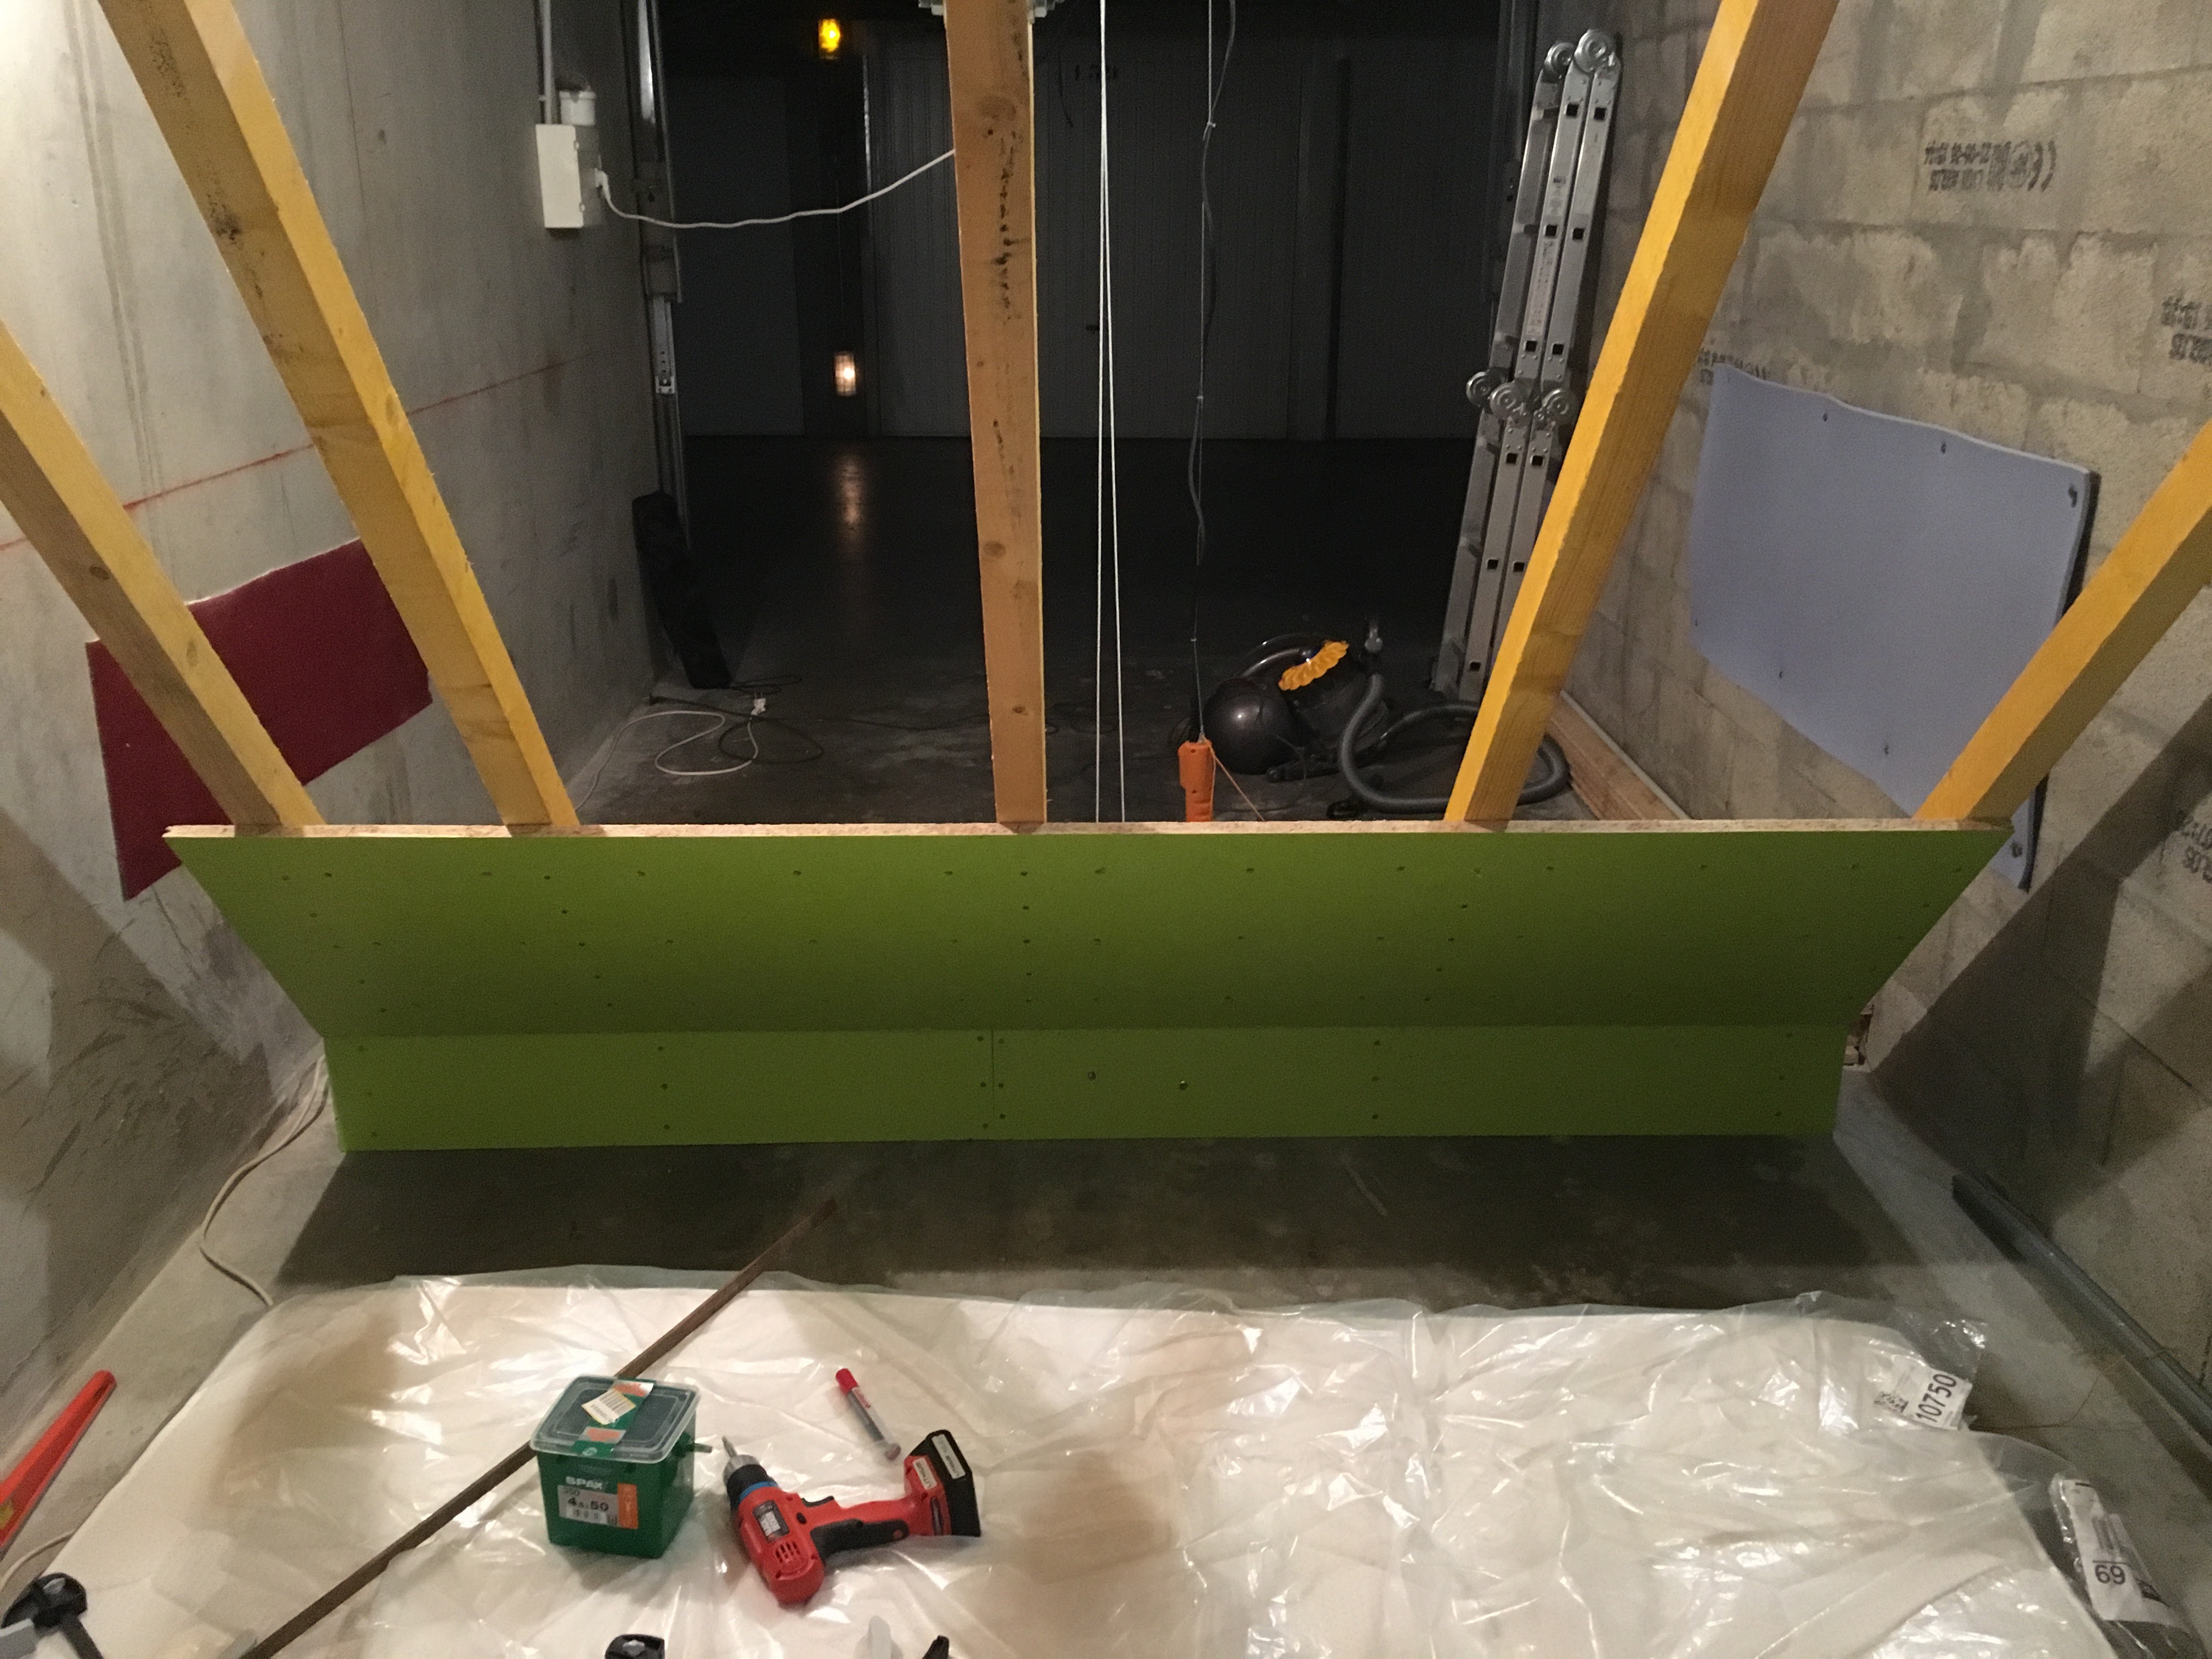
Second board:
Third board:

Fourth board:
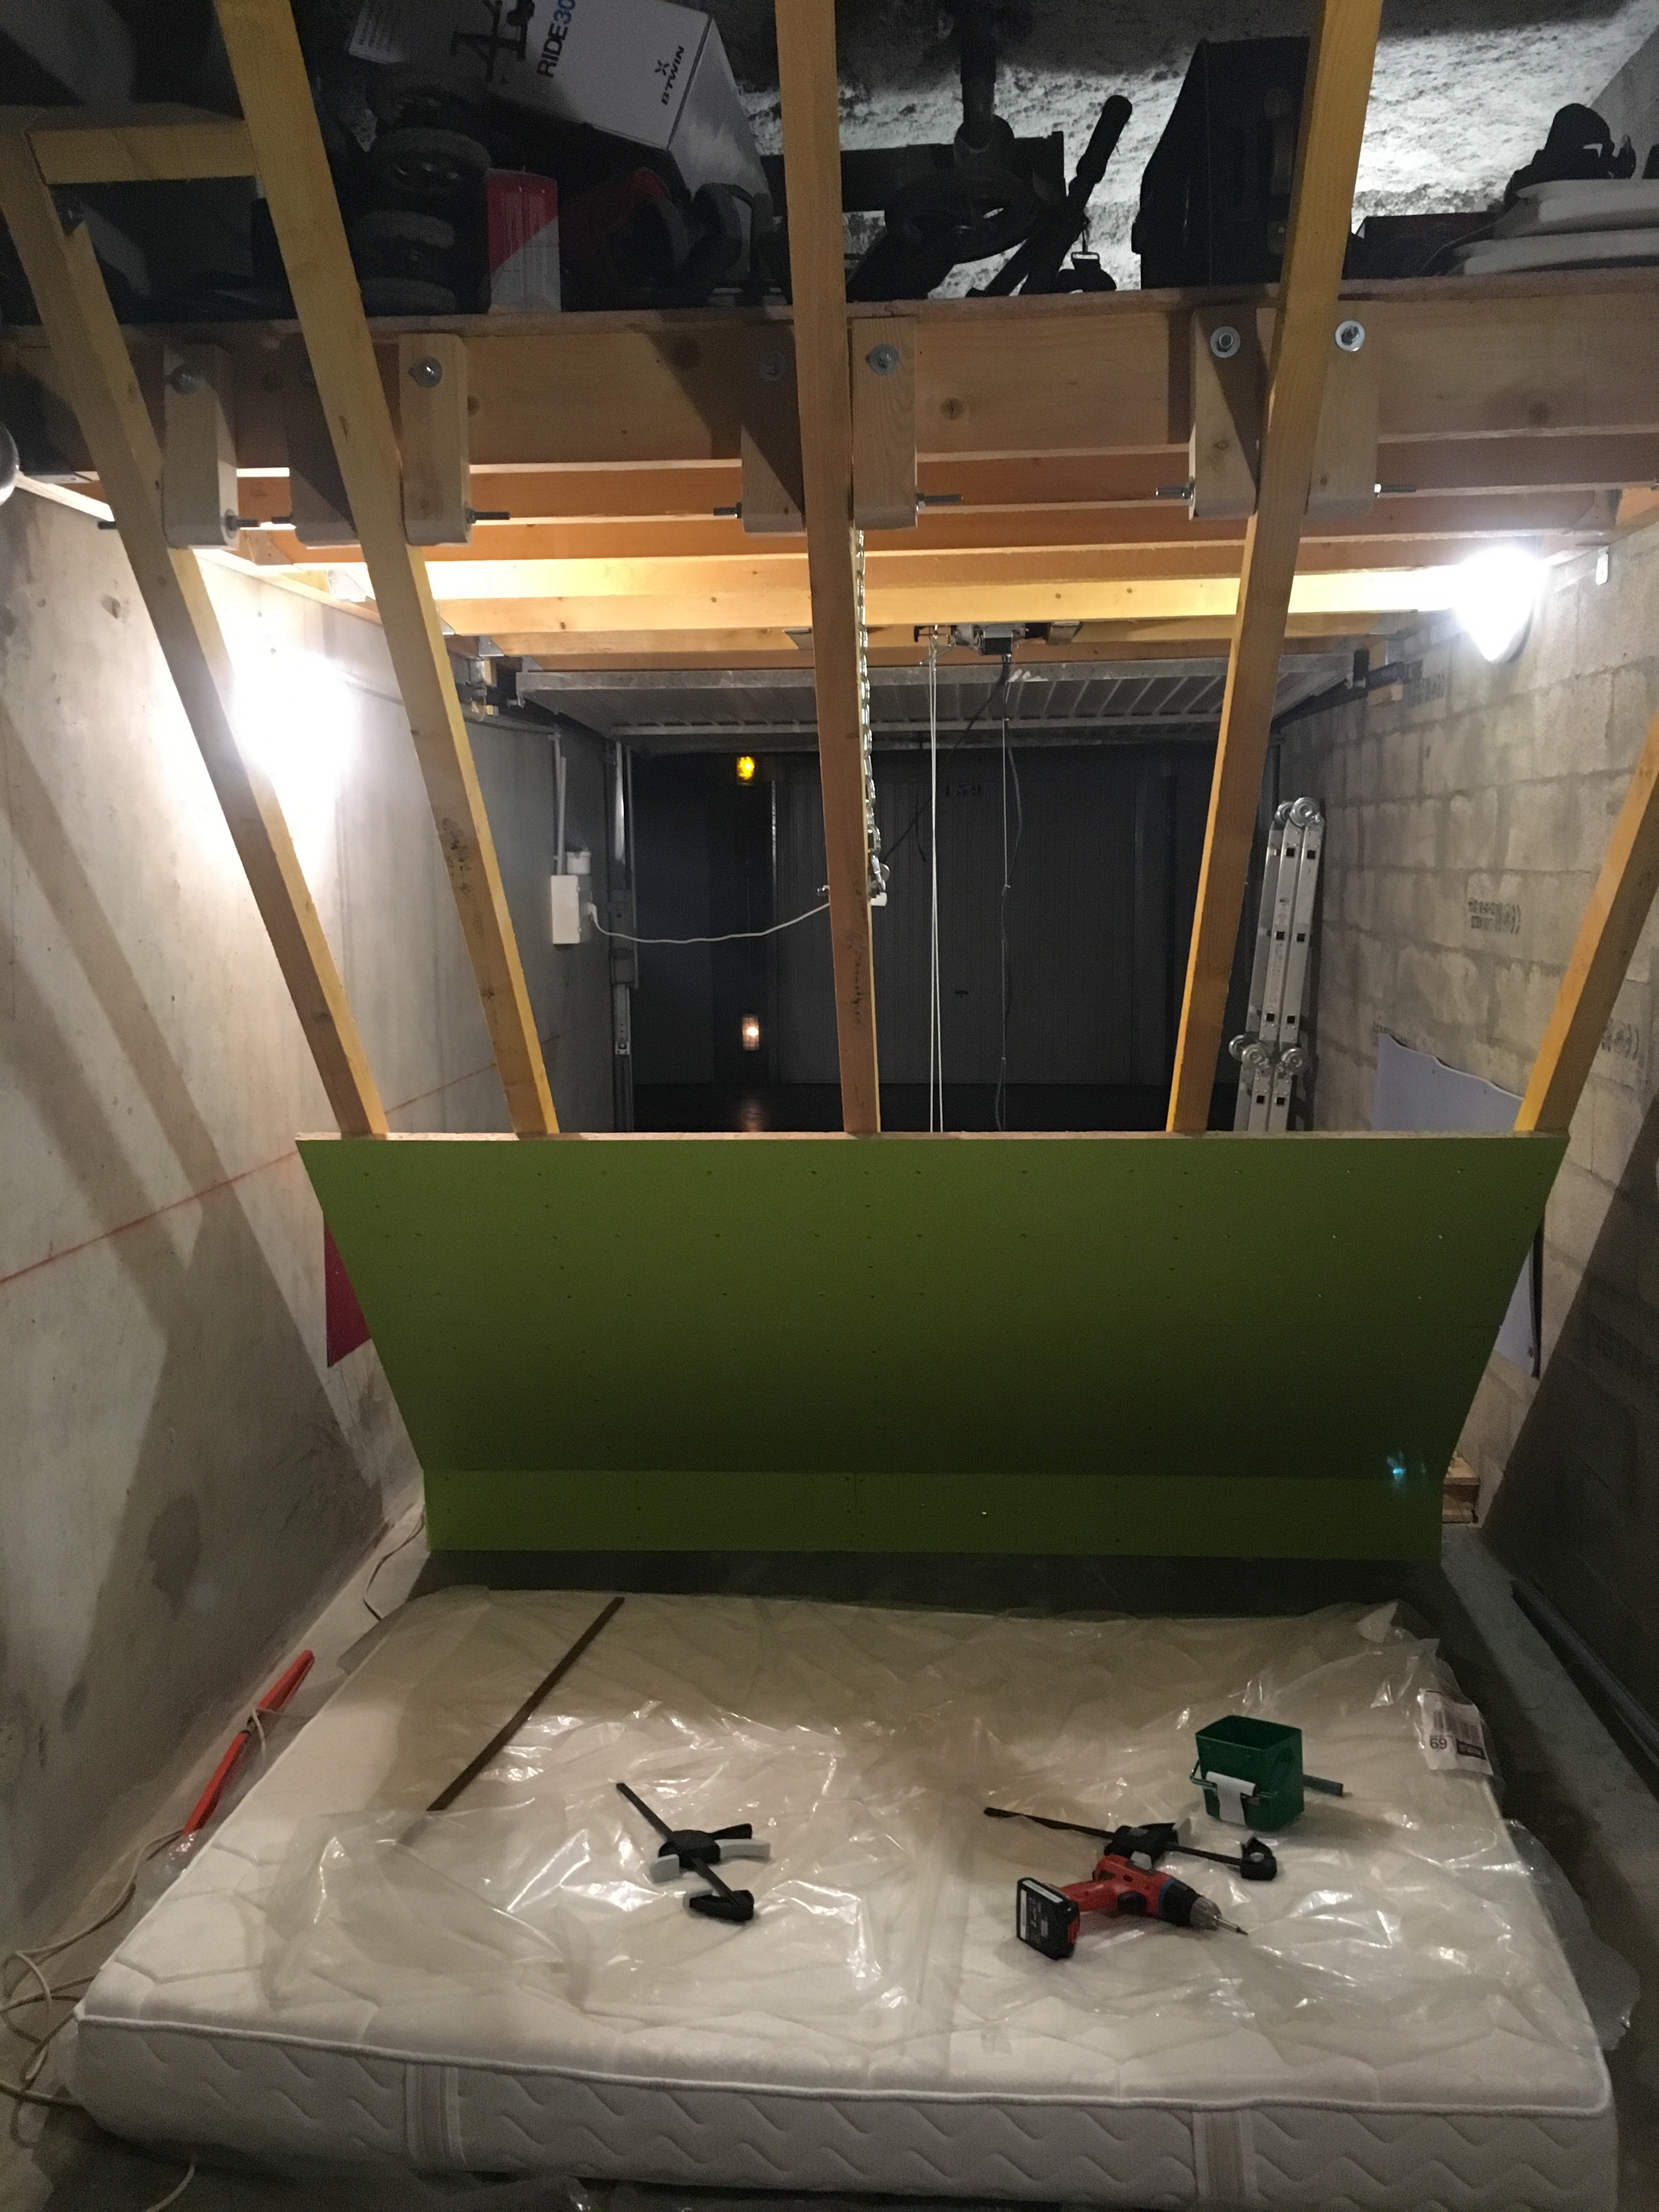
Intermediate test of electric hoist with 4 boards installed on 6 at total:

Here we see the detail of all the joints that link the chassis to the mezzanine:
Fifth board:
A little acrobatic placement of the clamps for the last board (reminder: the
ceiling is 3m high and one board weighs about 15kg):
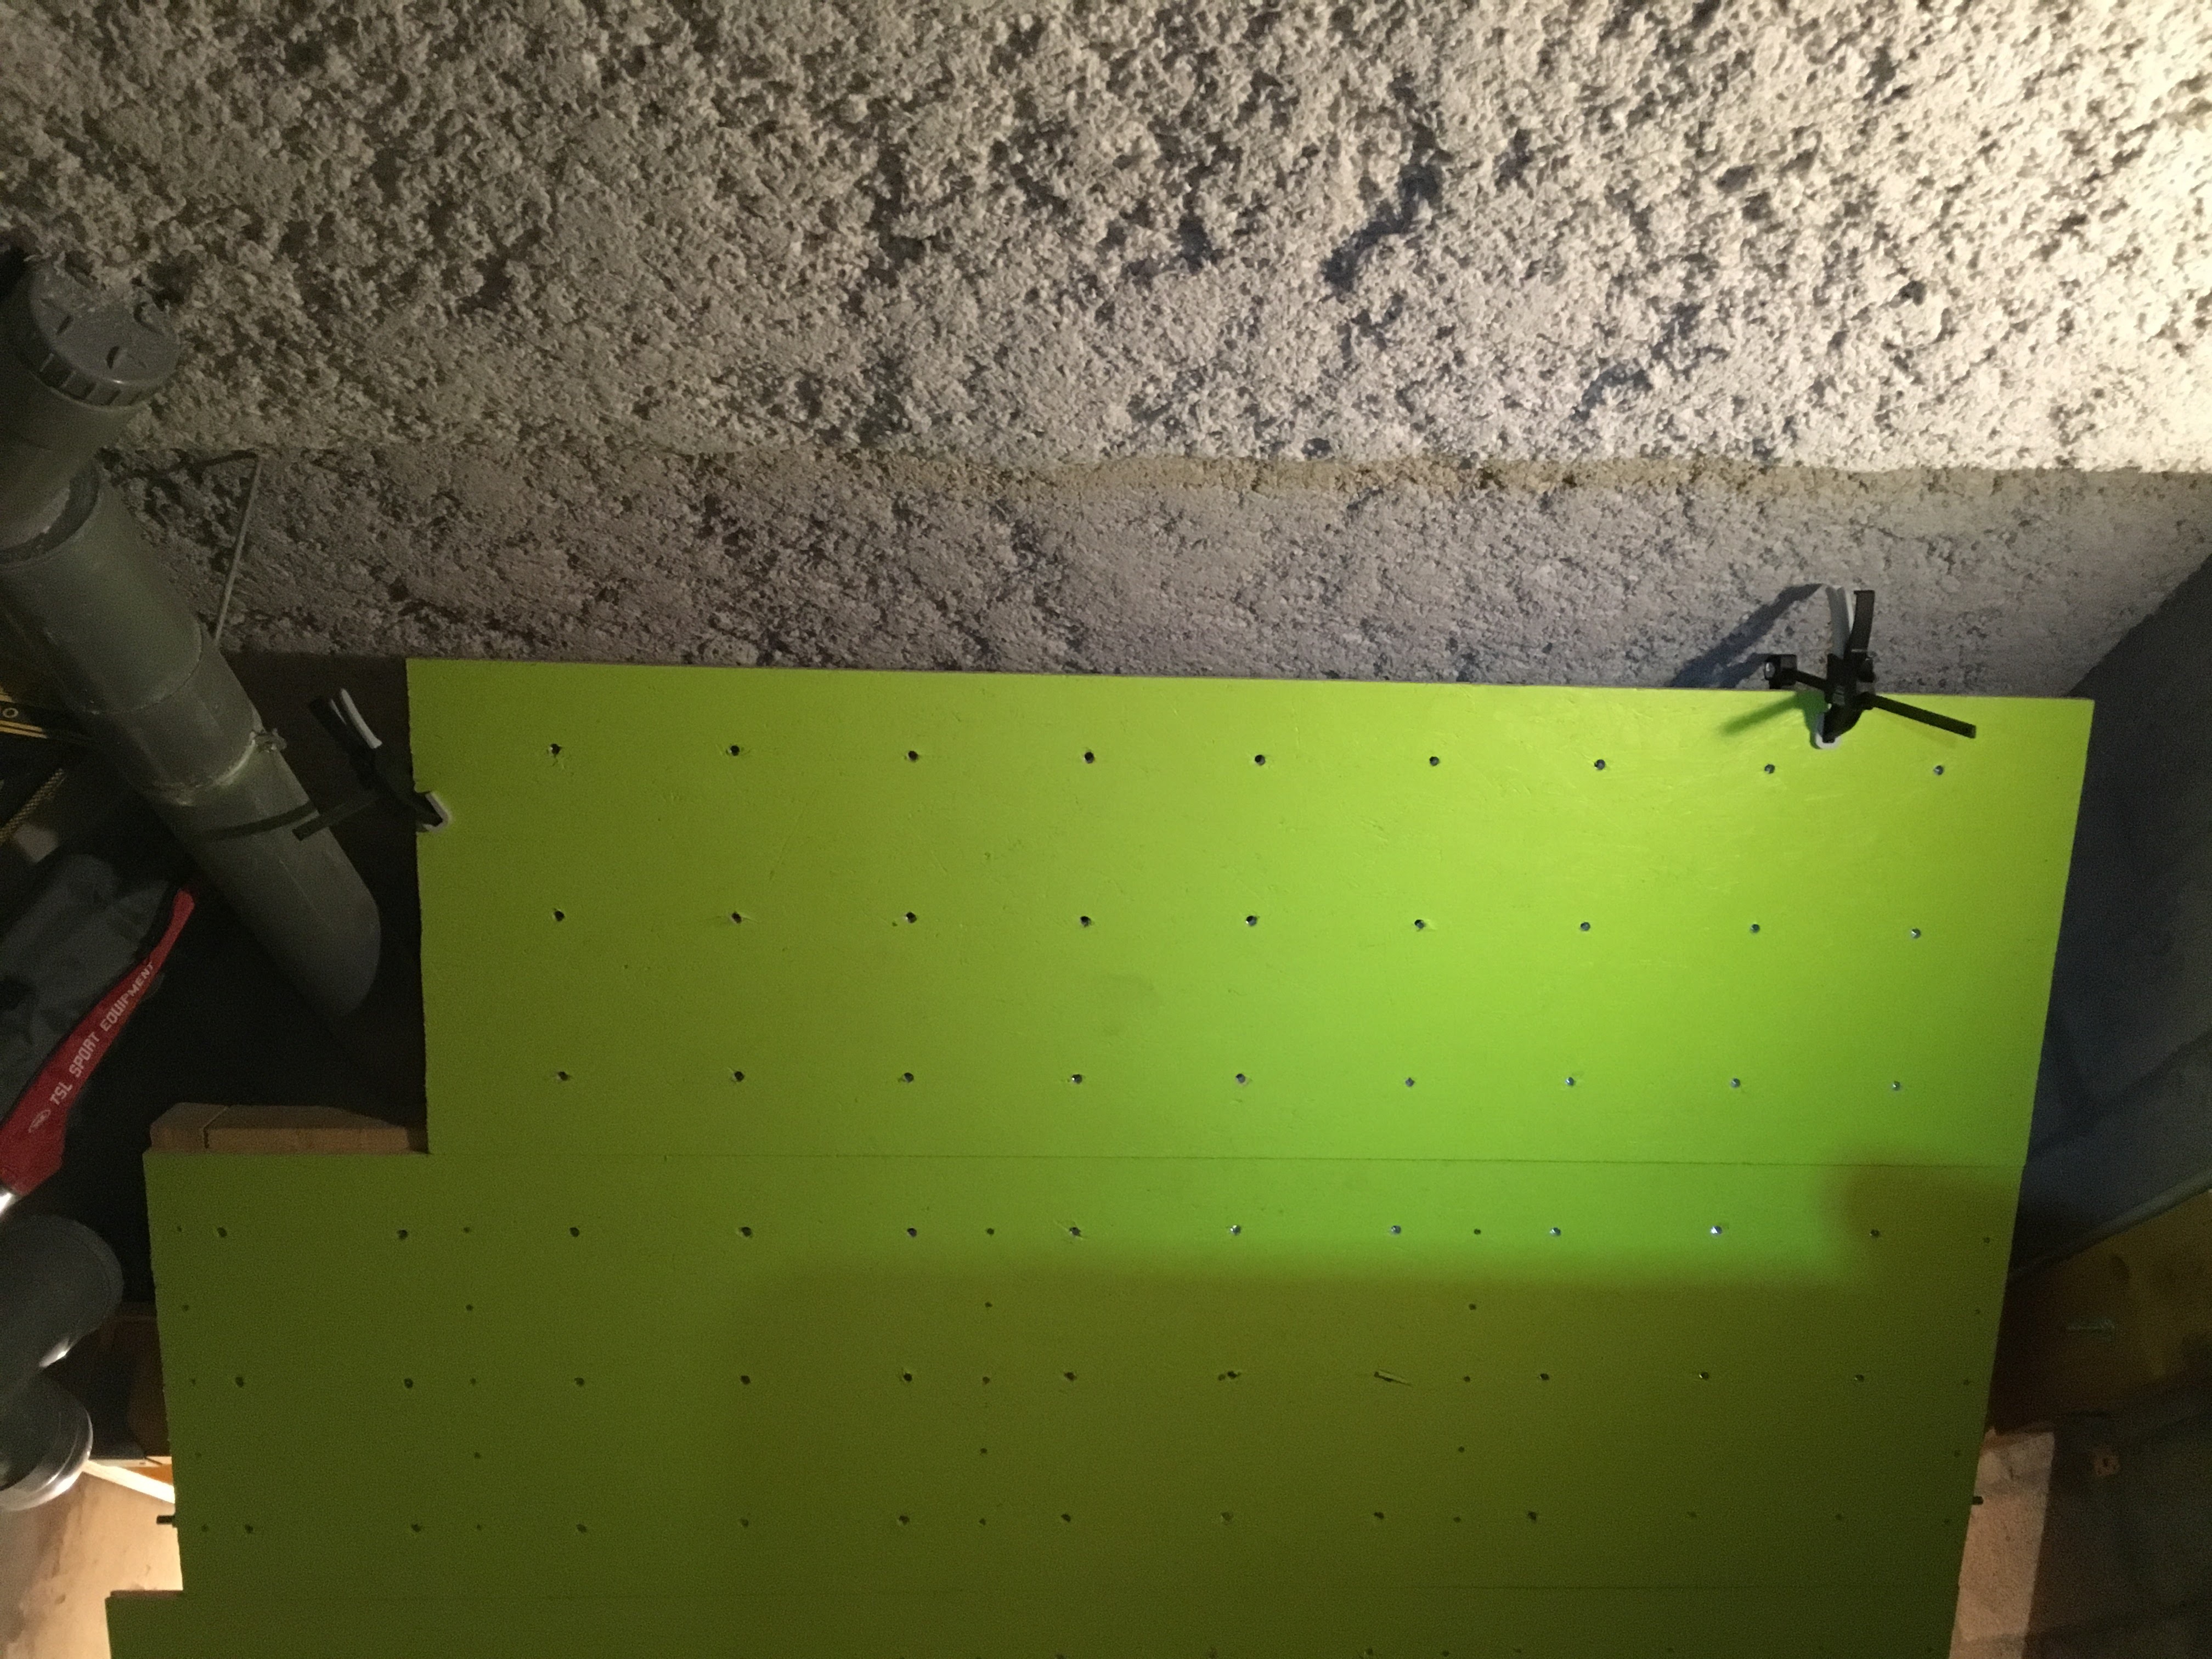
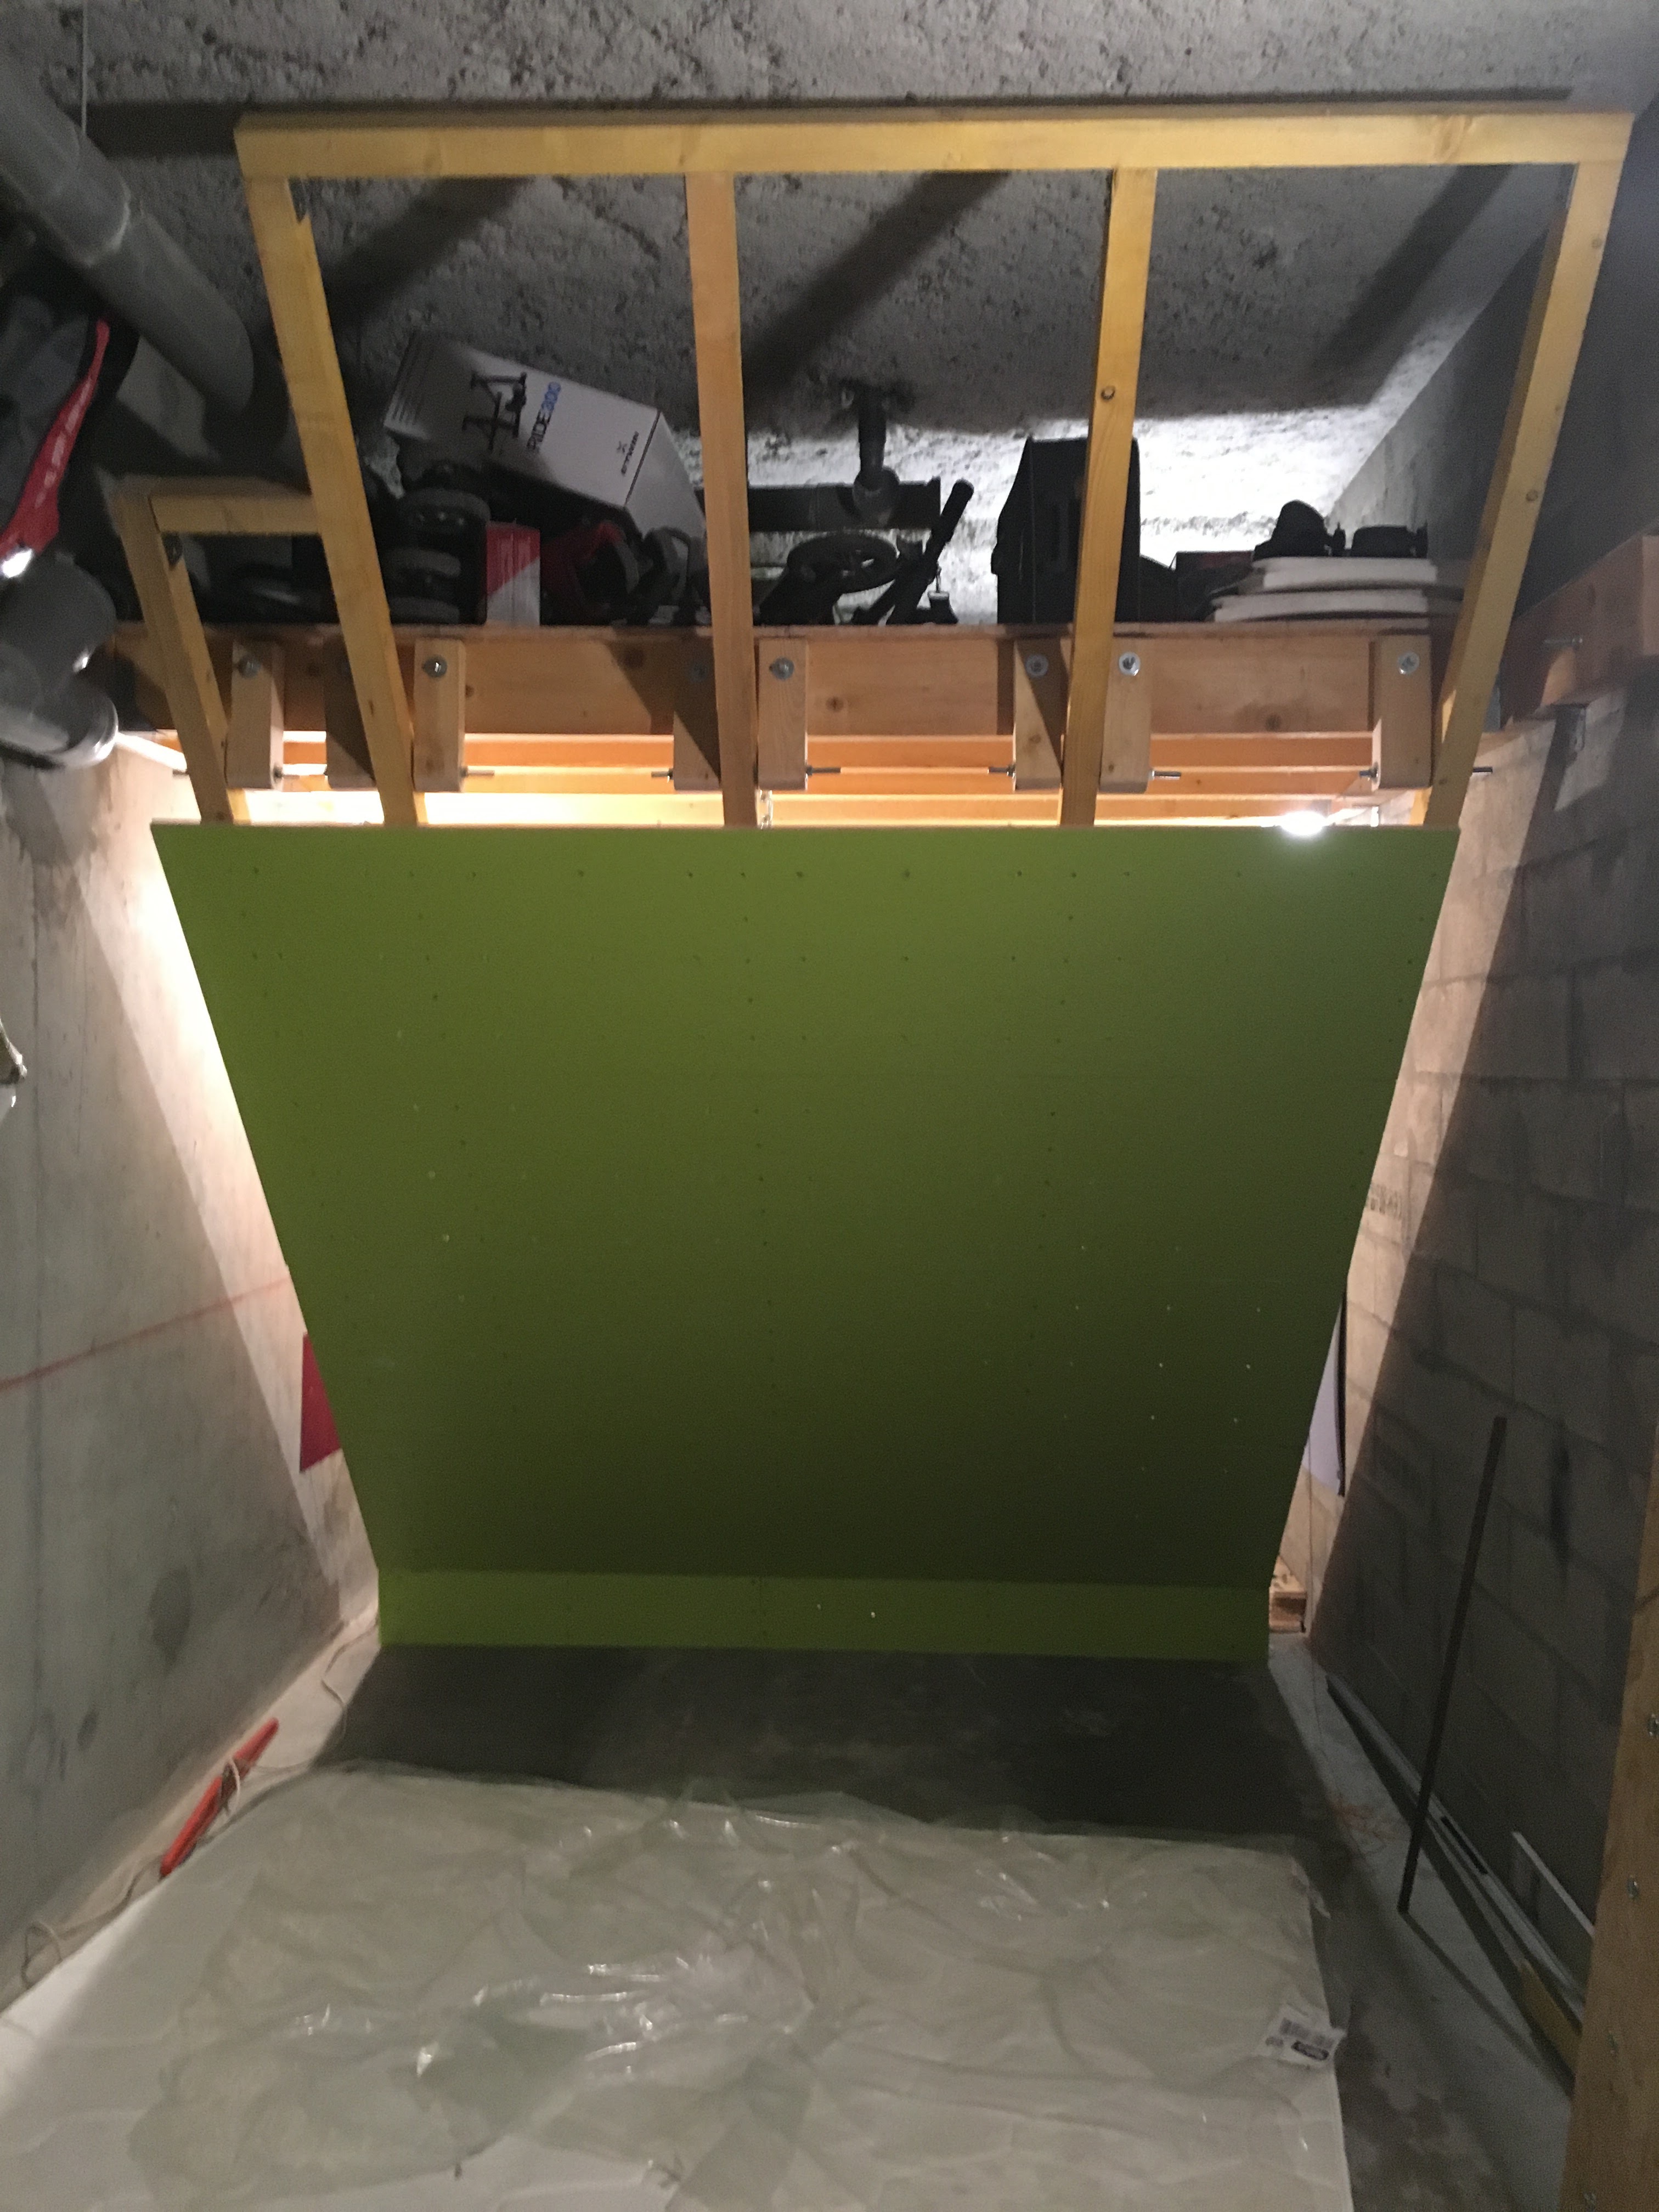
Sixth board:
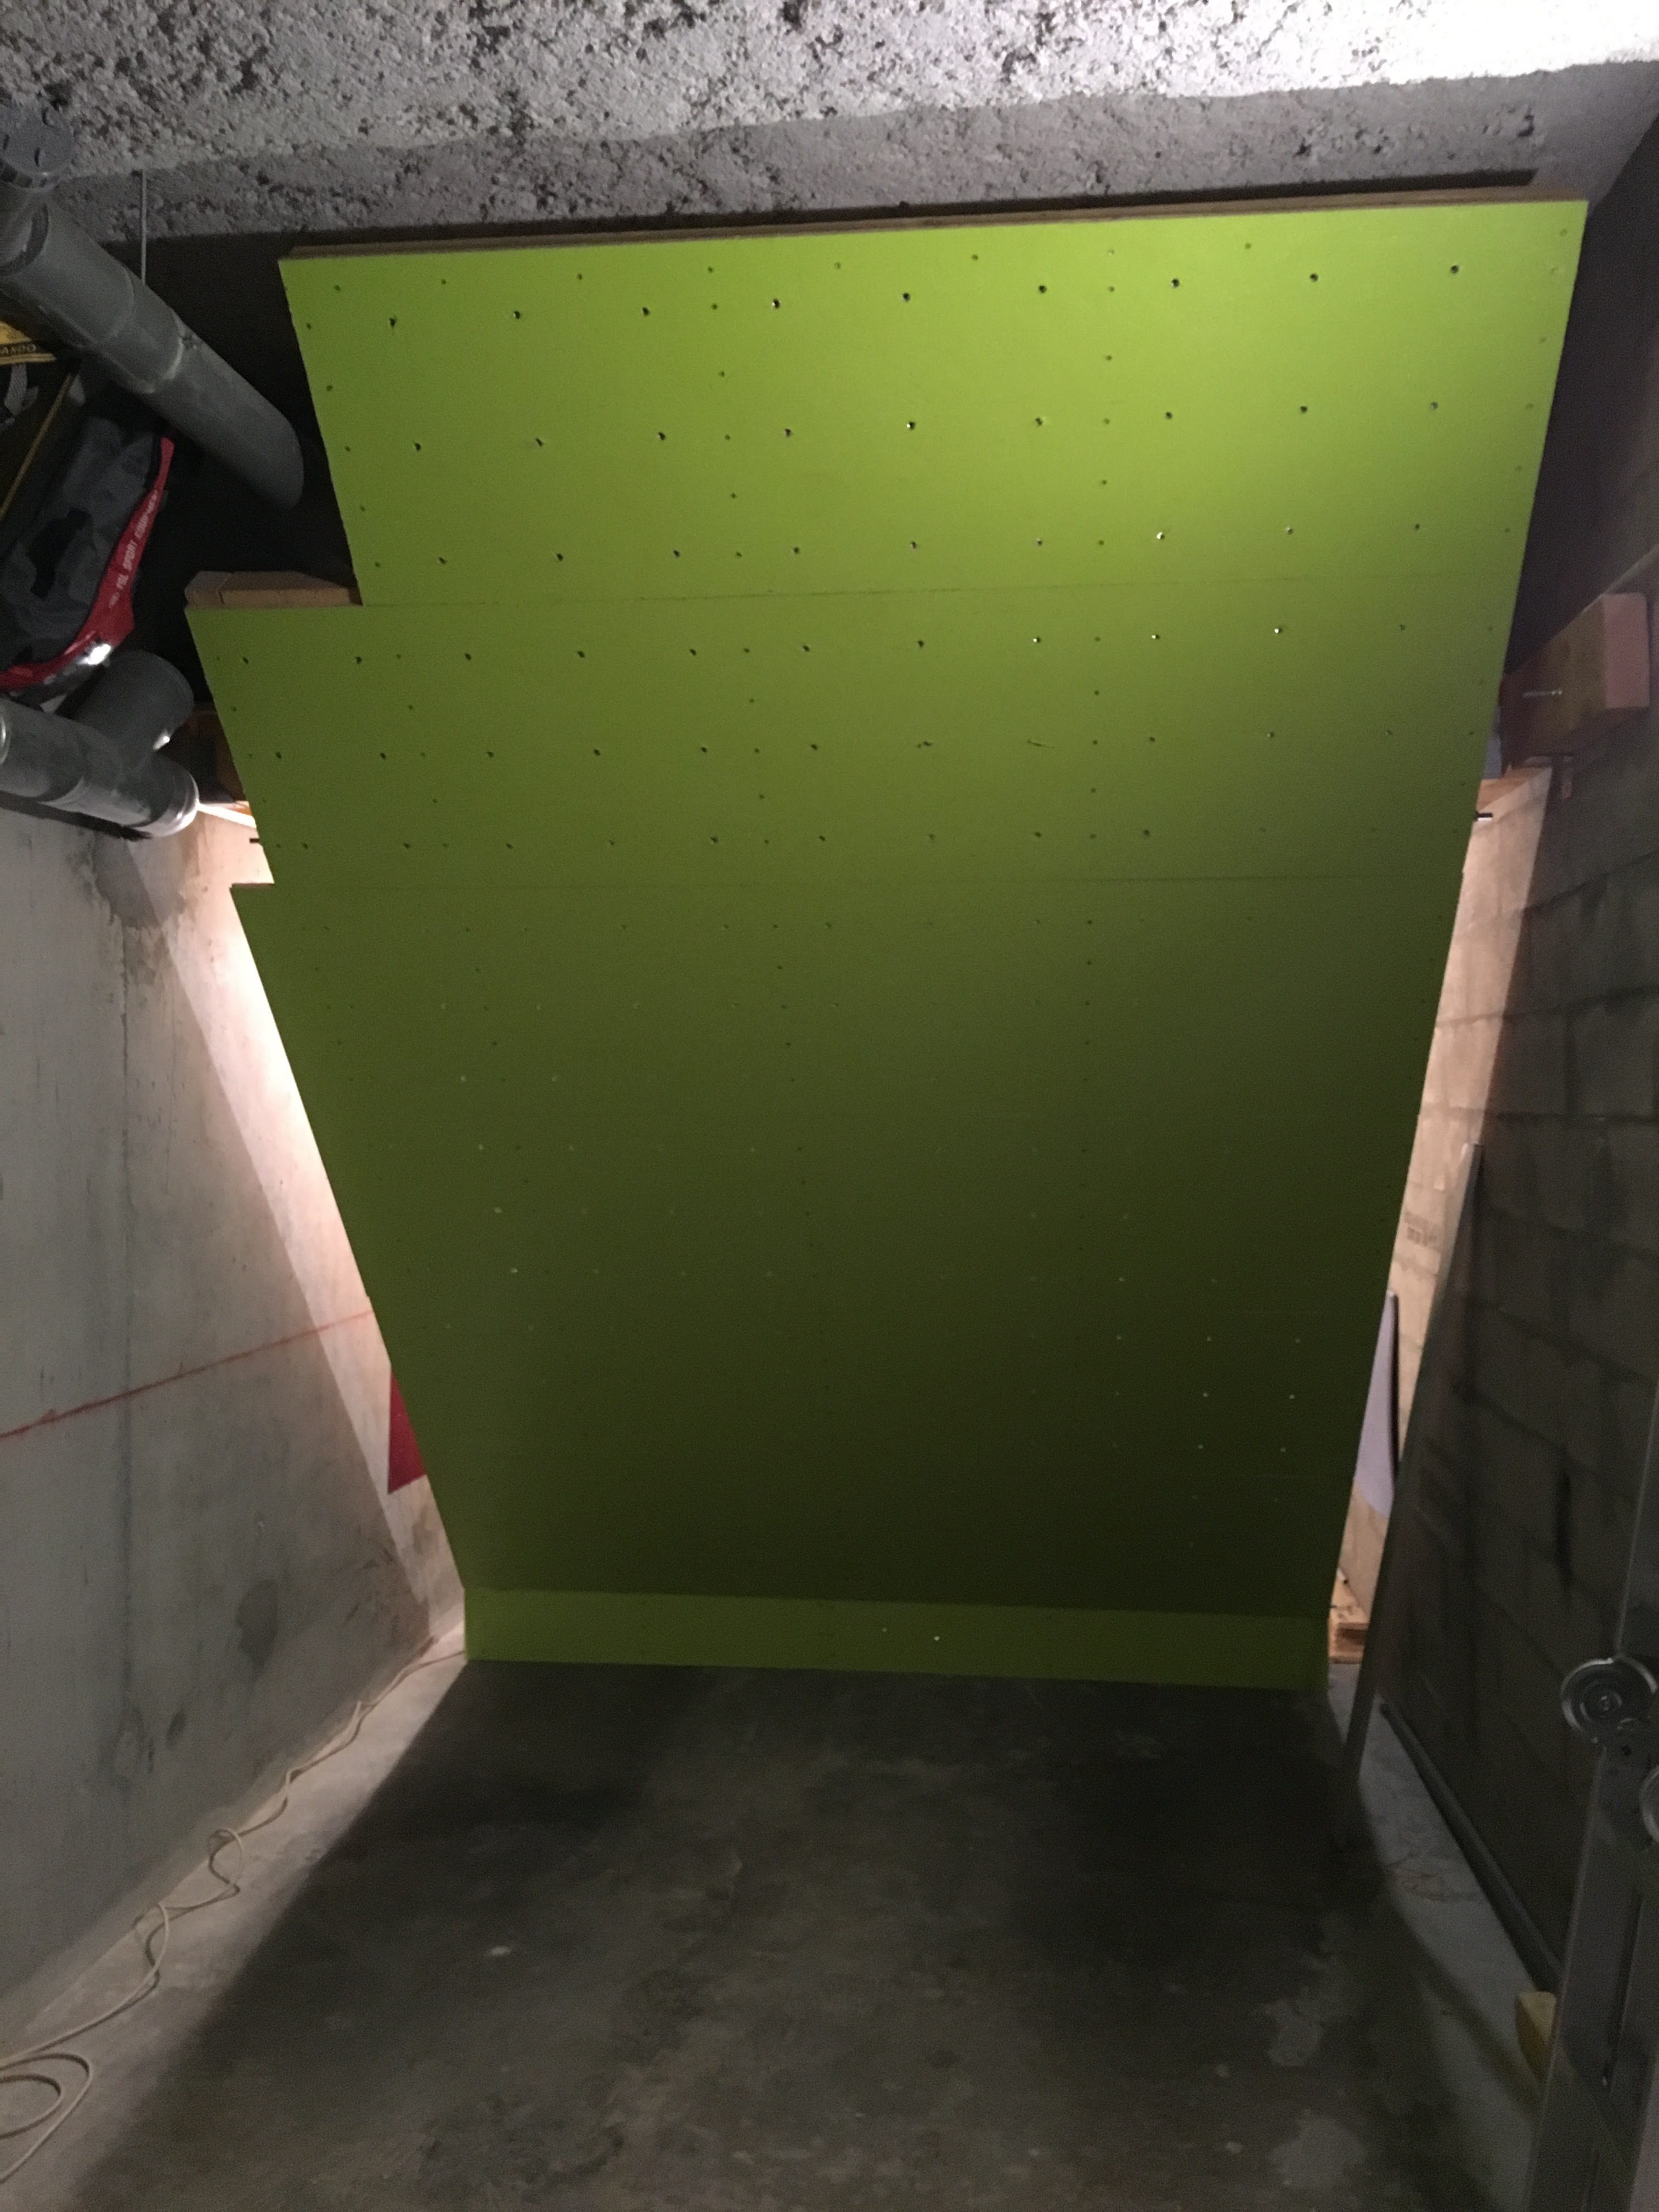
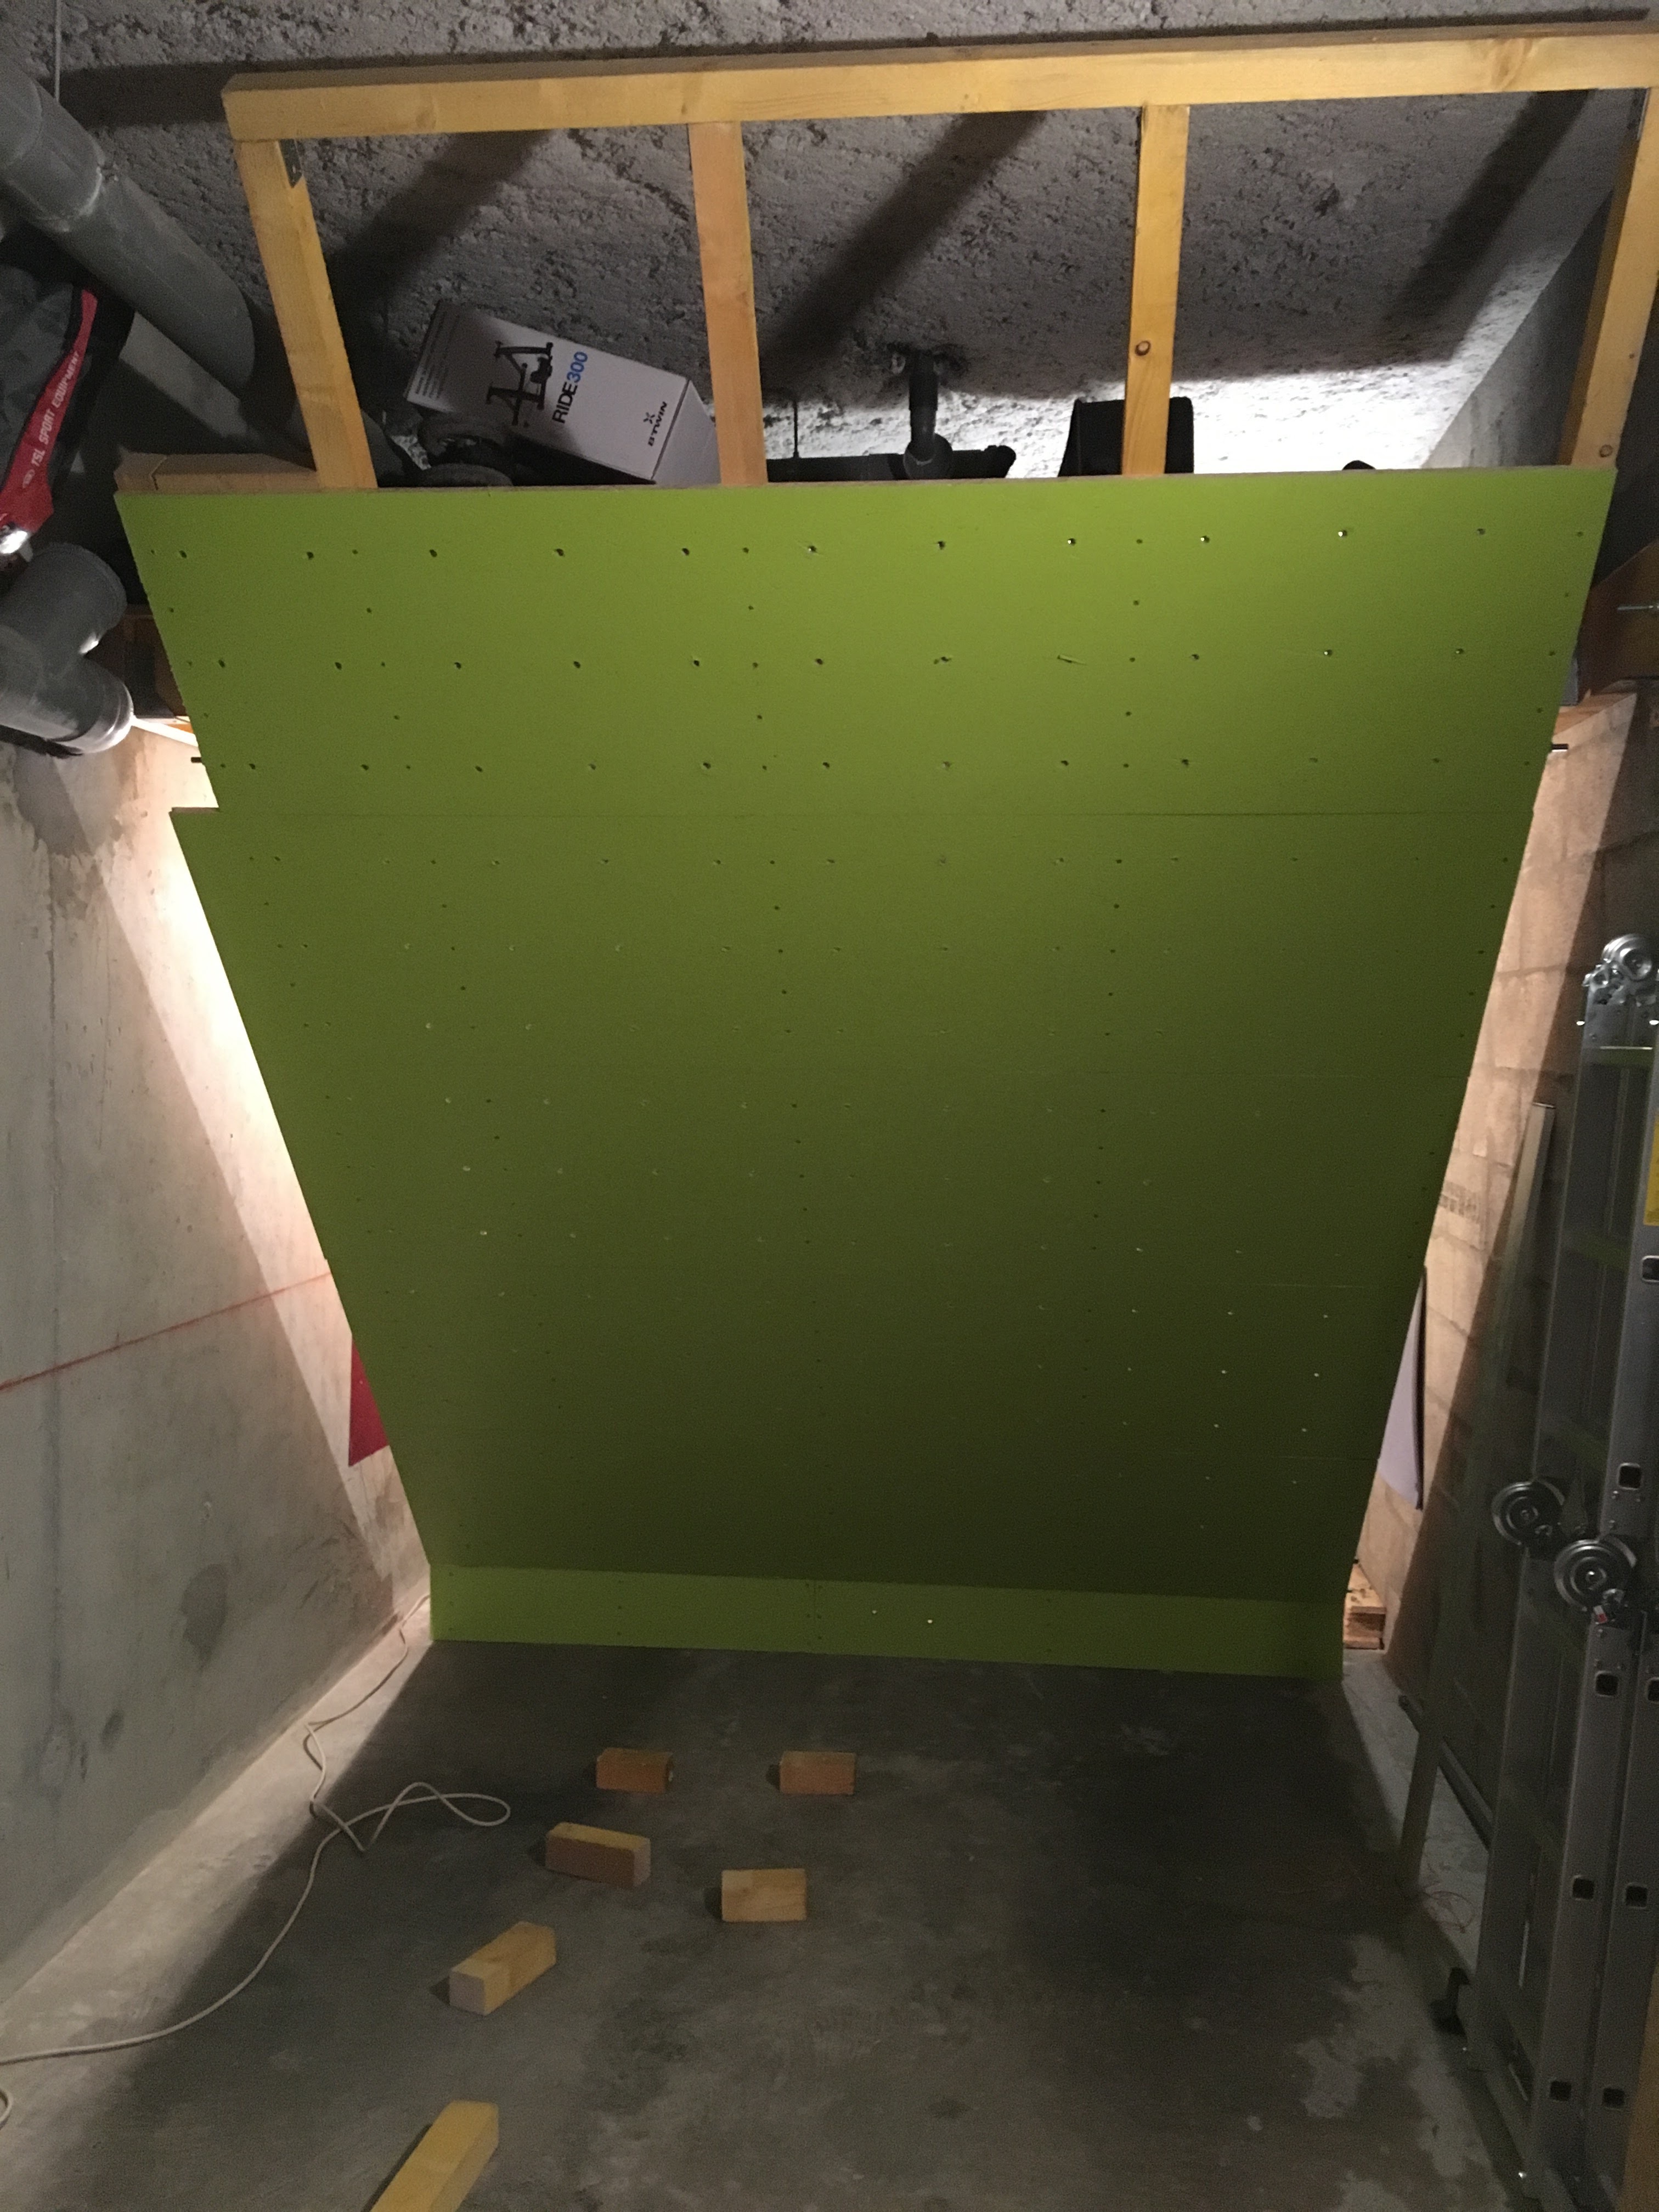
Chassis equipped with boards, in raised position:
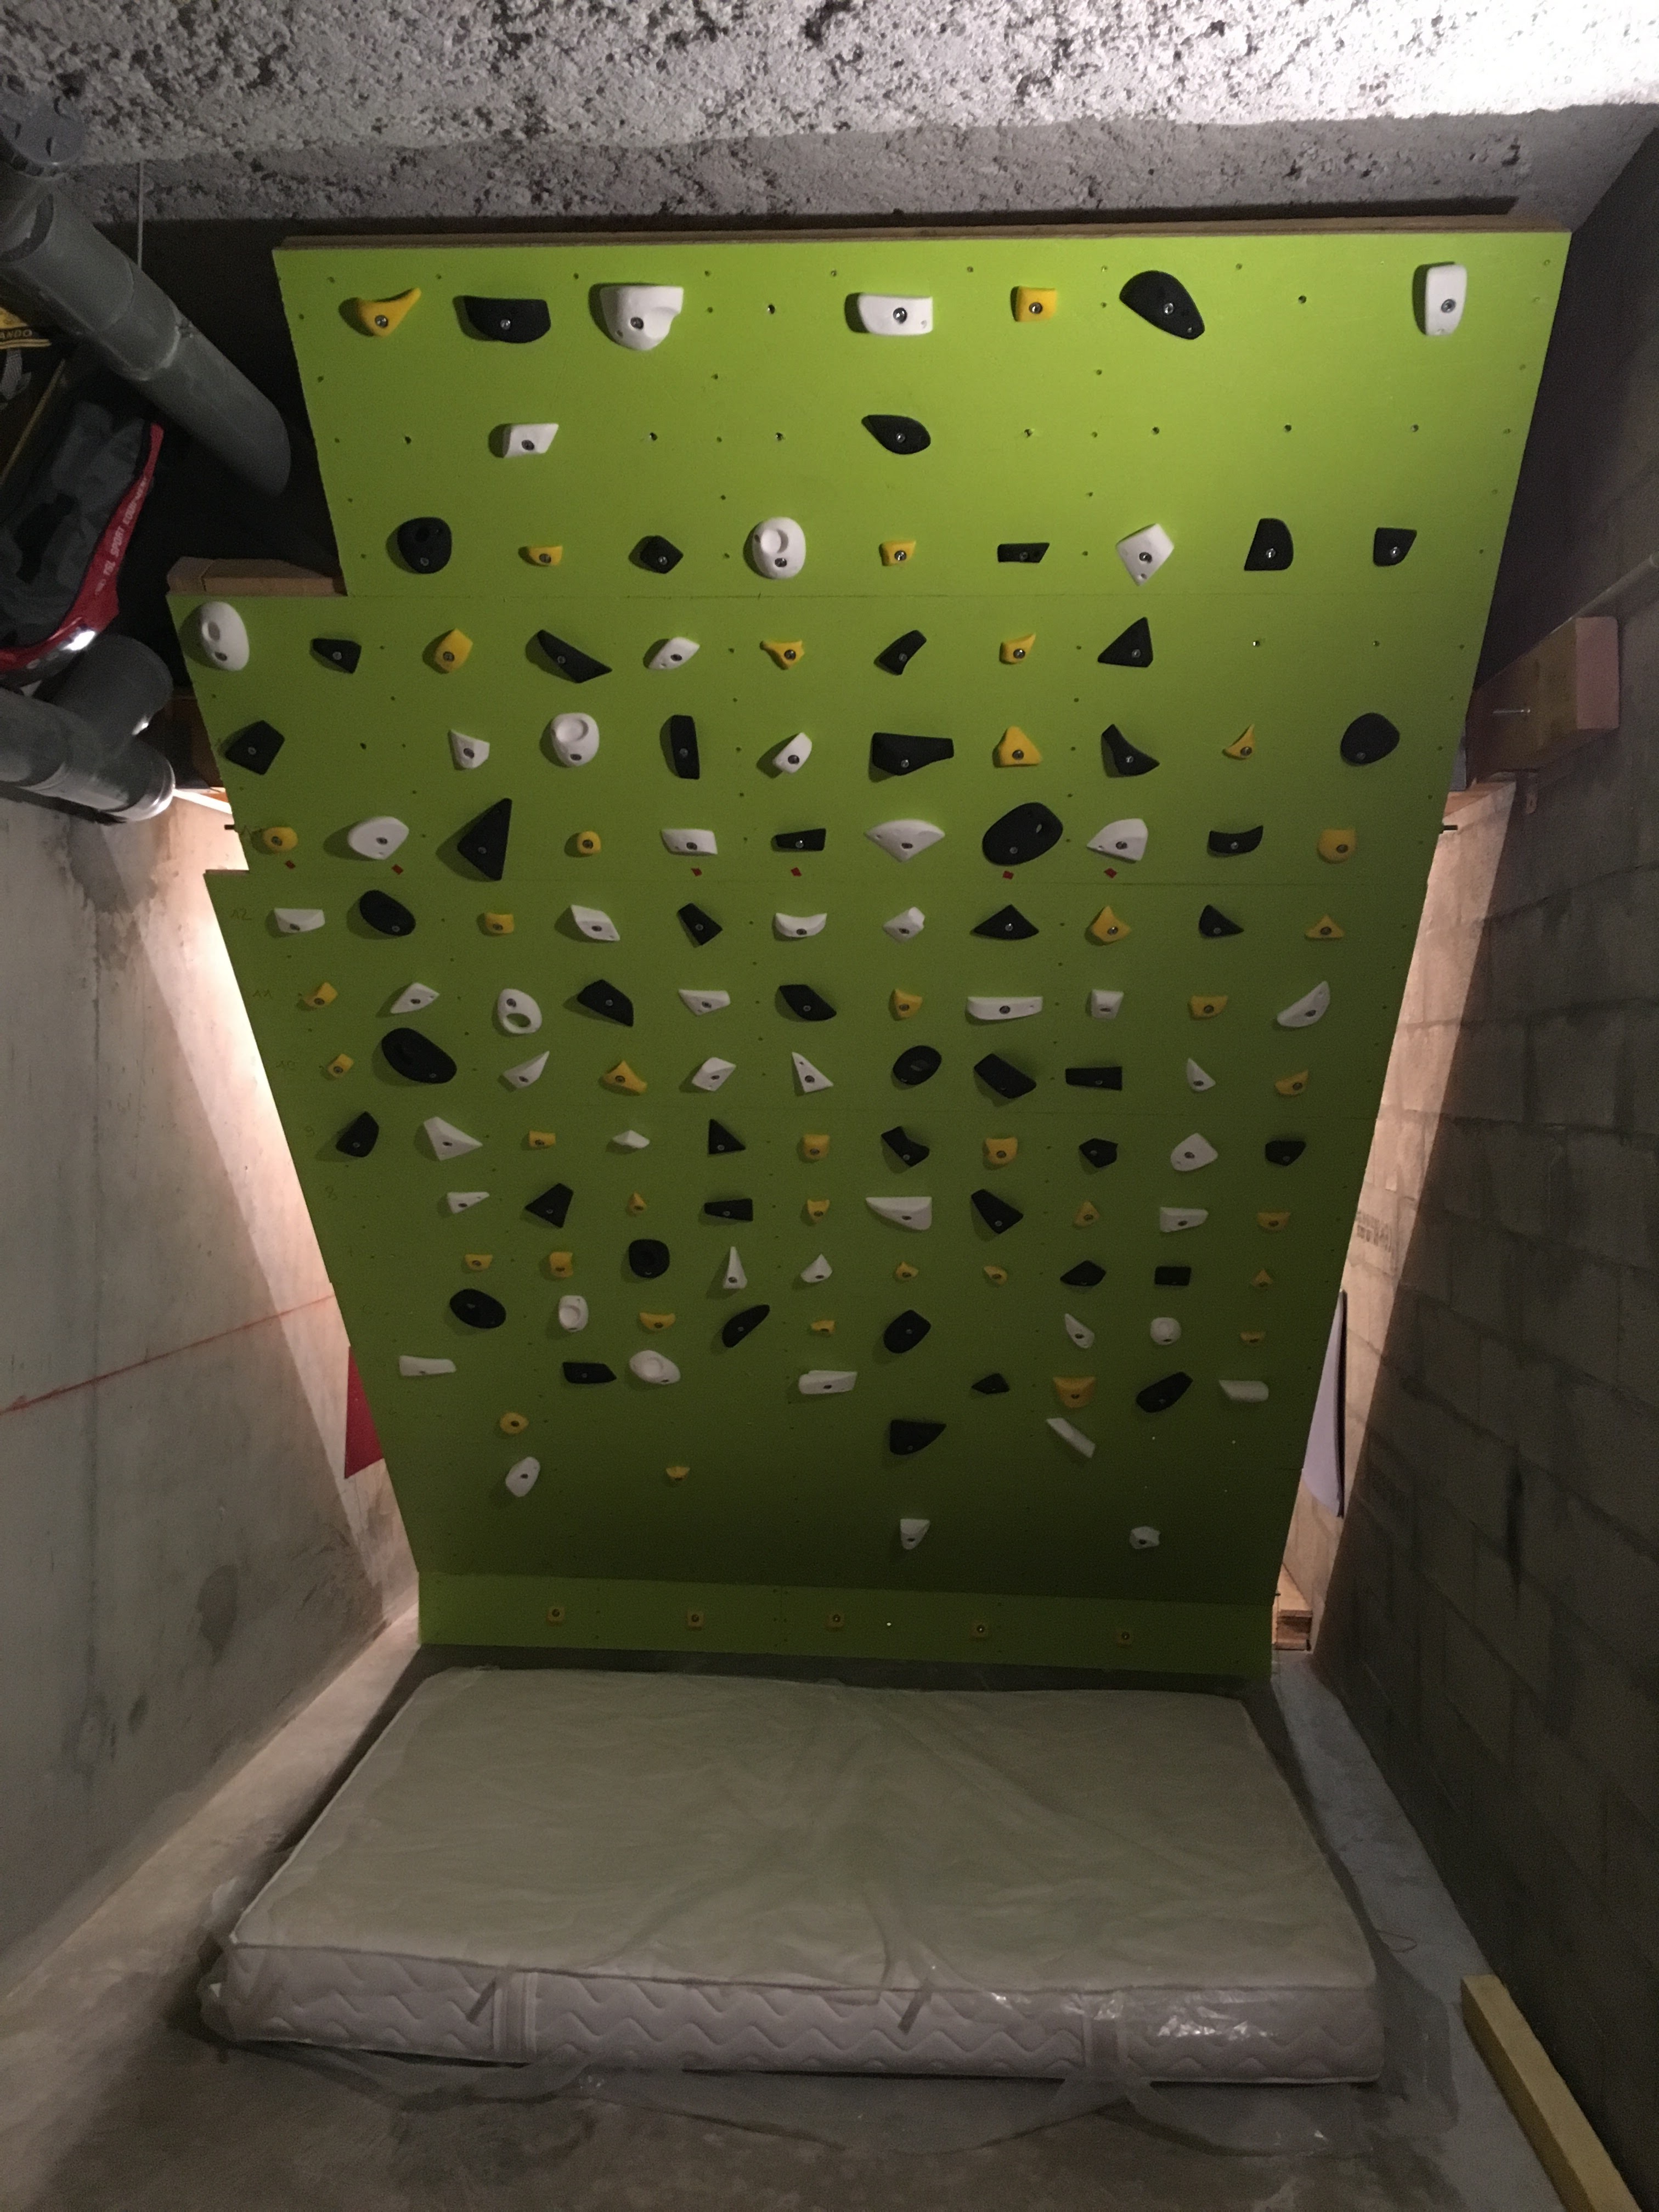
Holds setup
A few weeks after having ordered the holds (they were out of stock), they
have finally arrived. Installation time (in timelapse):

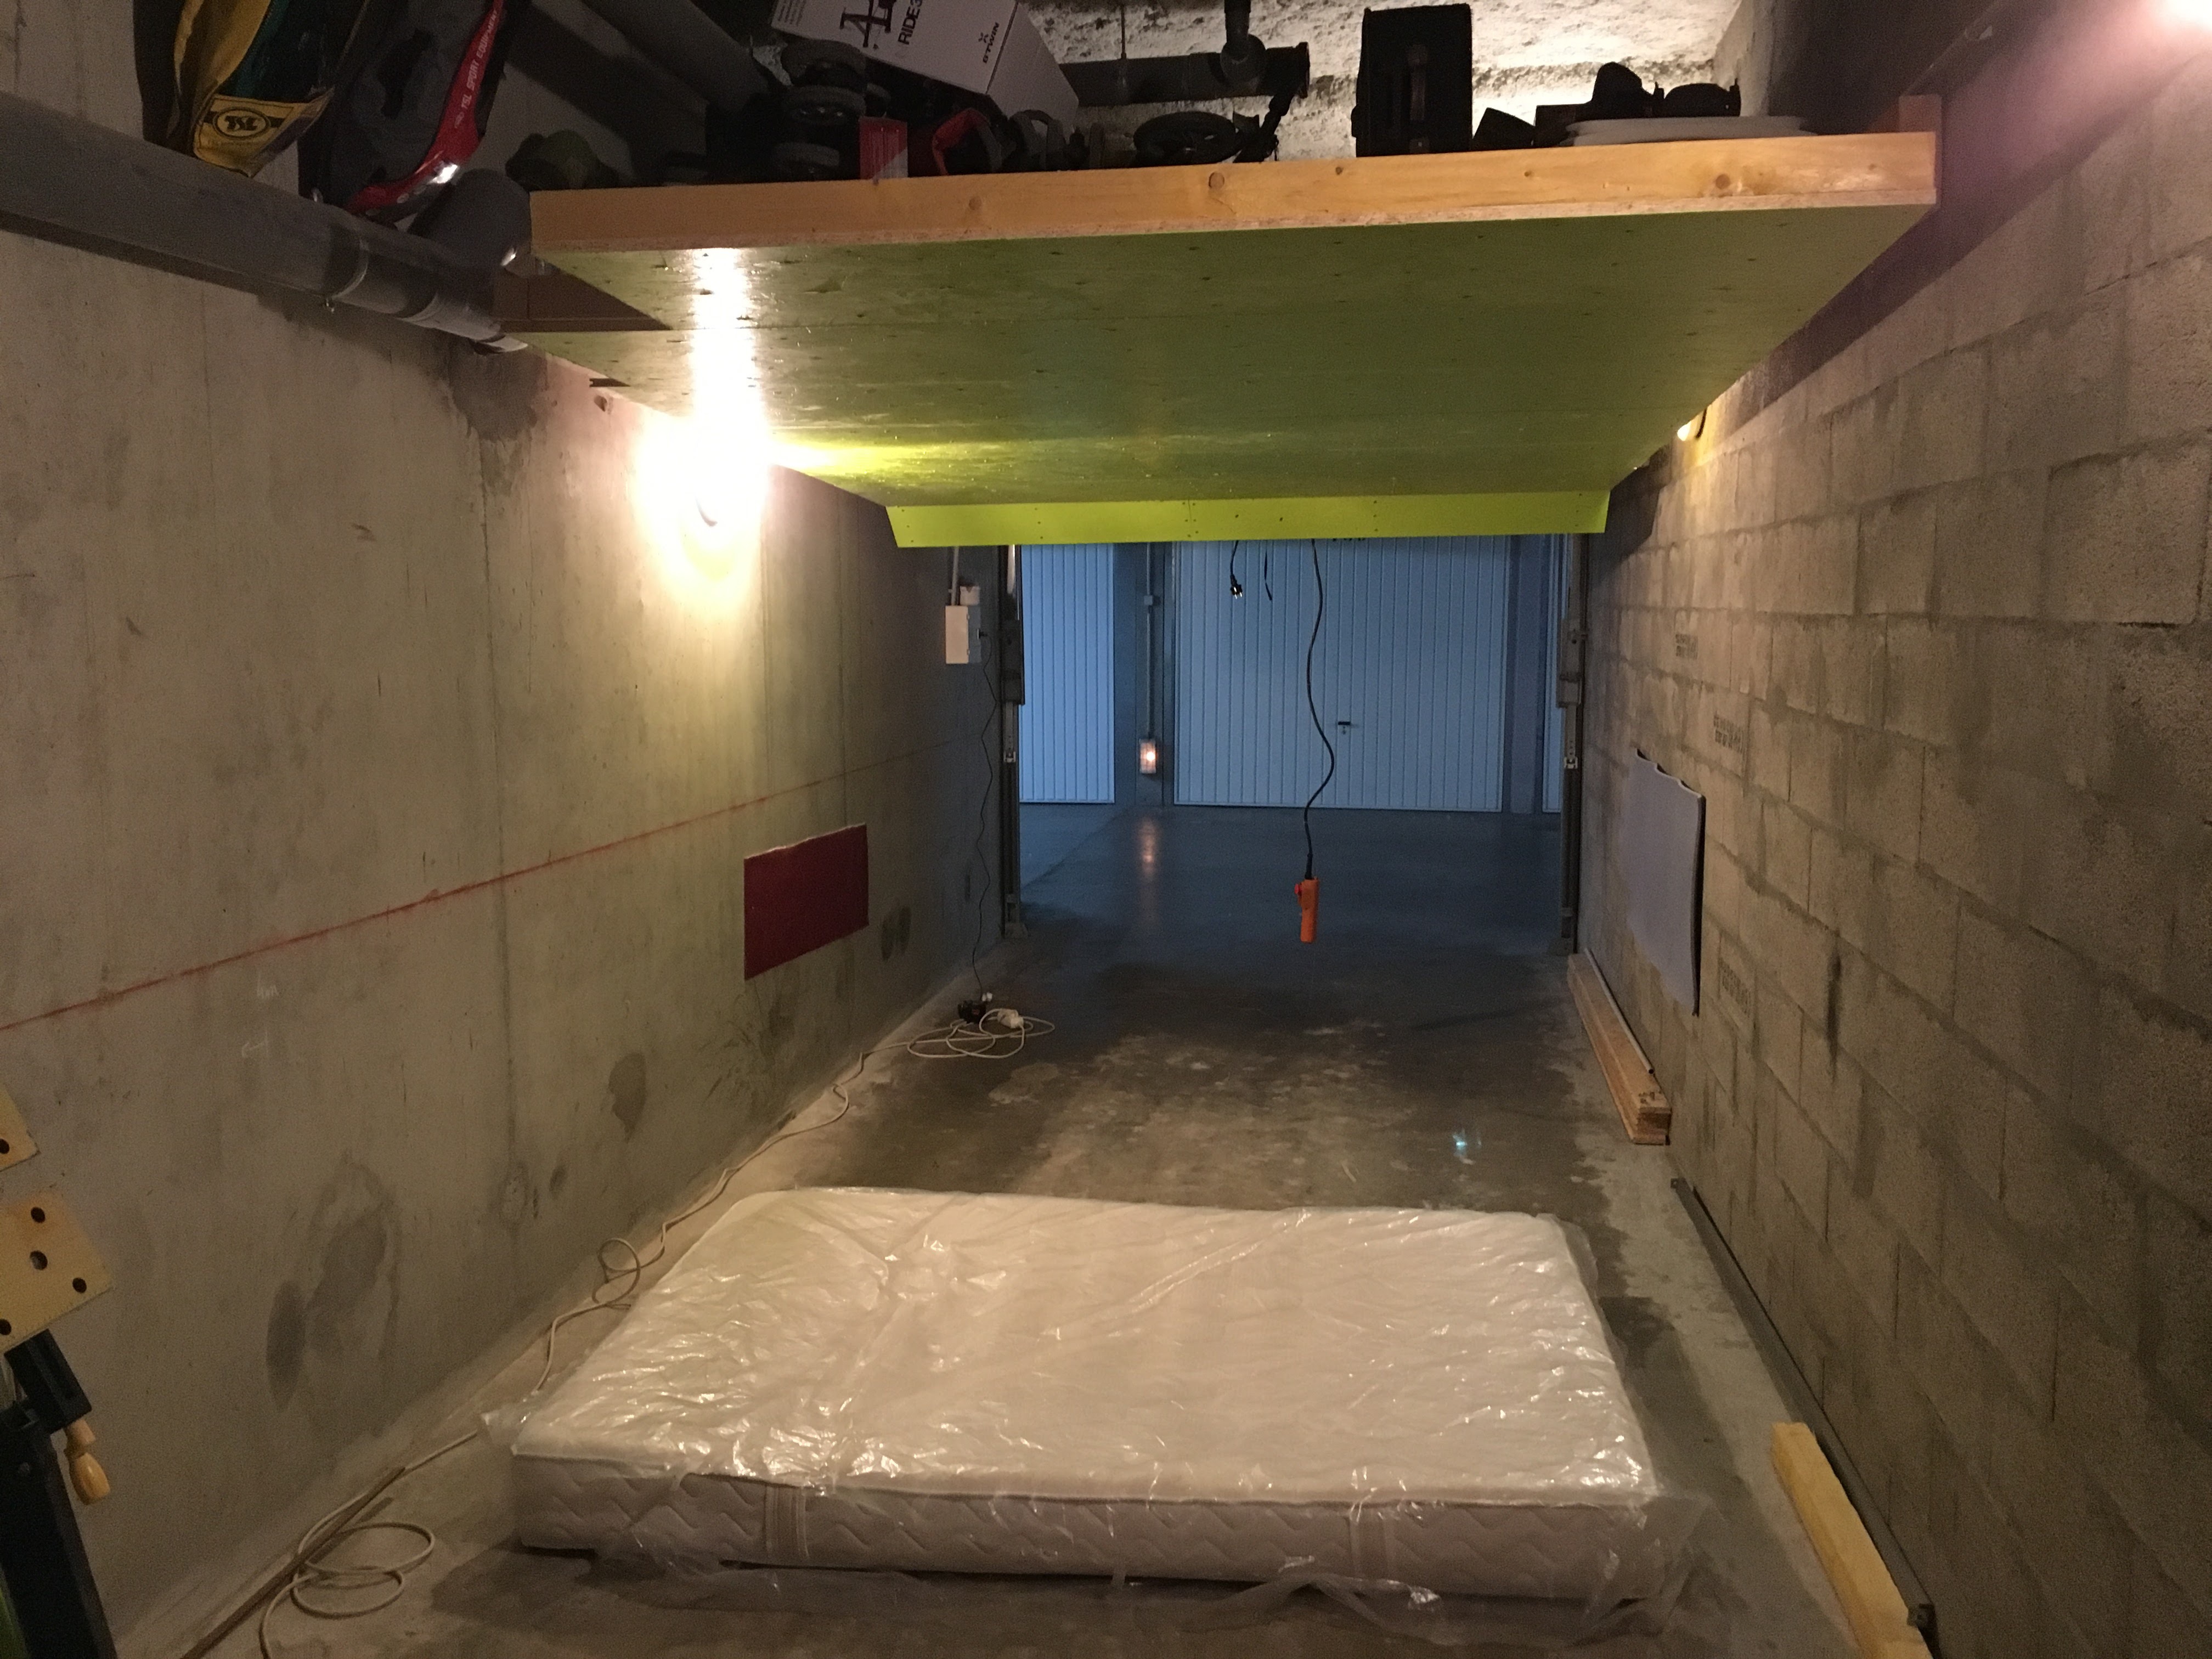
The wall equipped with all its holds :

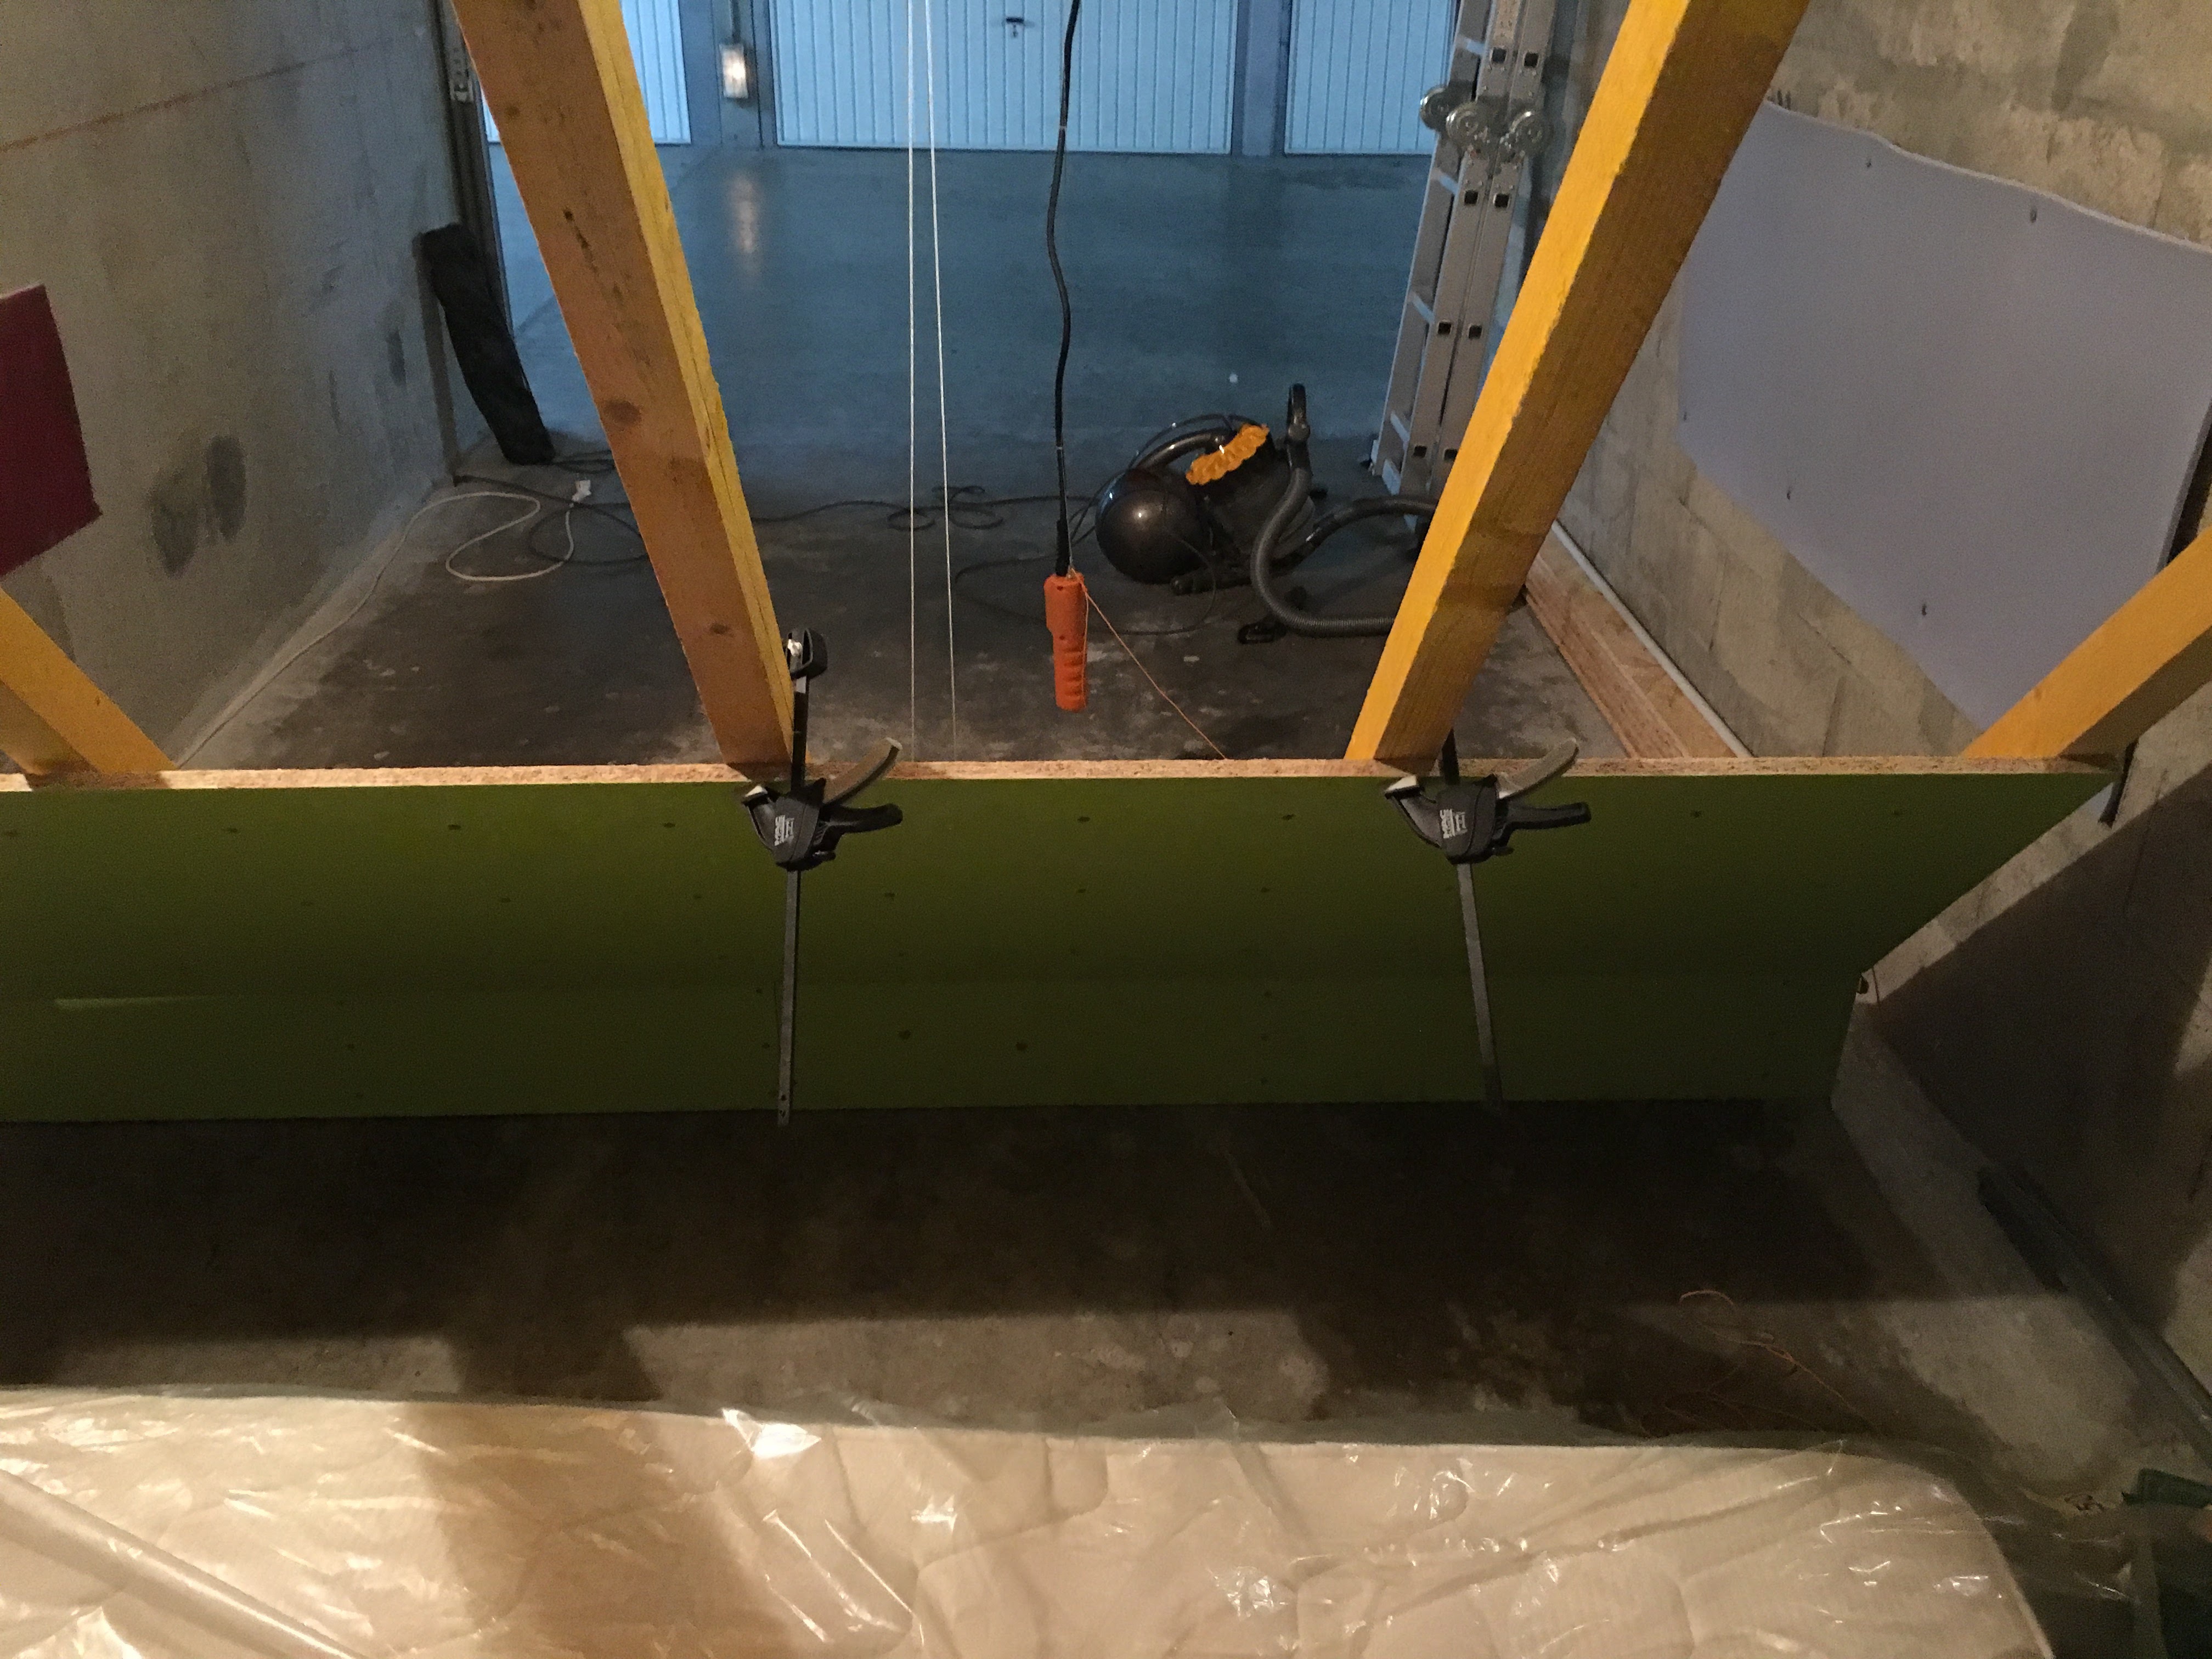
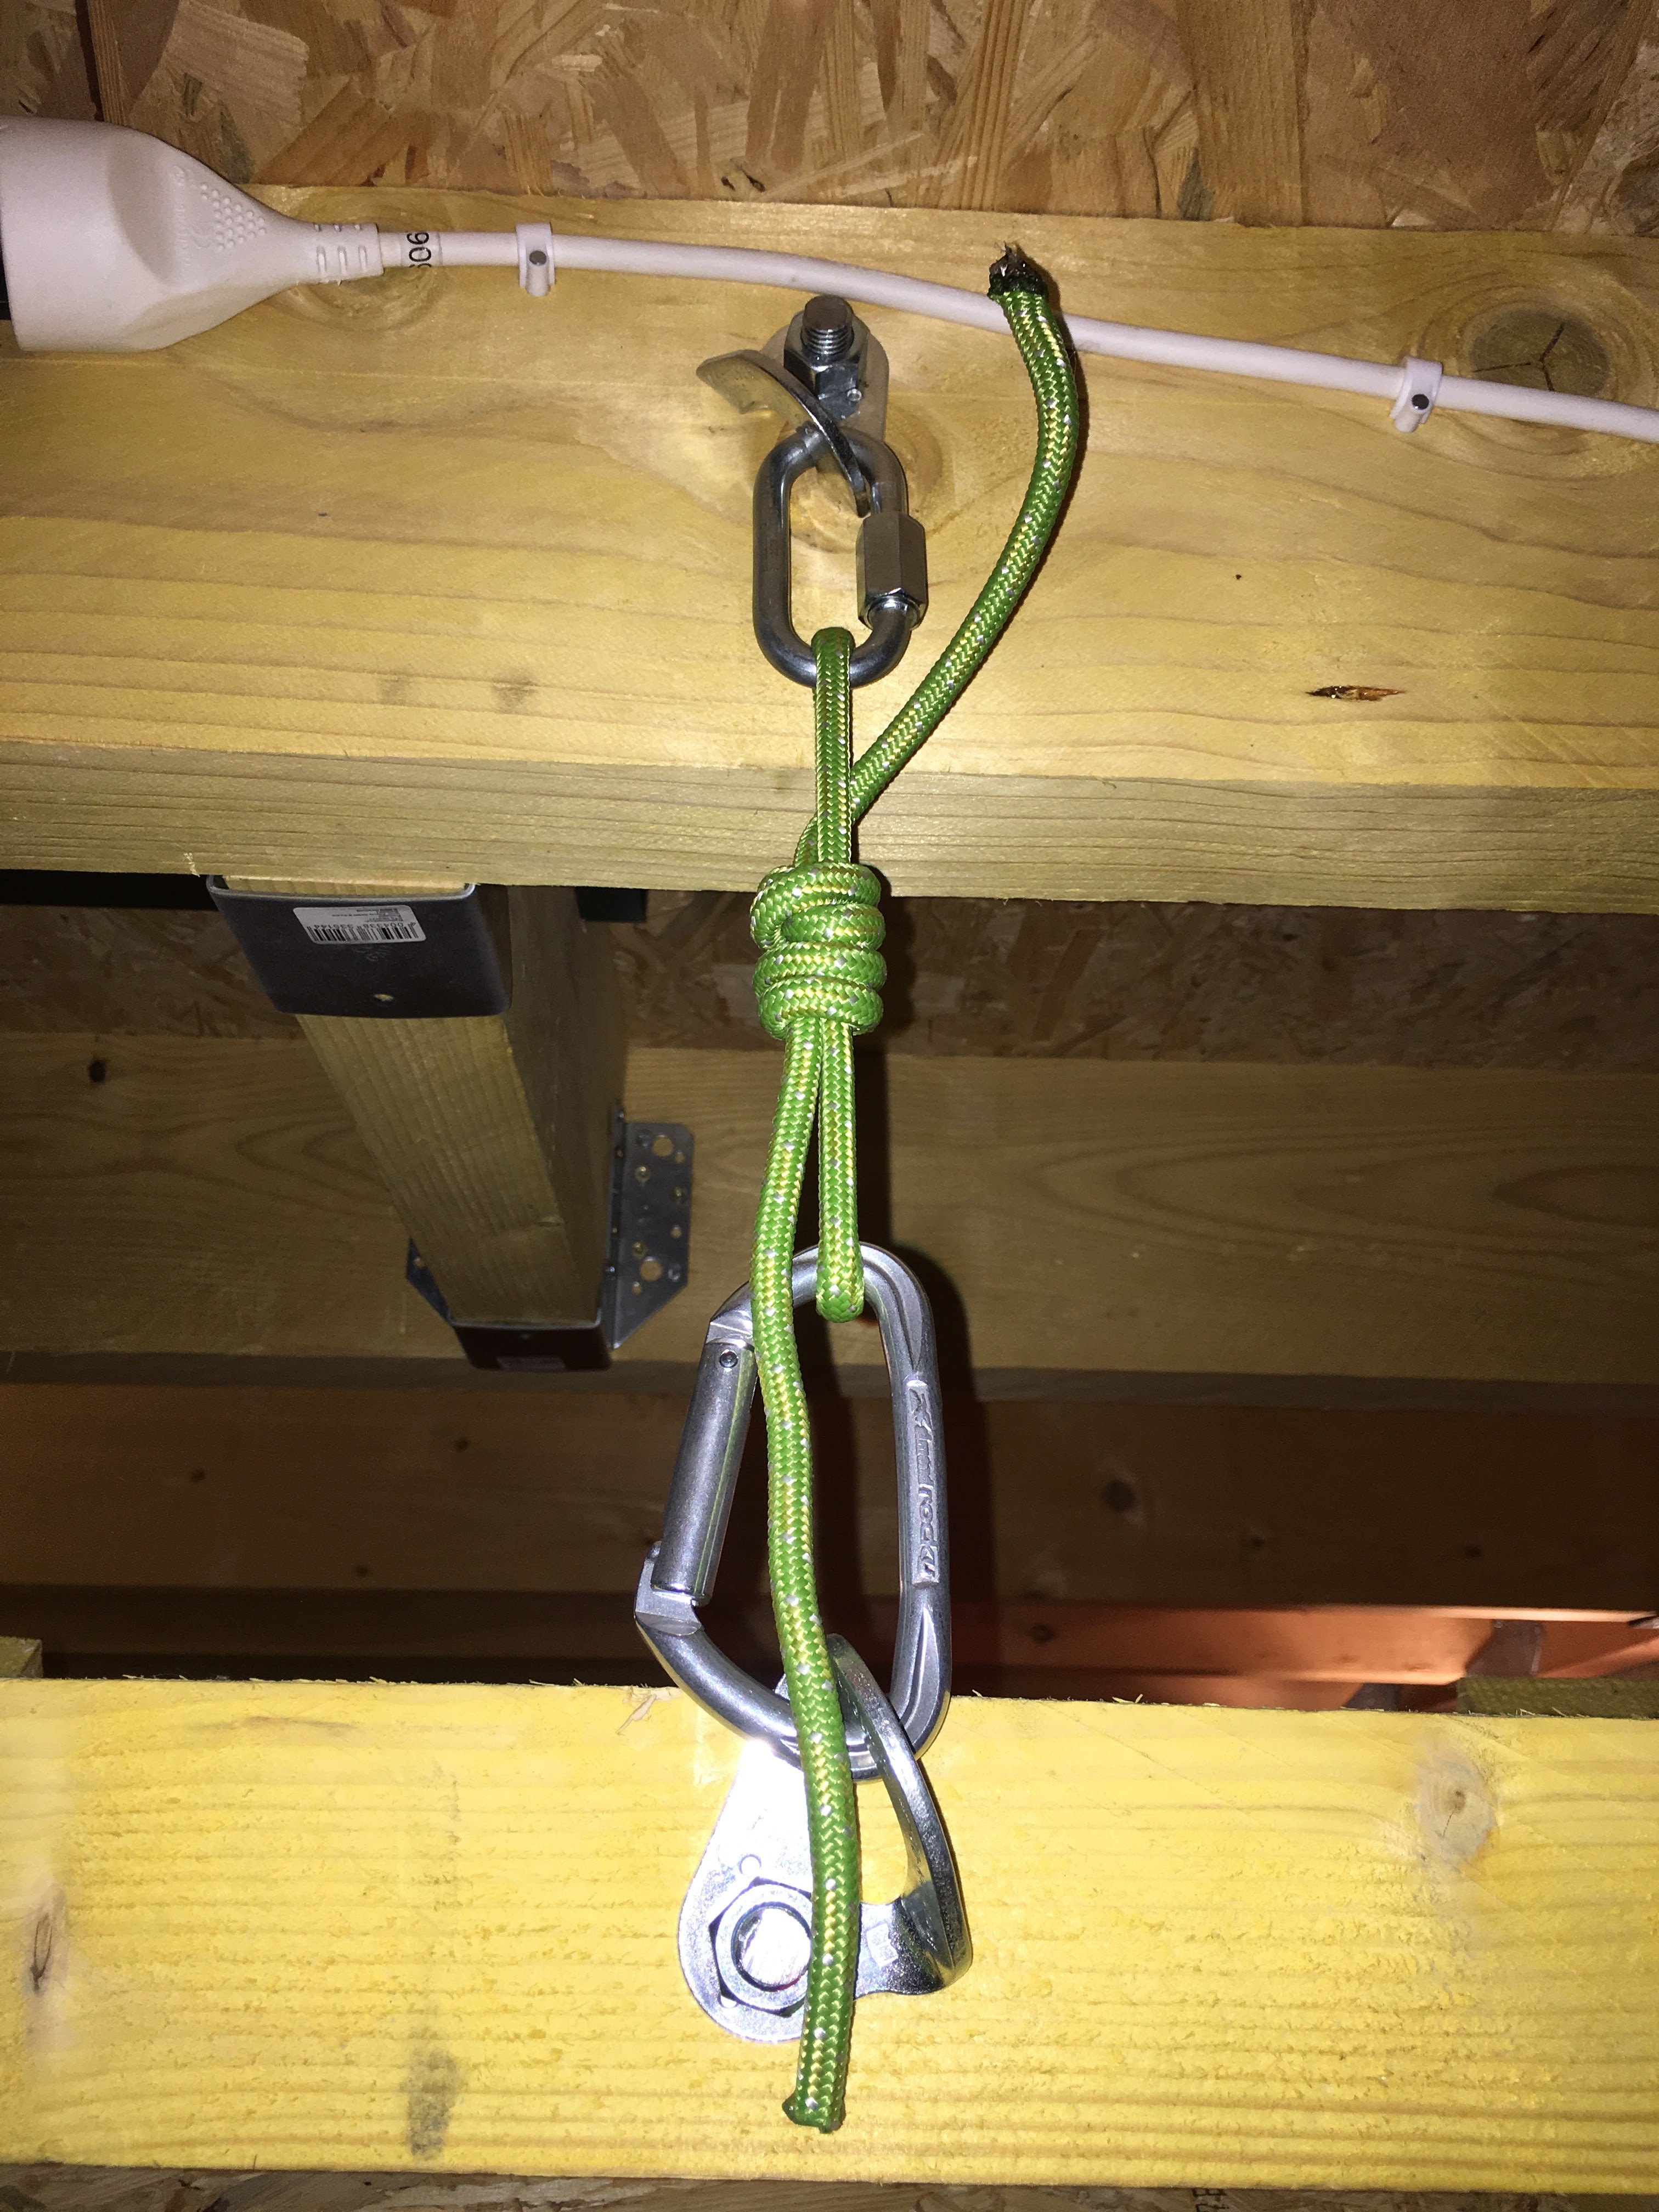
Raised wall secured
Small retouching at the end of the project (and I spare you others), I replaced the
2 chains of fixation (when the wall is in raised position), by 7mm climbing rope,
knotted with a double fisherman’s knot. It is lighter to handle than the steel chain
and it holds 1200kg before breaking (since I have the equivalent of 50kg per fixing point
to hold, I’m really secured here):
Conclusion
Many hours of design, thirty hours of DIY later, a picture is worth a thousand words:
In video :

I am very happy to have completed this project. Many moments of doubt and questioning before and during the project. The night has often worn advice. The very important time spent in design / thinking has enormously served to avoid potential pitfalls.
The most difficul part has just started: I will have to climb this wall.
Thanks to: Denis, Geoffrey, Nicolas and especially my darling for his infinite patience <3.
If you have questions / comments, do not hesitate.
Leave a comment
Discussion, links, and tweets

Proud father of two, I am a team leader, specialized in solving people problems with (mostly) technical responses.
Tweet Follow @ratibus
Comments
Hello Eric,
I am based here in the US (AZ) and am in the process of planning out a system wall for my garage. Given my limited space I wanted to build something similar to yours; when I came across your design I said, “That’s it!!”
I was wondering if you’d be able to provide more detailed insight into the joints you used as pivot points for the lowering/raising of the chassis? My questions include:
What size washers did you use as spacers between the joints and rafter?
Thanks in advance!! Really like your setup.
This is a great job, congratulations and enjoy your board!
Awesome project! I am pondering building a Moonboard for quite a while, good to see OSB works just fine. Makes quite a difference in the budget. But…
You seem to have used the “Original School Holds”, “School Holds - Set A” and “School Holds - Set B”, but list “only” 546€ for the holds… Sets A and B cost about 700€ alone. Where did you get your holds so cheap? Or did you use the “Power Grips” for the black holds?